
Last updated: October 2021
Contents
In the very first lesson of this course on the introduction to Ansible, we learnt that the ansible ad hoc can be used to execute ansible tasks, therefore, we will look at how to do this in this lesson.
UNDERSTANDING THE SUBJECT MATTER
What Is Ansible ad hoc Command
From the word ad hoc, ansible ad hoc commands are just the basic ansible command that is used to execute ansible operations or tasks in a very simple way.
Ansible ad hoc is limited and nothing advanced compared to using a playbook to execute ansible tasks, however, very useful.
With ansible ad hoc command, a user can easily interact with managed hosts and quickly carry out ansible tasks in no time.
The ansible ad hoc command can be used to manage files, manage packages, reboot servers, manage users and groups, manage services, etc.
Ansible ad hoc command uses /usr/bin/ansible for its operation
How Do I Run Ansible ad hoc command
The ansible ad hoc command has a basic syntax which is
#ansible <Managed-host> -m <module> -a <argument>where ansible = the utility/tool
-m = the option that represents module.
-a = the argument
There are other options that can be added to the basic syntax. We will understand better as we go on.
Let’s understand what a module is
What Is Ansible Module?
modules are small programs or rather units of code with tasks, python code specifically that are executed from a control node on managed hosts using the ansible ad hoc commands or ansible playbook. Modules are just basically task plugins
The ansible software by default has various modules.
To see the different modules ansible has, use the command,
[root@drdev1 ~]# ansible-doc -l

a10_server                                             Manage A10 Networks AX/SoftAX/Thunder/vThunder devices' s...
a10_server_axapi3                                      Manage A10 Networks AX/SoftAX/Thunder/vThunder devices
.......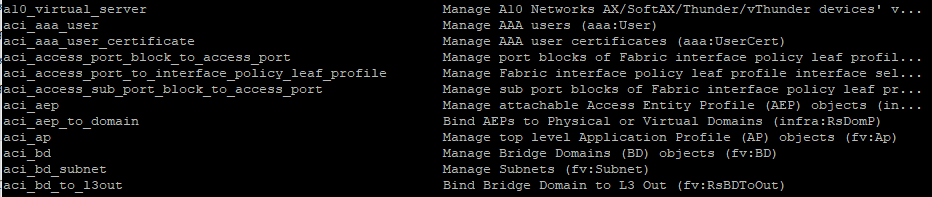
You can press the space bar to keep scrolling down.
From the output, you can see that there are a lot of modules.
The ansible version 2.8 has over 2000 modules
To know the number of modules your ansible version has, use the command,
[lisa@drdev1 ~]$ ansible-doc -l |wc -l

[WARNING]: template parsing did not produce documentation.
[WARNING]: win_template parsing did not produce documentation.
2834
To get more information about a module, for example, to get more information about the yum module, use the command,
[lisa@drdev1 ~]$ ansible-doc yum

> YUM    (/usr/lib/python3.6/site-packages/ansible/modules/packaging/os/yum.py)

        Installs, upgrade, downgrades, removes, and lists packages and groups with the `yum'
        package manager. This module only works on Python 2. If you require Python 3 support
        see the [dnf] module.
...........
What is the default module while executing ansible ad hoc command
The default module while executing ansible ad hoc is the “command” module. If no module is specified while executing ansible commands, ansible assumes the “command” module as the default module.
Just as I mentioned above, there are various ansible modules and they can be used while executing the ansible ad hoc command.
Having understood what ansible ad hoc command means and the basic syntax, let’s see the step by step process of how to execute the ansible ad hoc command with examples.
ACTION TIME
Step By Step Guide Of How To Use Ansible ad hoc
For the purpose of this lesson, we are going to set up an Ansible control node and one managed host.
Node A (Ansible Control Node)
Hostname = drdev1.tekneed.com
canonical name = drdev1
IP Address = 192.168.170.140
Node B (Managed host)
Hostname = hqdev1.tekneed.com
canonical name = hqdev1
IP Address = 192.168.170.141
Setting Up Ansible control node
1. create the ansible configuration file in the user, lisa’s home directory
[lisa@drdev1 ~]$ vim .ansible.cfg[defaults]
inventory=/home/lisa/inventory/static-ini-inventory
remote_user=root
[privilege_escalation]
become=True
become_user=root
become_method=sudo
beocme_ask_pass=false
*Verify the configuration file ansible is using
[lisa@drdev1 ~]$ ansible --version

ansible 2.8.18
  config file = /home/lisa/.ansible.cfg
2. create the inventory file
[lisa@drdev1 ~]$ vim inventory/static-ini-inventoryhqdev1.tekneed.com3. configure SSH key based authentication
Click Here to know more about SSH key based authentication.
*generate the SSH key
[lisa@drdev1 ~]$ ssh-keygen

Generating public/private rsa key pair.
Enter file in which to save the key (/home/lisa/.ssh/id_rsa):
.........
*copy the public key to the managed host
[lisa@drdev1 ~]$ ssh-copy-id root@hqdev1.tekneed.com
.........
The authenticity of host 'hqdev1.tekneed.com (hqdev1.tekneed.com)' can't be established.
ECDSA key fingerprint is SHA256:oKj1FTBsvHvVmLOgAdbWHZYfwlS0KMJUApq7SADJcDs.
Are you sure you want to continue connecting (yes/no/[fingerprint])?
........
*Test that you can login pass-wordlessly
[lisa@drdev1 ~]$ ssh root@hqdev1.tekneed.com

Activate the web console with: systemctl enable --now cockpit.socket

This system is not registered to Red Hat Insights. See https://cloud.redhat.com/
To register this system, run: insights-client --register

Last login: Mon Mar 15 14:08:57 2021 from 192.168.170.1

[root@hqdev1 ~]#
*exit out of the control node
[root@hqdev1 ~]# exit

logout
Connection to 192.168.170.141 closed.
[lisa@drdev1 ~]$NOTE: if you don’t have a DNS running in your environment, you can make use of the IP addresses or the /etc/hosts file for DNS resolution.
Having prepared the environment, let’s see some examples of how to run the ad hoc commands using ansible
Running Ansible ad hoc Command using the command module
*For example, to get the duration node B has been running using the ansible control node, use the basic ad hoc syntax/command below,
[lisa@drdev1 ~]$ ansible hqdev1.tekneed.com -m command -a uptime

hqdev1.tekneed.com | CHANGED | rc=0 >>
 15:22:28 up  5:50,  3 users,  load average: 0.02, 0.02, 0.00
*To see the number of users who has logged in on node B using the ansible control node, use the command,
[lisa@drdev1 ~]$ ansible hqdev1.tekneed.com -m command -a who

hqdev1.tekneed.com | CHANGED | rc=0 >>
root     pts/0        2021-03-15 09:36 (192.168.170.1)
root     pts/1        2021-03-15 14:08 (192.168.170.1)
root     pts/2        2021-03-15 15:33 (192.168.170.140)

In the “UNDERSTANDING THE SUBJECT MATTER” section, we understood that the default module is the command module, let’s ascertain this fact by excluding the command module while running one of these commands above.
[lisa@drdev1 ~]$ ansible hqdev1.tekneed.com  -a uptime

hqdev1.tekneed.com | CHANGED | rc=0 >>
 15:22:28 up  5:50,  3 users,  load average: 0.02, 0.02, 0.00
Now you can see that the default module is the command module.
There are other options apart from the basic syntax of the ansible ad hoc. Few among the other options that can be used to run ansible ad hoc commands are
1. all: This means all managed host, hence the ansible operations will be executed on all the managed host
2. -u: This is an option for the ansible operation to be executed as the remote user that is different from the one specified in ansible configuration file.
This user must however meet the conditions in the configuration file. For example, the user will have an administrative privilege and can be authenticated via SSH keys, etc.
If a remote user is not specified in the configuration file, ansible will use the user on the control node executing the ansible operation
3. – -become: This option is used to elevate or escalate privileges
4. -i: This option is used to specify a different inventory from the one specified in the ansible configuration file.
Moving forward, let’s run some other ansible ad hoc commands using some other modules with these options stated above.
Running Ansible ad hoc command using the copy module.
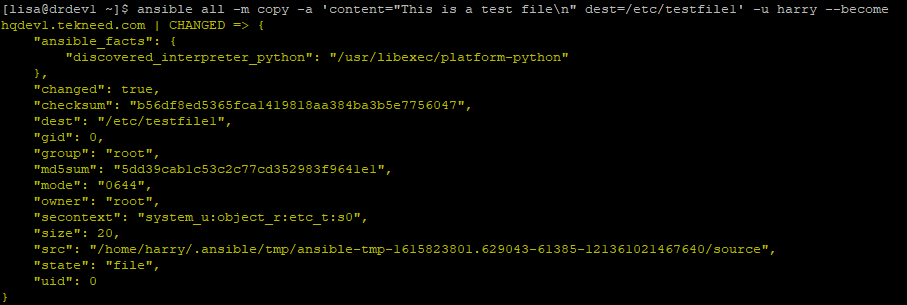
*To create a file/add a content to a file from the control node to the managed hosts, use the ad hoc command below
[lisa@drdev1 ~]$ ansible all -m copy -a 'content="This is a test file\n" dest=/etc/testfile1' -u harry --become

hqdev1.tekneed.com | CHANGED => {
    "ansible_facts": {
        "discovered_interpreter_python": "/usr/libexec/platform-python"
    },
    "changed": true,
    "checksum": "b56df8ed5365fca1419818aa384ba3b5e7756047",
    "dest": "/etc/testfile1",
    "gid": 0,
    "group": "root",
    "md5sum": "5dd39cab1c53c2c77cd352983f9641e1",
    "mode": "0644",
    "owner": "root",
    "secontext": "system_u:object_r:etc_t:s0",
    "size": 20,
    "src": "/home/harry/.ansible/tmp/ansible-tmp-1615823801.629043-61385-121361021467640/source",
    "state": "file",
    "uid": 0
}

.......
Just as I mentioned above, to know how to use a module or get more information about a module, use the command,
[lisa@drdev1 ~]$ ansible-doc copy*Verify that the file and its content has been created
[lisa@drdev1 ~]$ ansible all -m command -a 'cat /etc/testfile1' -u harry

hqdev1.tekneed.com | CHANGED | rc=0 >>
This is a test file

...........
*You can also verify by logging directly to Node B
[root@hqdev1 ~]# ls -l /etc/testfile1

-rw-r--r--. 1 root root 20 Mar 15 16:56 /etc/testfile1
[root@hqdev1 ~]# cat /etc/testfile1
This is a test fileManaging Multiple Servers With Ansible ad hoc Commands
In the inventory list, let’s include the local server, which is the control node as one of the managed host and use the “all” option with the ad hoc command.
*Include localhost in the inventory list
[lisa@drdev1 ~]$ vim inventory/static-ini-inventorylocalhostThe inventory list will now be in the form below
hqdev1.tekneed.com
localhost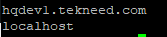
*configure admin privilege for the user, lisa on the control node.
[root@drdev1 ~]$ vim /etc/sudoers.d/lisalisa ALL=(ALL) NOPASSWD: ALL*configure SSH keys for the user lisa.
[lisa@drdev1 ~]$ ssh-copy-id root@localhost

.......
Now try logging into the machine, with:   "ssh 'root@localhost'"
and check to make sure that only the key(s) you wanted were added.
* Run the ansible ad hoc command with the “command” module and the “uptime” argument
[lisa@drdev1 ~]$ ansible all -a uptime

hqdev1.tekneed.com | CHANGED | rc=0 >>
 13:42:11 up 15:50,  1 user,  load average: 0.11, 0.03, 0.01

localhost | CHANGED | rc=0 >>
 13:42:14 up 1 day, 23:49,  3 users,  load average: 0.79, 0.20, 0.07
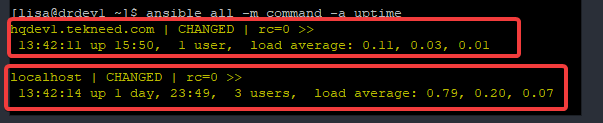
Anytime you execute ansible tasks, always look out for the return code. You can see that the return code is equal to zero (rc=0) meaning that the operation was successful on both managed hosts, that is hqdev1.tekneed.com and localhost.
Running Ansible ad hoc command using the user module
*To create a user with the name jack on all managed hosts for example, use the command,
[lisa@drdev1 ~]$ ansible all -m user -a name=jack
hqdev1.tekneed.com | CHANGED => {
    "ansible_facts": {
        "discovered_interpreter_python": "/usr/libexec/platform-python"
    },
    "changed": true,
    "comment": "",
    "create_home": true,
    "group": 1004,
    "home": "/home/jack",
    "name": "jack",
    "shell": "/bin/bash",
    "state": "present",
    "system": false,
    "uid": 1004
}
localhost | CHANGED => {
    "ansible_facts": {
        "discovered_interpreter_python": "/usr/libexec/platform-python"
    },
    "changed": true,
    "comment": "",
    "create_home": true,
    "group": 3410,
    "home": "/home/jack",
    "name": "jack",
    "shell": "/bin/bash",
    "state": "present",
    "system": false,
    "uid": 3408
}
*verify that that the user, jack has been created
[lisa@drdev1 ~]$ id jack

uid=3408(jack) gid=3410(jack) groups=3410(jack)
[lisa@drdev1 ~]$
Running Ansible ad hoc command using the ping module
*To determine if ansible tasks will be able to take effects on managed host, use the command,
[lisa@drdev1 ~]$ ansible all -m ping

hqdev1.tekneed.com | SUCCESS => {
    "ansible_facts": {
        "discovered_interpreter_python": "/usr/libexec/platform-python"
    },
    "changed": false,
    "ping": "pong"
}
localhost | SUCCESS => {
    "ansible_facts": {
        "discovered_interpreter_python": "/usr/libexec/platform-python"
    },
    "changed": false,
    "ping": "pong"
}
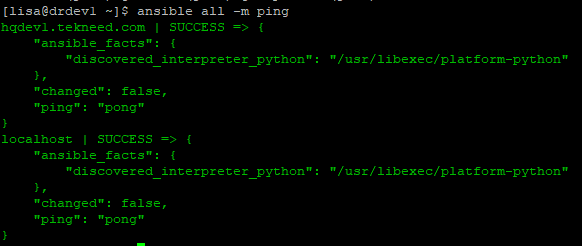
Ansible is Idempotent, hence whenever an ansible task is successful and there are no changes made, one will be able to tell with the green color.
Similarly, whenever an Ansible task is successful and there are changes made, one can tell with the yellow color.
More so, whenever an Ansible task is not successful, one will be able to tell with the red color. Not all ansible tasks executed by the command module however are idempotent.
Class Activity
As the harry user on the control node, use the Ansible Ad hoc command to create the usernames, mary, and oyindamola in one ansible managed host.
If you like this article, you can support us by
1. sharing this article.
2. Buying the article writer a coffee (click here to buy a coffee)
3. Donating to push our project to the next level. (click here to donate)
If you need personal training, send an email to info@tekneed.com
Click Here To Watch The Video On How To Use The Ansible ad hoc Command In Linux
RHCE EX200 Exam Practice Question On Using Ansible ad hoc Command In Linux
Your feedback is welcomed. If you love others, you will share with others
Leave a Reply