
Last updated: October 2021
Contents
Just like every other Linux software, ansible also has its own configuration files, and knowing how to manage the essential ansible configuration files is imperative.
Where Is The Ansible Configuration File Located
The global default ansible configuration file is “/etc/ansible/ansible.cfg”
Let’s have a look at this file.
[root@DRDEV1 ~]# cat /etc/ansible/ansible.cfg |more

# config file for ansible -- https://ansible.com/
# ===============================================

# nearly all parameters can be overridden in ansible-playbook
..............
[defaults]

# some basic default values...

#inventory      = /etc/ansible/hosts
..........
From the output of this file, you can see that there are a lot of parameters in this file and it is an INI data structure, which has sections in brackets and key-value pairs and most of them are commented with the # sign explaining what each syntax means and will do.
Understanding these parameters and knowing how to use them is very important when it comes to using and managing the ansible software.
Let’s understand some of these important parameters. For a clearer view, let’s display only the parameters without the # sign.
[root@DRDEV1 ~]# grep ^[^#] /etc/ansible/ansible.cfg

[defaults]
[inventory]
[privilege_escalation]
[paramiko_connection]
[ssh_connection]
[persistent_connection]
[accelerate]
[selinux]
[colors]
[diff]
You can see that the configuration file is broken into nine different sections/headers.
Under these sections/headers is where the ansible settings related to the headers will be stated as a key-value pair.
Let’s understand some of these sections.
defaults section
The first section, which is the default section/header is the general section where some of the default ansible settings can be defined.
From the configuration file, some of the tunable settings for the defaults section are listed below.
[defaults]

# some basic default values...

#inventory      = /etc/ansible/hosts
#library        = /usr/share/my_modules/
#module_utils   = /usr/share/my_module_utils/
#remote_tmp     = ~/.ansible/tmp
#local_tmp      = ~/.ansible/tmp
#plugin_filters_cfg = /etc/ansible/plugin_filters.yml
#forks          = 5
#poll_interval  = 15
#sudo_user      = root
#ask_sudo_pass = True
#ask_pass      = True
#transport      = smart
#remote_port    = 22
#module_lang    = C
#module_set_locale = False
#remote_user=root
The first key-value pair under the defaults section is (#inventory = /etc/ansible/hosts). This means by default, the inventory file will be in /etc/ansible/hosts. However, this value can be changed to whichever location you desire.
Having learnt about inventory in the previous lesson, creating an ansible inventory file shouldn’t be a problem.
Another key-value pair is (#ask_pass = True). This parameter is used to allow playbook prompt for a password by default. The default value will be true if the line is commented out
Another important key value pair is (#remote_user=root). This means that ansible will execute the required action against the remote hosts as the root user.
This value can be changed to whichever user one desires. However, that user must be present in the managed/remote hosts.
For example, if the value is changed to lisa, the lisa user must be present in all the managed hosts. The remote user, with the remote_user keyword can also be specified in the playbook.
It is recommended that the remote_user is set to be other users apart from the root user because it is not ideal that root user always connects directly via SSH since SSH is the default connection method or mechanism for Ansible, especially for Linux systems.
As we go on in this course, we will understand the meaning and functions of other parameters under the default section. Some of the parameters are self-explanatory though.
inventory section
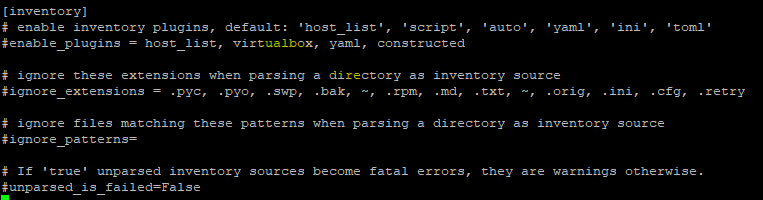
[inventory]
# enable inventory plugins, default: 'host_list', 'script', 'auto', 'yaml', 'ini', 'toml'
#enable_plugins = host_list, virtualbox, yaml, constructed
..............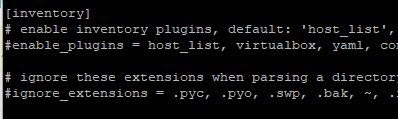
The inventory section is where the settings related to inventories are defined. As mentioned in the previous lesson, an inventory is a file that contains the managed hosts address.
The default location of the inventory file is “/etc/ansible/hosts”
inventory = /etc/ansible/hostsFrom the ansible configuration file, the other settings that can be done under the inventory section are;
#enable_plugins = host_list, virtualbox, yaml, constructed#ignore_patterns=#unparsed_is_failed=FalseThe screenshot below explains what these settings mean.
We will explore and understand more of these settings as we move forward in this course.
privilege_escalation section

Some tasks would require administrative privileges. For windows system, that would be the Administrator user while for Linux systems, that would be the root or sudo users. The privilege escalation directive can be used to do this
The privilege escalation settings can be done under the privilege escalation header.
Privilege escalation, from the word, means that some admin privileges or other user’s privileges can be given/escalated to some other users, hence these users will execute commands as the admin or other users.
In the global default ansible configuration file, the privilege escalation settings is related to some parameters and values which are listed below.
[privilege_escalation]
#become=True
#become_method=sudo
#become_user=root
#become_ask_pass=False
The first key-value pair is (#become=True) and you can see that it is commented out, meaning that the default privilege escalation settings is false, hence privilege escalation cannot be set or activated.
To change these settings otherwise, comment the value out or change the value of True to False.
The second key-value pair is (#become_method=sudo), meaning that if the privilege_escalation setting is enabled, by default, the privilege escalation method will be sudo if the line is commented out.
Other values that can be set for “become_method” parameter are su, ksu, doas, pfexec, and pbrun. Therefore, if one wishes to set the method to su, it will be “become_method=su”.
The third string of the privilege escalation settings is (#become_user=root), meaning that the privilege escalation user that you become by default is root if the line is commented out.
please note that “it is the user you become” and not the user you logged in as
The fourth parameter of the privilege escalation settings is (#become_ask_pass=False), meaning that the privilege escalation password will not be asked or prompted by default if the line is commented out.
To change otherwise, set the value to be true
ssh_connection Section
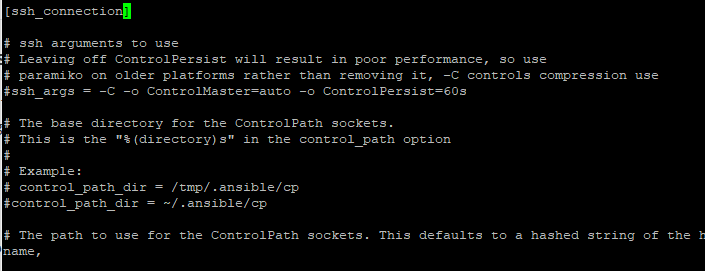
As we mentioned in our previous lesson on introduction to ansible, the default ansible plugin to manage remote hosts is SSH and the following settings are tunable for SSH connections.
1. Control persist
#ssh_args = -C -o ControlMaster=auto -o ControlPersist=60sThis string above is SSH argument with different options (-o). This simply means that the control persist time is 60 seconds by default if the line is commented out.
The control persist time increases performance. 30m is a good value for control persist.
2. Another key value pair is control path
# control_path_dir = /tmp/.ansible/cp
#control_path_dir = ~/.ansible/cp
The parameter above is the base directory for control path sockets by default and it will be set to whichever line is commented out. However, these settings can be changed or modified.
3. Pipelining
#pipelining = FalseBy default, pipelining is false if the line is commented out and if this setting is enabled, it lessens the number of SSH operations that will be required to carry out a module operation on the remote server.
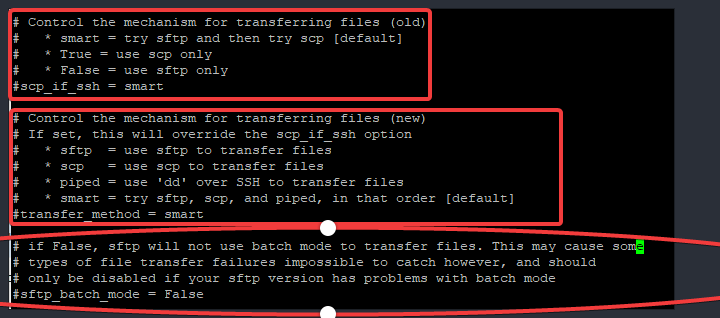
4. Another key value pair is scp_if_ssh
#scp_if_ssh = smartThe string above controls the mechanism for transferring files, though it is an old string.
Other values for scp_if_ssh and the new string can be seen in the documentation, just as it is in the screenshot below
accelerate section
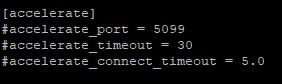
The accelerate setting is an alternative for pipe-lining. If pipe-lining cannot be enabled, the accelerate option can be used.
The #accelerate_port string is the accelerated port mode.
The #accelerate_timeout string is the timeout settings for receiving data. If there is no activity for the period of time set, the socket connection will be closed.
Having understood the global default ansible configuration file, you should also know that there are also other important ansible configuration files.
Other Important Ansible Configuration Files
The global default ansible configuration file which is “/etc/ansible/ansible.cfg can be edited by only the root user or other users with root privileges.
However, you should also know that there there are cases where a non root user or users with non-root privileges needs to use the ansible software just as we have non root users in containers, hence, the essence of the other important ansible configuration files which are “~/.ansible.cfg“, “./ansible.cfg“, and “ANSIBLE_CONFIG“
The next question would be how to create these ansible configuration files
How Do I Create Ansible Configuration File
The entries in these configuration files will have the same syntax, the INI data structure as the global default ansible configuration file.
Ansible uses the entries in this configuration file for its settings and these configuration files take precedence over one another.
The configuration files in the order of precedence from the lowest to the highest would be
1. /etc/ansible/ansible.cfg (global default config file)
2. ~/.ansible.cfg (config file in user’s home directory)
3. ./ansible.cfg (config file in the current directory)
4. ANSIBLE_CONFIG (config file defined by environment variable)
Let’s see how these configuration files work starting from the global default ansible configuration file.
1. /etc/ansible/ansible.cfg (global default config file)
To see the configuration file ansible currently uses, you can run the command,
[lisa@DRDEV1 ~]$ ansible --version

ansible 2.8.18
  config file = /etc/ansible/ansible.cfg
  configured module search path = ['/home/lisa/.ansible/plugins/modules', '/usr/share/ansible/plugins/modules']
From the screenshot above, ansible is using the settings in /etc/ansible/ansible.cfg configuration file which is the global default ansible configuration file.
2. ~/.ansible.cfg (config file in user’s home directory)
To change the ansible configuration file to ~/.ansible.cfg, simply create the configuration file in the user’s home directory by following the steps below
[lisa@DRDEV1 ~]$ vi .ansible.cfg[defaults]
inventory=/home/lisa/inventory/static-ini-inventory
remote_user=lisa
[privilege_escalation]
become=True
become_user=root
become_method=sudo
beocme_ask_pass=false
*create an inventory file. Please see the previous lesson if you don’t know how to
[lisa@DRDEV1 ~]$ mkdir /home/lisa/inventory[lisa@DRDEV1 ~]$ vim /home/lisa/inventory/static-ini-inventoryserver5.tekneed.com
server8.tekneed.com
[manchester]
server1.tekneed.com
server2.tekneed.com
[barcelona]
server3.tekneed.com
server4.tekneed.com
[juve]
server6.tekneed.com
server7.tekneed.com
[Europe:children]
manchester
barcelona
juve*Verify the current configuration file ansible is using
[lisa@DRDEV1 ~]$ ansible --version

ansible 2.8.18
  config file = /home/lisa/.ansible.cfg
  configured module search path = ['/home/lisa/.ansible/plugins/modules', '/usr/share/ansible/plugins/modules']

*verify that the inventory file can be listed.
[lisa@DRDEV1 ~]$ ansible --list-hosts ungrouped

  hosts (2):
    server5.tekneed.com
    server8.tekneed.com
You can now see that the first configuration file, which is the default has been overridden and ~/.ansible.cfg has taken precedence.
3. ./ansible.cfg (config file in the current directory)
To make ansible use a configuration file in the current working directory, create the config file in your desired directory by following the steps below.
[lisa@DRDEV1 ~]$ mkdir myfiles[lisa@DRDEV1 ~]$ vim myfiles/ansible.cfg[defaults]
inventory=/home/lisa/inventory/static-ini-inventory
remote_user=lisa
[privilege_escalation]
become=True
become_user=root
become_method=sudo
beocme_ask_pass=false[lisa@DRDEV1 ~]$ cd myfiles/[lisa@DRDEV1 myfiles]$ pwd
/home/lisa/myfiles[lisa@DRDEV1 myfiles]$ ansible --version
ansible 2.8.18
config file = /home/lisa/myfiles/ansible.cfg
configured module search path = ['/home/lisa/.ansible/plugins/modules', '/usr/share/ansible/plugins/modules']

4. ANSIBLE_CONFIG (config file defined by environment variable)
To make ansible use a configuration file defined by an environment variable, create the environment variable by following the steps below.
[lisa@DRDEV1 ~]$ mkdir myfiles2[lisa@DRDEV1 ~]$ vim myfiles2/ansible.cfg[defaults]
inventory=/home/lisa/inventory/static-ini-inventory
remote_user=lisa
[privilege_escalation]
become=True
become_user=root
become_method=sudo
beocme_ask_pass=false[lisa@DRDEV1 ~]$ export ANSIBLE_CONFIG=/home/lisa/myfiles2/ansible.cfg[lisa@DRDEV1 ~]$ echo $ANSIBLE_CONFIG
/home/lisa/myfiles2/ansible.cfg[lisa@DRDEV1 ~]$ ansible --version
ansible 2.8.18
config file = /home/lisa/myfiles2/ansible.cfg
configured module search path = ['/home/lisa/.ansible/plugins/modules', '/usr/share/ansible/plugins/modules']

You can see that ansible is using the configuration file from the environment variable, which has taken the highest precedence and overridden other ansible configuration files.
NOTE: use the command below to unset the environmental variable.
[lisa@DRDEV1 ~]$ unset ANSIBLE_CONFIG[lisa@DRDEV1 ~]$ ansible --version
ansible 2.8.18
config file = /home/lisa/.ansible.cfgTo see the complete listing of your ansible configuration file, use the command below
[lisa@drdev1 ~]$ ansible-config list
ACTION_WARNINGS:
  default: true
  description: [By default Ansible will issue a warning when received from a task
      action (module or action plugin), These warnings can be silenced by adjusting
      this setting to False.]
  env:
  - {name: ANSIBLE_ACTION_WARNINGS}
............
Depending on how long the output is, you can always pipe the output to the more or less command. You can also search for a particular string
To see the final state of the ansible configurations that will be used for your ansible operations, use the command below
[lisa@DRDEV1 ~]$ ansible-config dump

ACTION_WARNINGS(default) = True
AGNOSTIC_BECOME_PROMPT(default) = True
ALLOW_WORLD_READABLE_TMPFILES(default) = False
ANSIBLE_CONNECTION_PATH(default) = None
ANSIBLE_COW_PATH(default) = None
..........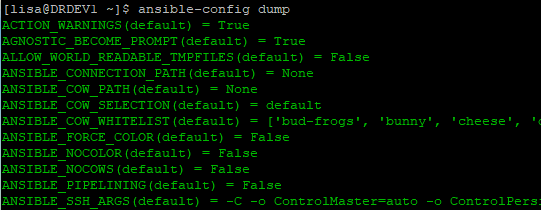
Depending on how long the output is, you can always pipe the output to the more or less command. You can also search for a particular string.
The output in green color is the configurations that are set by default while the output in yellow is the configurations that are set by the user.
Class Activity
In your lab environment, create the ansible configuration file to use the current working directory of ~/my-first-config.
If you like this article, you can support us by
1. sharing this article.
2. Buying the article writer a coffee (click here to buy a coffee)
3. Donating to move our project to the next level. (click here to donate)
If you need personal training, send an email to info@tekneed.com
Click To Watch Video On Creating & Managing Ansible Configuration File
RHCE EX294 Exam Practice Question & Answer On Creating & Managing Ansible Configuration File In Linux
Your feedback is welcomed. If you love others, you will share with others
Leave a Reply