
Last updated: November 2022
In this lesson, you will learn how to login to Linux with SSH keys from windows using putty.
UNDERSTANDING THE SUBJECT MATTER
Using key-based authentication for SSH is considered to be safer than using passsword-based authentication. The keys are generated by a mathematical algorithm in an encrypted format, making them very hard and almost impossible to guess.
One needs an SSH key generator tool to be able to generate SSH keys. The SSH key generator will generate two important SSH key pairs, which are the private key and the public key. There must be a handshake between these two keys before authentication can happen.
The public key, as the name implies, public, will be on the target server/system, and the private key, as the name implies, private, will be private to you and must be on the client system/server/node.
In this lesson, we will look at how to generate SSH keys and use PuTTY to login to a Linux server from a Windows system.
ACTION TIME
1. Generate SSH key pair.
You can use the PuTTY Key Generator (PuTTYgen) tool on windows or the ssh-key tool on Linux.
The most important thing is that you have the two key pairs, public and private keys, where your public key will be on the Linux system, and your private key will be on the windows system.
In this snippet, I will be using the ssh-keygen tool
[tayo@Tekneed ~]$ ssh-keygen

Generating public/private rsa key pair.
Enter file in which to save the key (/home/tayo/.ssh/id_rsa):
Because I am generating this key pair for the user, tayo, I will like to save the key pair in tayo’s home directory, so I will accept the default location to save the files to.
You must generate a key pair for individual users on the system, just like you are creating passwords for every user if you disable using SSH password login.
Enter file in which to save the key (/home/tayo/.ssh/id_rsa):
Enter passphrase (empty for no passphrase):
Because I want the user, tayo to always login via the keys using a passphrase, I will enter a passphrase. If you want to always login automatically without a passphrase, don’t enter any, just press the enter key on your keyboard and move on.
Enter passphrase (empty for no passphrase):
Enter same passphrase again:
Your identification has been saved in /home/tayo/.ssh/id_rsa.
Your public key has been saved in /home/tayo/.ssh/id_rsa.pub.
The key fingerprint is:
SHA256:alUVV69Vwp/XmDRFNpR6iXXrk744MptKvRLSws2PgPE tayo@Tekneed
The key's randomart image is:
+---[RSA 3072]----+
|            oo+*B|
|           . .+==|
|          .  .+=O|
|     .   .   ooB+|
|      = S     + o|
|     . E =.    + |
|      o +.+.  . .|
|     .  .o +o... |
|         .o++....|
+----[SHA256]-----+
[tayo@Tekneed ~]$
2. Verify that the keys have been generated.
[tayo@Tekneed ~]$ ls -l .ssh/

total 8
-rw-------. 1 tayo tayo 2655 Nov 17 12:31 id_rsa
-rw-r--r--. 1 tayo tayo  566 Nov 17 12:31 id_rsa.pub
You can see that the private key (id_rsa) and the public key (id_rsa.pub) have been generated.
3. create an authorized_keys file in “.ssh” directory if none exists, and copy the public keys to the authorized_keys file.
if an authorized_keys file exists, just add the public key in the next line of the file.
[tayo@Tekneed ~]$ cat .ssh/id_rsa.pub > .ssh/authorized_keys
[tayo@Tekneed ~]$ ls -l .ssh/

total 12
-rw-rw-r--. 1 tayo tayo  566 Nov 17 16:03 authorized_keys
-rw-------. 1 tayo tayo 2655 Nov 17 12:31 id_rsa
-rw-r--r--. 1 tayo tayo  566 Nov 17 12:31 id_rsa.pub
[tayo@Tekneed ~]$ cat authorized_keys

ssh-rsa AAAAB3NzaC1yc2EAAAADAQABAAABgQDdqwEBg8/U7cOYTasVxhR6ySnZs0VPRgwRo1txVN5stZg81W+9TdiHRJXefUH8IeKNg5b70vnlsXGAlREAlGRUohsSEvUAw5GSfuv6oCiANMIj9usi/Iodf+ieQo9fQtI8NfMtllezGkViHbWaKfb8tMzvagop+LB8tS1fjDRlurI8UFEJM4YsUddZQa2SLKupCkMETQ7PP3qdnSurMDTDBEalMADIcOGWBOZdbHfR6a5K9yX6D+kJzolanFmFSPJeLBHesMR8Y+BiLXq69PVr3krM1g+tP+QXeYNr/EY0RG4G9J59IjkN/FZ76fOr5c153hqWMkuJho4rHnW1wvUwfbpXz9lgfMmYuKLuGj+7zm4FPe8utcrPM+uUnNh0FxbzR92vSM1BAH9uNnv3yGdBTZ8TPWGi/k5VF61IHxfsYJ4Fts1h3Z7Z8QIXgmjNFjJ9uXZIcfokSnOqETVSwJjfDRuTJHYD1+KPaNnL0gZ8/LEmHMjL58fpVUo+KaTVSJM= tayo@Tekneed
3b. You might want to change the permission of the authorized_keys to 600.
Note that you will need to change the permission of authorized_keys to 600 if you are having the error, “the server refused our key” as shown after step 11 below.
The “.ssh” folder should have the permission, 700 which comes mostly by default, and the authorized_keys file should have the permission, 600
[tayo@Tekneed ~]$ chmod 600 .ssh/authorized_keys[tayo@Tekneed ~]$ ls -l .ssh/
total 12
-rw-------. 1 tayo tayo 566 Nov 17 16:03 authorized_keys
-rw-------. 1 tayo tayo 2655 Nov 17 12:31 id_rsa
-rw-r--r--. 1 tayo tayo 566 Nov 17 12:31 id_rsa.pub[tayo@Tekneed ~]$ ls -al |grep .ssh
drwx------. 2 tayo tayo 61 Nov 17 16:03 .ssh
One good practice is to delete the private keys except when you need them to login to another Linux system or login as a different user or root user. Like I mentioned, there must be a handshake between the private key and the public key. You can also passphrase or password to protect it or restrict access to the file.
4. Disable SSH password authentication to use only SSH keys in the SSH configuration file
Please click here to disable password authentication
We are done generating the key and preparing the system for key based authentication
4. Copy the private key to your windows system
Please keep this key safe (One good practice to do is to delete the private key from the target server (Linux server or restrict access), also, password the key on your windows server
You can cat the private key file, copy and paste it on a notepad on your windows system or copy directly from your windows command line using putty secure copy (pscp). I will be using pscp as shown below.
C:\Users\Victor>pscp tayo@192.168.37.140:/home/tayo/.ssh/id_rsa c:\users\Victor\Documents

tayo@192.168.37.140's password:
id_rsa                    | 2 kB |   2.6 kB/s | ETA: 00:00:00 | 100%

C:\Users\Victor>
5. Verify that the private key has been copied
C:\Users\Victor>dir Documents\id_rsa

 Volume in drive C has no label.
 Volume Serial Number is 6412-3A40

 Directory of C:\Users\Victor\Documents

11/17/2022  01:28 PM             2,655 id_rsa
               1 File(s)          2,655 bytes
               0 Dir(s)  264,554,893,312 bytes free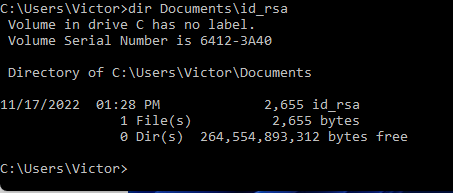
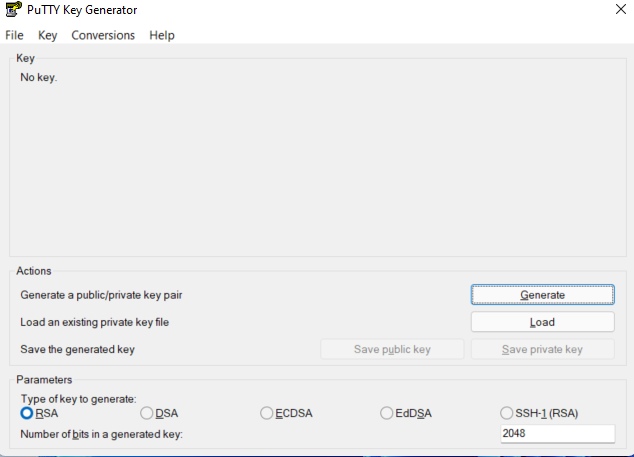
6. Import the private key to your windows/PuTTYgen client since you will be using PuTTY from your windows system to connect to the Linux system
You can launch the puttygen tool from all programs/all apps on your windows or from cmd just like I have done below.
C:\Users\Victor>puttygen
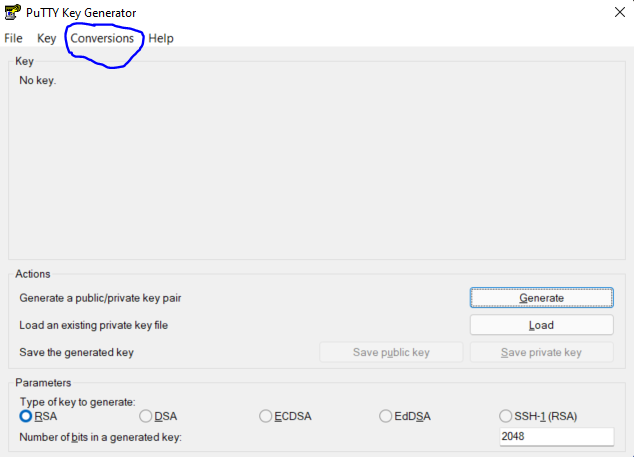
a. Click on conversion tab, then click on import key, browse through and import the keys you saved on your system.
If you are lost, please click the link at the end of this tutorial to watch the video
b. After importing, the tab will look like the picture below, and because i want to always login using a passphrase, I will leave the key passphrase section as it is (it automatically took the passphrase I used when generating the key pair through ssh-keygen)
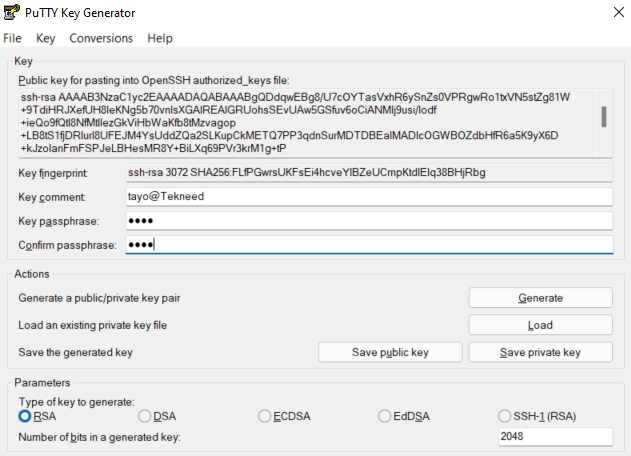
C. Click on “save private key” to save the file.
You can give the file any name and save it in any folder you wish to.

7. Close PuTTYgen and launch the PuTTY tool
you can also launch the putty tool from cmd as shown below.
C:\Users\Victor>putty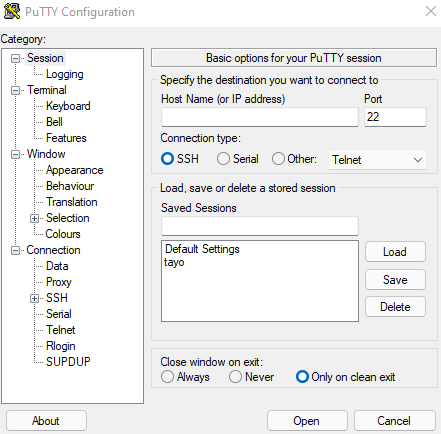
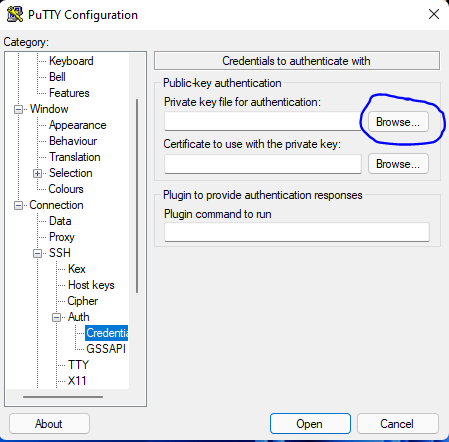
8. Click on connection, then click on SSH, then click on Auth, then click on Credentials
9. Click on browse and browse to where you stored the private key you imported via PuTTYgen
10. Go back to “session”, put in the IP as shown below.
You can save the session if you wish so that you don’t have to always go through this process again. then click on open
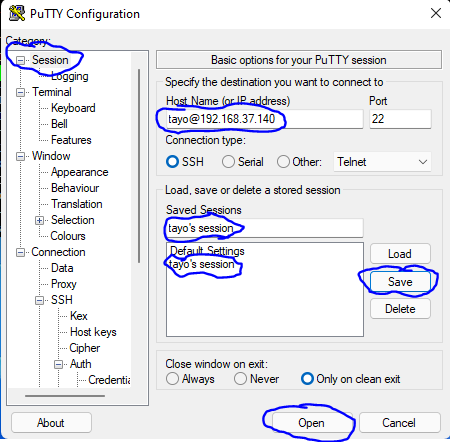
11. When you click open, enter your passphrase, and you will be able to login.
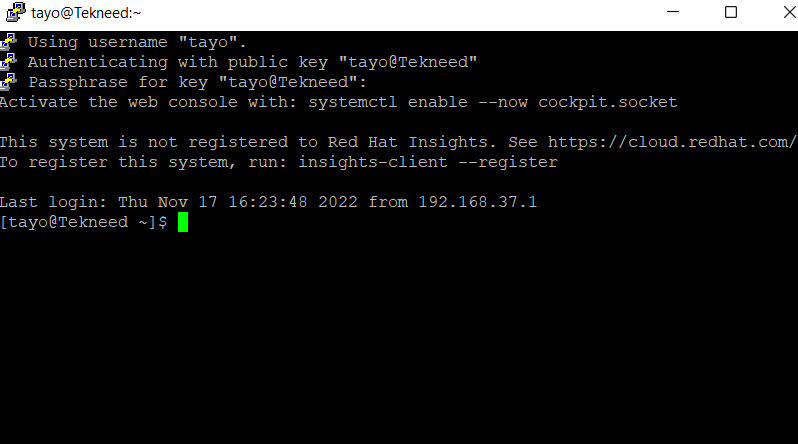
In case you get the error as shown below, make sure that the authorized_keys file has a permission of 600 just like I mentioned in step 3b
Using username "tayo".
Server refused our key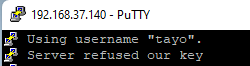
If you still get the error, make sure that the .ssh directory has a permission of 700 just like I mentioned in step 3b
I got the error first time and I was able to check my logs as shown below to see where the issue was coming from to realize its a permission issue from the authorized__keys file.
[root@Tekneed log]# cat /var/log/secure............................
Nov 17 11:11:30 Tekneed sshd[3912]: Received signal 15; terminating.
Nov 17 11:11:30 Tekneed sshd[4000]: Server listening on 0.0.0.0 port 22.
Nov 17 11:11:30 Tekneed sshd[4000]: Server listening on :: port 22.
Nov 17 11:11:52 Tekneed sshd[4014]: Authentication refused: bad ownership or modes for file /home/tayo/.ssh/authorized_keys

PARTING NOTE
1. If you delete a private key, for example, the user, bola’s private key, and you have the public key in the authorized file of the user, tayo, you won’t be able to authenticate because there won’t be any handshake. You will have the error as shown below.
[bola@Tekneed .ssh]$ ssh tayo@localhost

tayo@localhost: Permission denied (publickey,gssapi-keyex,gssapi-with-mic).
With the private key in the .ssh directory, and the public key in the authorized file of the user, tayo, you will be able to authenticate as shown below.
[bola@Tekneed .ssh]$ ssh tayo@localhost

Activate the web console with: systemctl enable --now cockpit.socket

This system is not registered to Red Hat Insights. See https://cloud.redhat.com/
To register this system, run: insights-client --register

Last login: Fri Nov 18 11:12:53 2022 from ::1
2. You can use the ssh-copy-id tool. This tool will copy the public key to an authorized file on the target system. If there is no existing authorized file, it will create one, and if there is an already existing authorized file, it will add the public key to the next line inside the file.
Watch Video On How To Login To Linux With SSH Keys From Windows Using PuTTY
Your feedback is welcomed. If you love others, you will share with others.
Leave a Reply