
Last updated: November 2021
Understand What Ansible Roles are and how to use them.
Contents
UNDERSTANDING THE SUBJECT MATTER
What Are Ansible Roles
Ansible role is a technique to simplify a playbook by logically splitting it into multiple files. The splitting of a playbook into multiple files has a directory structure which makes these files reusable, hence Ansible roles are directory structures that are reusable.
With Ansible roles, a set of task(s) files, including variables and templates can be created.
Imagine you have a large environment that involves creating a very long playbook file, with Ansible role, the playbook can be broken into segments of files using roles, thereby making the playbook file short, neat, simple, and easy to troubleshoot.
Ansible role is not a playbook, they are files that contain specified functionalities and must be used with a playbook. Ansible Roles allow you to group your tasks into different files.
Ansible Role Directory Structure
Let’s look at the directory structure of Ansible roles, but before that, let’s create an Ansible role so I can explain using the role we have created.
To create an Ansible role, use the command,
[lisa@drdev1 ~]$ ansible-galaxy init role1

- role1 was created successfully
To see the directory structure of role1, use the “ls” or “tree” command,
[lisa@drdev1 ~]$ ls -l role1/

total 4
drwxrwxr-x. 2 lisa lisa   22 May 15 21:53 defaults
drwxrwxr-x. 2 lisa lisa    6 May 15 21:53 files
drwxrwxr-x. 2 lisa lisa   22 May 15 21:53 handlers
drwxrwxr-x. 2 lisa lisa   22 May 15 21:53 meta
-rw-rw-r--. 1 lisa lisa 1328 May 15 21:53 README.md
drwxrwxr-x. 2 lisa lisa   22 May 15 21:53 tasks
drwxrwxr-x. 2 lisa lisa    6 May 15 21:53 templates
drwxrwxr-x. 2 lisa lisa   39 May 15 21:53 tests
drwxrwxr-x. 2 lisa lisa   22 May 15 21:53 vars
OR
[lisa@drdev1 ~]$ tree -F role1/

role1/
├── defaults/
│   └── main.yml
├── files/
├── handlers/
│   └── main.yml
├── meta/
│   └── main.yml
├── README.md
├── tasks/
│   └── main.yml
├── templates/
├── tests/
│   ├── inventory
│   └── test.yml
└── vars/
    └── main.yml
You can see that the directory structure of a role consists of eight directories with one README.md file.
The eight directories are; defaults, files, handlers, meta, README.md, tasks, templates, tests, and vars. Most of all these directories also have a main.yml file where the role files will be defined.
Also, note that one can create/develop a role or use an already created/developed role.
Let’s understand what these Ansible role directories are;
1. default directory
The default directory contains the default variables that will be used or used by a role, and these variables are easily overridden because of the lowest priority it has.
2. files directory
The files directory contains any files that will be used by the role. It also contains files that will be copied to the managed hosts.
3. handlers directory
The handlers directory contains the handlers that are or will be used by the roles
4. meta directory
The meta directory contains the meta data file for the role. It also includes licenses, authors, dependencies, etc.
5. tasks directory
The tasks directory contains the tasks the role will use or rather the tasks you need to execute. If one is using an already created/developed role, and the tasks need to point to variables, it’s best the variables are defined in the defaults directory.
However, role developers/creators will define their variables in the vars directory.
6. vars directory
The vars directory contains the internal variables that are defined for a role. For example, if you are the creator/developer of the role, the variables will be defined in the vars directory.
More so, it is best variables are defined in the defaults directory if you are not the creator. Tampering with the vars directory can break a role if you don’t really understand how the role is developed.
7. templates directory
The templates directory contains the templates file, the Ansible jinja2 template(link) files for the role.
8. tests directory
The test directory contains an example of how a role is used. It contains two files which are the inventory and test.yml file. The inventory file contains an example of inventory, while the test.yml file contains an example of a playbook and task.
For example, a role creator/developer will specify examples, just like a manual or documentation of how the role can be used in the test directory.
Advantages of Ansible Role
1. code can be reusable/reused
2. simplifies a playbook
3. code can easily be shared
4. Better management of large environment
How Do You Write an Ansible Role
To define Ansible roles or call a role in a playbook, the keyword, roles will be used. For example, to call a role name, role1 in a playbook, the playbook can be written as shown below.
- name: calling a role to do the tasks
  hosts: group1
  roles:
    - role1
As we go on in this lesson, we will learn how to create roles and use existing created roles with examples but before then, let’s look at using system roles.
Using System Roles For Ansible Tasks
Like I mentioned above, one can use already existing roles instead of creating one if it suits your need.
Red Hat has some system roles (rhel-system-roles) that can be used or re-used provided it suits your need. The good thing about these roles is that they are supported by Red Hat.
To use these roles, the rhel-system-roles package needs to be installed, and to install rhel-system-roles package, use the command,
# yum install rhel-system-rolesAfter installation, you can use the command below to see all the number of roles available on your system, including the ones you created or downloaded.
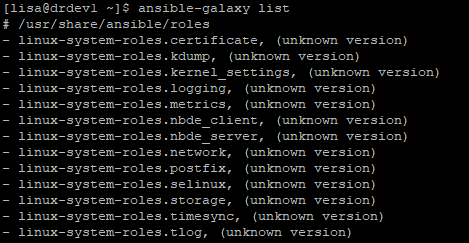
[lisa@drdev1 ~]$ ansible-galaxy list

# /usr/share/ansible/roles
- linux-system-roles.certificate, (unknown version)
- linux-system-roles.kdump, (unknown version)
- linux-system-roles.kernel_settings, (unknown version)
- linux-system-roles.logging, (unknown version)
- linux-system-roles.metrics, (unknown version)
- linux-system-roles.nbde_client, (unknown version)
- linux-system-roles.nbde_server, (unknown version)
- linux-system-roles.network, (unknown version)
- linux-system-roles.postfix, (unknown version)
- linux-system-roles.selinux, (unknown version)
- linux-system-roles.storage, (unknown version)
- linux-system-roles.timesync, (unknown version)
- linux-system-roles.tlog, (unknown version)
The role names easily define the function of the roles. For example, the linux-system-roles.kdump role is used for kdump configuration. Similarly, the linux-system-roles.network role is used for network configuration.
To get information about how a role can be used, for example, to get more information about how the timesync role, use the command,
[lisa@drdev1 ~]$ cat /usr/share/doc/rhel-system-roles/timesync/README.md |more
In the ACTION TIME section below, we will see how to use the rhel system roles with examples.
Other Ansible Roles (Ansible Galaxy)
Apart from the rhel system roles that are shipped with Red Hat Enterprise Linux 8, there are also many more roles available online, in a repository called Ansible galaxy which can be accessed by clicking here. (www.galaxy.ansible.com)
These roles are not supported by Red Hat. You can also search for a role that is related to a particular service, for example,
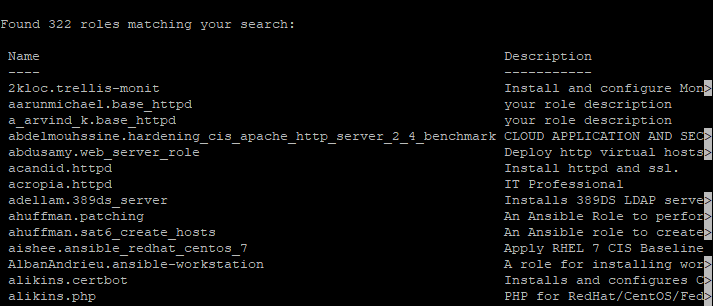
[lisa@drdev1 ~]$ ansible-galaxy search httpd

Found 322 roles matching your search:

 Name                           Description
............
You can also choose to streamline your search by adding some other options, like the author of the role or the type of platform.
[lisa@drdev1 ~]$ ansible-galaxy search httpd --platforms EL[lisa@drdev1 ~]$ ansible-galaxy search httpd --platforms EL --author geerlingguy
Found 2 roles matching your search:
Name Description
---- -----------
geerlingguy.certbot Installs and configures Certbot (for Let's Encrypt).
geerlingguy.php PHP for RedHat/CentOS/Fedora/Debian/Ubuntu.
Creating Custom Ansible Roles
Your own custom roles can be created. Following the directory structure, the necessary components will be specified in their directories which also makes your role reusable.
It is a good idea to restrict a role to a specific function. For example, if you need to deploy a webserver, create the role for that specific purpose so that the role can be easily maintained and reused.
There are three locations a role can be created. To see these locations, use the command,
[lisa@drdev1 ~]$ ansible-config dump |grep -i roles

DEFAULT_ROLES_PATH(default) = ['/home/lisa/.ansible/roles', '/usr/share/ansible/roles', '/etc/ansible/roles']
Just as I mentioned above that you can use the “ansible-galaxy list” command to see the number of roles on your system, you must know that these roles will also be under any of these three Ansible roles locations.
For example, to see the number of roles available on your system, use the command,
[lisa@drdev1 ~]$ ansible-galaxy list

# /usr/share/ansible/roles
# /etc/ansible/roles
[WARNING]: - the configured path /home/lisa/.ansible/roles does not exist.
You can also specify a role’s path in your configuration file if you don’t want to use the role’s default path or don’t have permission to the default role’s path.
Depending on how you want your roles to be defined, the roles path can be specified in the configuration file as shown below.
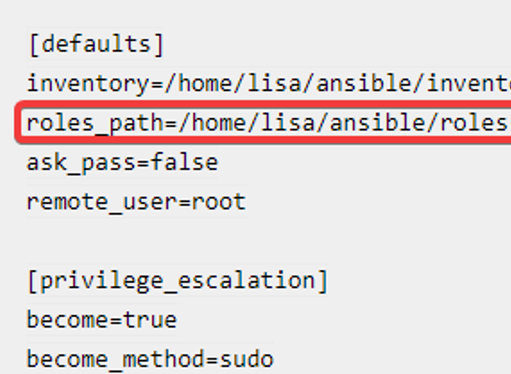
In the ACTION TIME section below, we will see how to create a custom role with examples.
ACTION TIME
Let’s see the step by step guide of how to use Ansible roles.
NOTE: The inventory file we will use in the step by step guide is below
[lisa@drdev1 ~]$ cat  inventory/static-ini-inventory

[group1]
hqdev1.tekneed.com
localhost

[Asia_region]
hqdev1.tekneed.com

[America_region]
localhost
Step By Step Guide Of How To Use Ansible System Roles For Tasks
In this example, we are going to use the linux-system-roles.timesync role for time synchronization.
1. Install rhel-system-roles package.
[lisa@drdev1 ~]$ sudo dnf install rhel-system-roles -y

Updating Subscription Management repositories.
Last metadata expiration check: 0:04:16 ago on Sun 09 May 2021 07:38:22 PM WAT.
Dependencies resolved.
.............
2. Verify that the rhel-system-roles package has been installed
[lisa@drdev1 ~]$ rpm -q rhel-system-roles

rhel-system-roles-1.0-21.el8.noarch
3. Verify that the rhel system roles that are available on your system
[lisa@drdev1 ~]$ ansible-galaxy list

# /usr/share/ansible/roles
- linux-system-roles.certificate, (unknown version)
- linux-system-roles.kdump, (unknown version)
- linux-system-roles.kernel_settings, (unknown version)
..........
In this example, we are making use of the linux-system-roles.timesync role
4. create a playbook and define the role in the playbook.
[lisa@drdev1 ~]$ vim playbook20.yml- name: Time synchronization with rhel-system-roles.timesync
hosts: group1
roles:
- rhel-system-roles.timesync
tasks:
- name: synchronize time
timezone:
name: "{{ host_timezone }}"
notify: restart crond service
handlers:
- name: restart crond service
service:
name: crond
state: restartedThe playbook will call the rhel-system-roles.time.sync role, this role contains tasks that target variables, hence, variable files will be created. One is a variable file that will be used for all inventory hosts and the other will be the one for the host_timezone.
The role will be executed, followed by the other tasks in the playbook, including handlers.
5. create a group directory, group_vars/all directory for the role variables
[lisa@drdev1 ~]$ mkdir group_vars/all[lisa@drdev1 ~]$ vim group_vars/all/timezonetimesync_ntp_servers:
- hostname: region1.tekneed.com
iburst: yes
timesync_ntp_provider:
- hostname: chronyNOTE: regioin1.tekneed.com is the NTP server.
6. Define the variables for host_timezone specified in the playbook.
*create a variable file for each region, make their directories.
[lisa@drdev1 ~]$ mkdir -p group_vars/Asia_region
[lisa@drdev1 ~]$ mkdir -p group_vars/America_region
*create the timezone variable file for each region
[lisa@drdev1 ~]$ vim group_vars/Asia_region/timezonehost_timezone: Asia/Tokyo[lisa@drdev1 ~]$ vim group_vars/America_region/timezonehost_timezone: America/Toronto7. Run the playbook
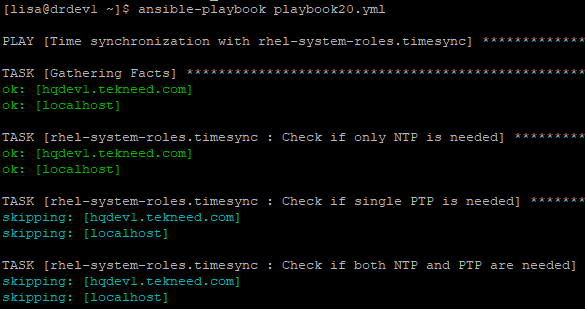
[lisa@drdev1 ~]$ ansible-playbook playbook20.yml

PLAY [Time synchronization with rhel-system-roles.timesync] *******************************************
.......
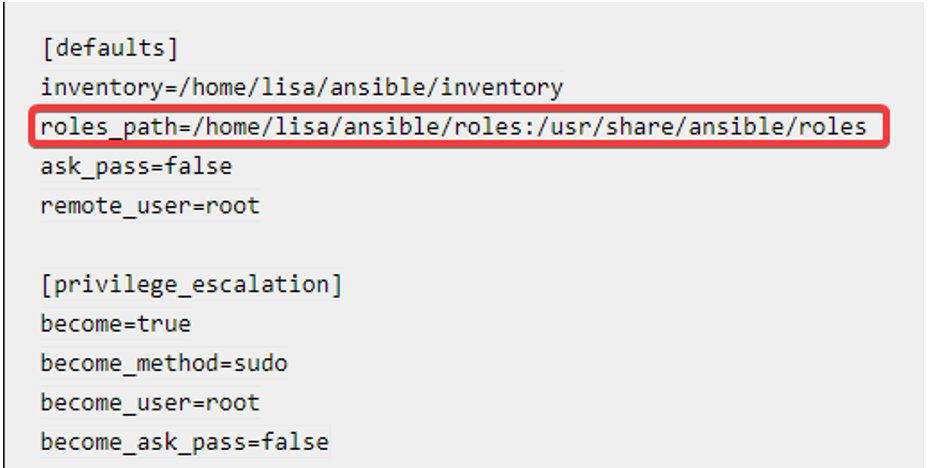
Another very easy way to write a playbook for time synchronization using RHEL system roles can be seen below. The roles path will be defined in the Ansible configuration file as seen below. In this case, the Ansible configuration file is in the path, /home/lisa/ansible.
roles_path=/home/lisa/ansible/roles:/usr/share/ansible/roles---
- name: time synchronization
hosts: all
vars:
timesync_ntp_servers:
- hostname: 10.112.116.64
iburst: yes
roles:
- rhel-system-roles.timesync
You can always check the rhel system roles examples to see how the playbook can be created.
[lisa@drdev1 ansible]$ cat /usr/share/doc/rhel-system-roles/timesync/example-timesync-playbook.yml

---
- hosts: "{{ target }}"
  vars:
    timesync_ntp_servers:
      - hostname: 0.pool.ntp.org
        iburst: yes
      - hostname: 1.pool.ntp.org
.................
Step By Step Guide Of How To create Ansible Custom Role
To create a role with the name tekneed.apache that will install the httpd package, follow the steps below.
1. create a role with the name, tekneed.apache
[lisa@drdev1 ~]$ ansible-galaxy init tekneed.apache

- tekneed.apache was created successfully
2. Verify if the role and the directory structure of the role have been created.
[lisa@drdev1 ~]$ ls tekneed.apache/

defaults  files  handlers  meta  README.md  tasks  templates  tests  vars
[lisa@drdev1 ~]$ tree -F tekneed.apache/
tekneed.apache/
├── defaults/
│ └── main.yml
├── files/
├── handlers/
│ └── main.yml
...................3. Define the role that has been created.
*In the tasks directory, edit the main.yml file and define your role task. This file will contain the tasks.
[lisa@drdev1 ~]$ vim tekneed.apache/tasks/main.yml---
# tasks file for tekneed.apache
- name: Install apache httpd
yum:
name: httpd
state: present
- name: start and enable apache
service:
name: httpd
enabled: true
state: started4. Create a playbook file and define the role that was created in the playbook file.
[lisa@drdev1 ~]$ vim playbook21.yml- name: Install Apache web server
hosts: group1
roles:
- tekneed.apache5. Run the playbook
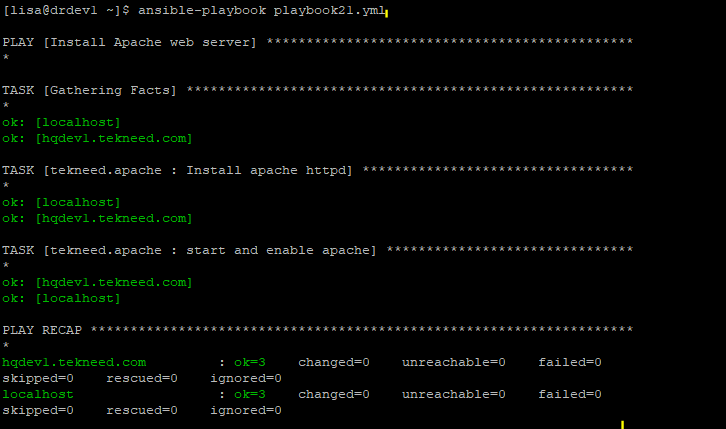
[lisa@drdev1 ~]$ ansible-playbook playbook21.yml

PLAY [Install Apache web server] ***********************************************
...........
Moving this example forward, let’s add a test web file in /var/www/html by editing the tasks file of the role created. We also need to add the notify directive to notify a handler to restart the httpd service.
*Edit the main.yml file in the tasks directory and add the third task with the handler directive.
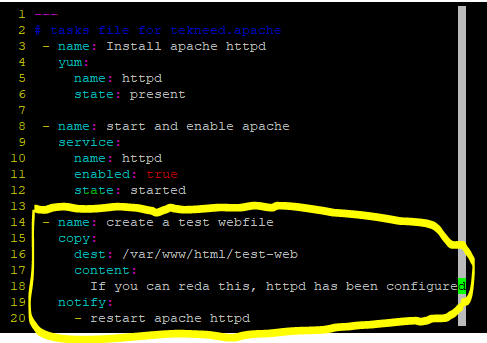
[lisa@drdev1 ~]$ vim tekneed.apache/tasks/main.yml---
# tasks file for tekneed.apache
- name: Install apache httpd
yum:
name: httpd
state: present
- name: start and enable apache
service:
name: httpd
enabled: true
state: started
- name: create a test webfile
copy:
dest: /var/www/html/test-web
content:
If you can reda this, httpd has been configured
notify:
- restart apache httpd
*In the handlers directory of the role, create handler by editing the main.yml file and define the handler in there
[lisa@drdev1 ~]$ vim tekneed.apache/handlers/main.yml---
# handlers file for tekneed.apache
- name: restart apache httpd
service:
name: httpd
state: restarted*Run the playbook
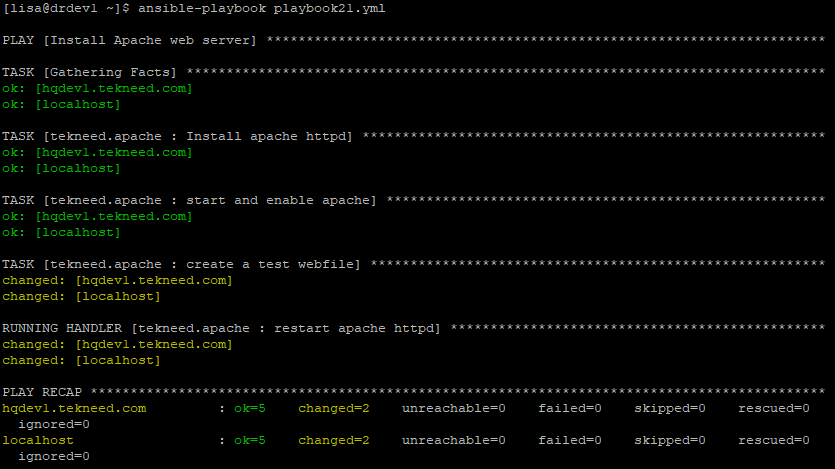
[lisa@drdev1 ~]$ ansible-playbook playbook21.yml

PLAY [Install Apache web server] ************************************************************
..............
Moving this example forward, let’s create another role that will install mysql server.
*create a role with the name, tekneed.mysql
[lisa@drdev1 ~]$ ansible-galaxy init tekneed.mysql

- tekneed.mysql was created successfully
*Verify that the role has been created
[lisa@drdev1 ~]$ ls tekneed.mysql/

defaults  files  handlers  meta  README.md  tasks  templates  tests  vars
*Edit the role task, main.yml file by defining the tasks in there
[lisa@drdev1 ~]$ vim tekneed.mysql/tasks/main.yml---
# tasks file for tekneed.mysql
- name: Install mysql database server
yum:
name: mysql
state: latest*Edit the playbook file and add the role into the playbook file
[lisa@drdev1 ~]$ vim playbook21.yml- name: Install Apache web server
hosts: group1
roles:
- tekneed.apache
- tekneed.mysql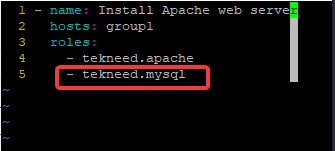
*Run the playbook
[lisa@drdev1 ~]$ ansible-playbook playbook21.yml

PLAY [Install Apache web server] ************************************************************
............
Roles can also be installed with the use of a requirement file. We installed some roles with requirements files in the Ansible practice questions. You can also check here to know more about requirements file.
If you like this article, you can support us by
1. sharing this article.
2. Buying the article writer a coffee (click here to buy a coffee)
3. Donating to push our project to the next level. (click here to donate)
If you need personal training, send an email to info@tekneed.com
Click Here To Watch Video On Ansible Roles
RHCE 8 ex294 Exam Practice Question On Ansible Roles
Your feedback is welcomed. If you love others, you will share with others
Leave a Reply