
Last updated: August 2024
How to Create Groups in Linux – Introduction
Hello everyone! Today, we’re diving into an essential topic for any Linux user: how to create and manage groups. Understanding groups is crucial for managing permissions and access on a Linux system.
You can also watch this lesson’s video tutorial here.
Before I continue, if you intend to write the certification exam,
you can get our exam practice or preparation questions using this link, or contact us on info@tekneed.com.
So, let’s get started!
Types of Groups in Linux
In Linux, there are two types of groups: primary groups and secondary (or supplementary) groups.
Primary Groups
A primary group is created by default whenever a user is created. The primary group has the same name as the user. For example, if you create a user named john, a primary group called john is also created, and the user john is automatically added to this group.
Secondary Groups
Secondary groups are additional groups that users can be added to, which are not created by default. These groups are usually created manually by the user or the system administrator.
Understanding Group Attributes
When groups are created, their information is stored in the /etc/group file. Let’s explore this file:
cat /etc/group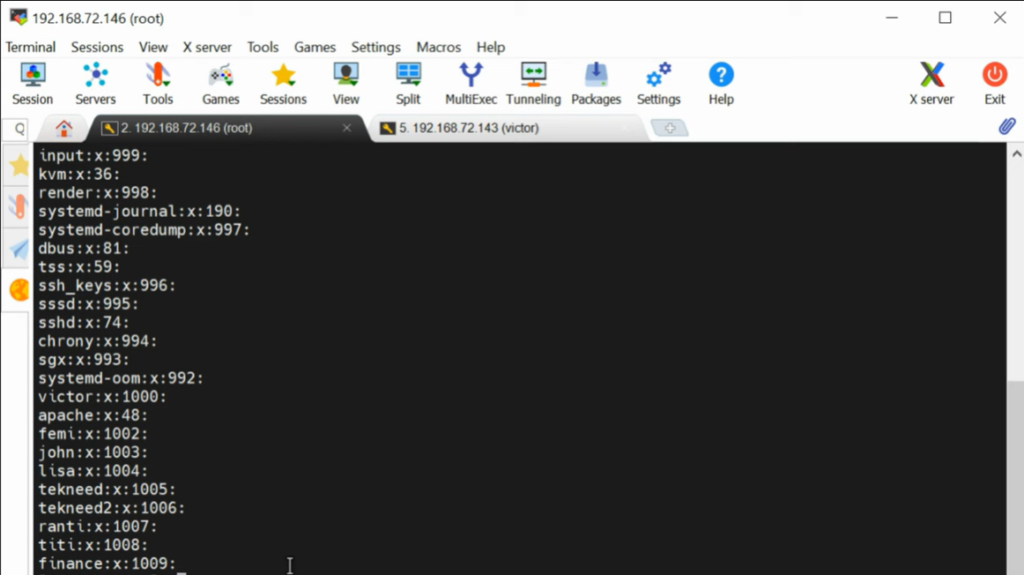
You will see a list of groups with their attributes. Let’s create a new group to understand this better. To create a group, use the groupadd command followed by the name of the group:
groupadd salesIf you check the /etc/group file again, you’ll see the new sales group listed. Here’s a breakdown of the attributes:

- Group Name:
sales - Group Password: Represented by an
x, stored in/etc/gshadow - Group ID (GID): A unique identifier for the group, for example,
1010 - Group Members: Users who belong to this group
Adding Users to Groups
To add users to a group, we use the usermod command. For example, to add a user named lisa to the sales group:
usermod -aG sales lisaHere, -aG appends the user to the group without removing them from other groups.

If you check the /etc/group file again, you will see lisa listed under the sales group. Similarly, you can add another user, tekneed, to the same group:
usermod -aG sales tekneedNow, let’s verify:
cat /etc/group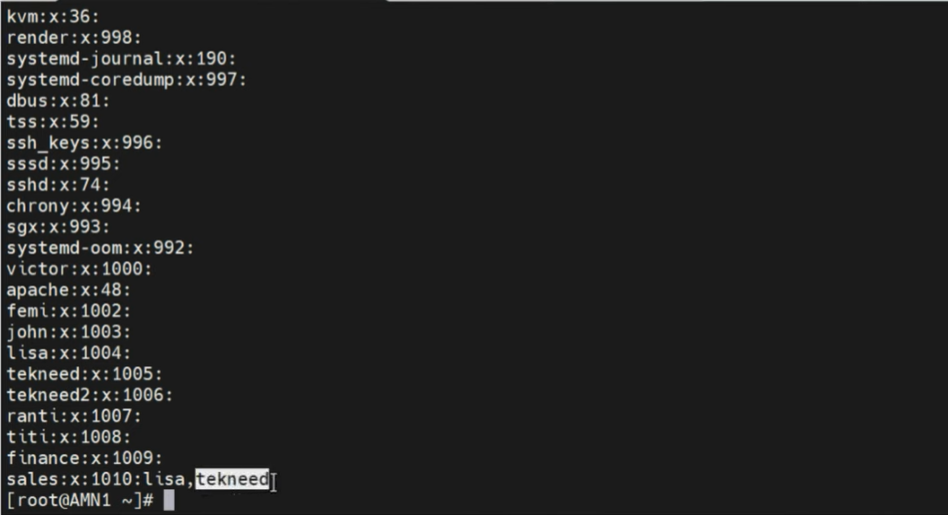
You should see both lisa and tekneed in the sales group.
How to Create Groups in Linux – Red Hat Enterprise Linux
Now, let’s see how to create groups in linux, specifically in Red Hat.
Creating a Primary Group
When you create a user, a primary group is automatically created. For example:
useradd olaCheck the /etc/group file:
cat /etc/group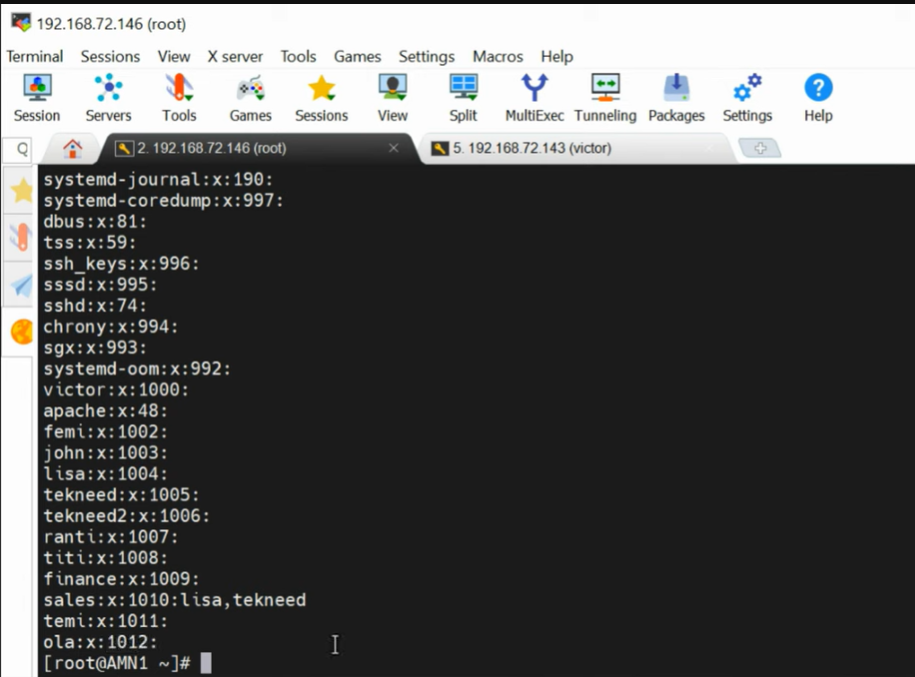
You’ll see the ola group created with a unique GID of 1012.
Creating a Secondary Group
To create a secondary group, use:
groupadd hrVerify the creation:
cat /etc/group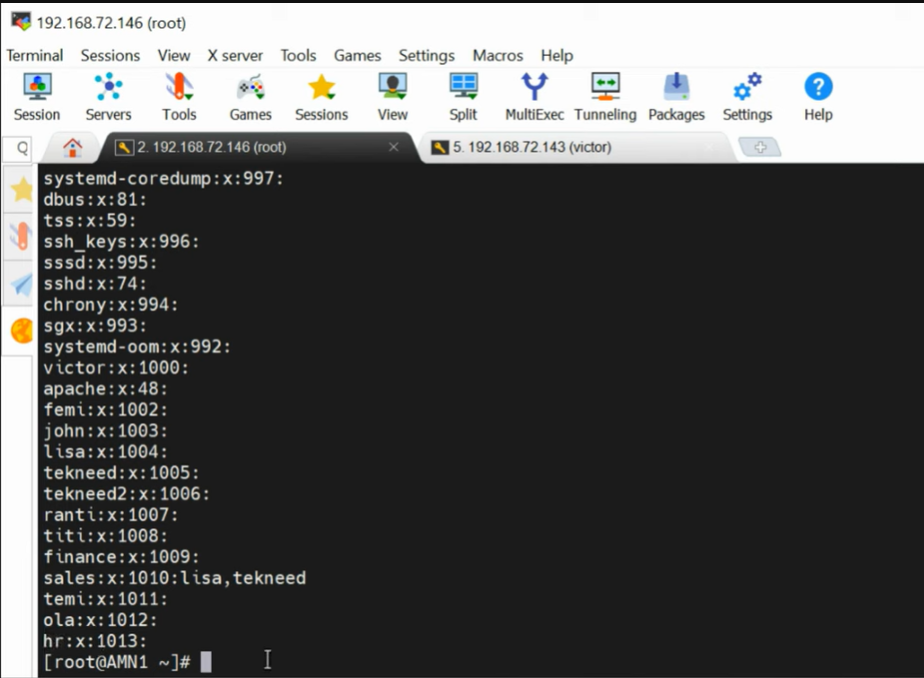
You should see the hr group listed. It has a unique group ID of 1013.
Adding Users to a Secondary Group
The command used to add users to a group is usermod.
Take your time to look through the help manual of the usermod command.
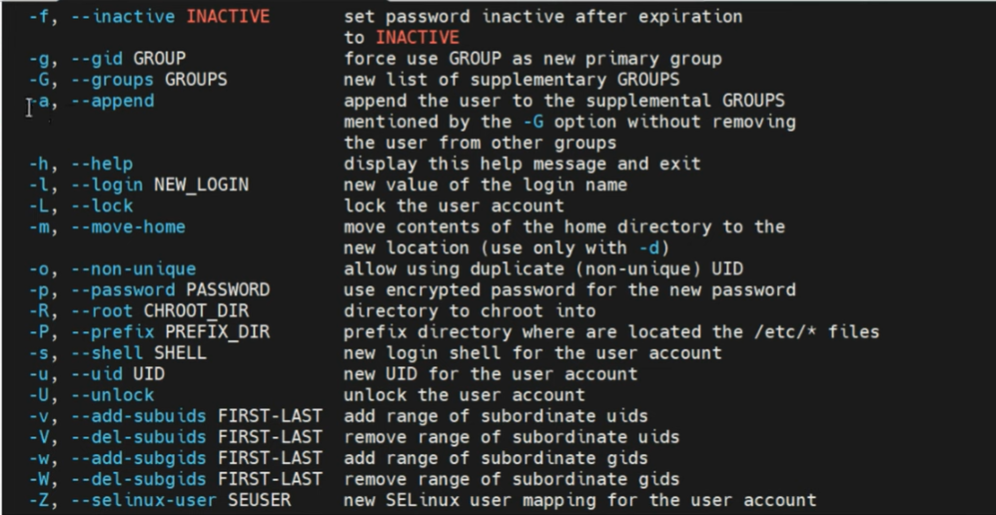
Note: always use the append option when adding users to a group, so as not to overwrite the existing users in the group.
usermod -aG sales tekneedCheck the group file:
cat /etc/group
However, in RHEL 9; users do not get overwritten even when the append option is not used.
usermod -G sales tekneed2Check the group file:
cat /etc/group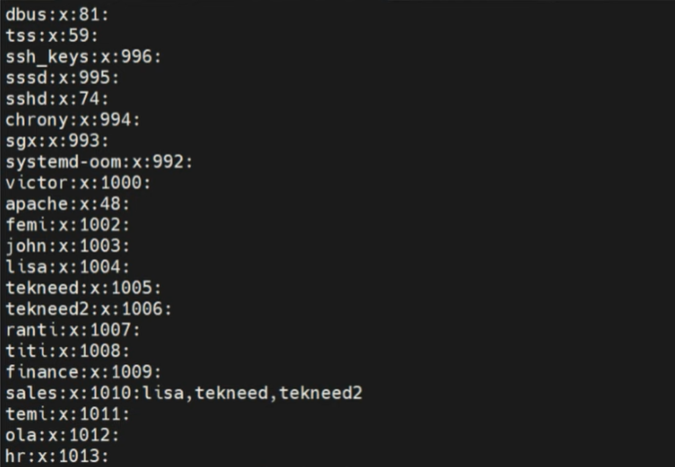
Deleting a Group
To delete a group, use the groupdel command:
groupdel hrVerify the deletion:
cat /etc/group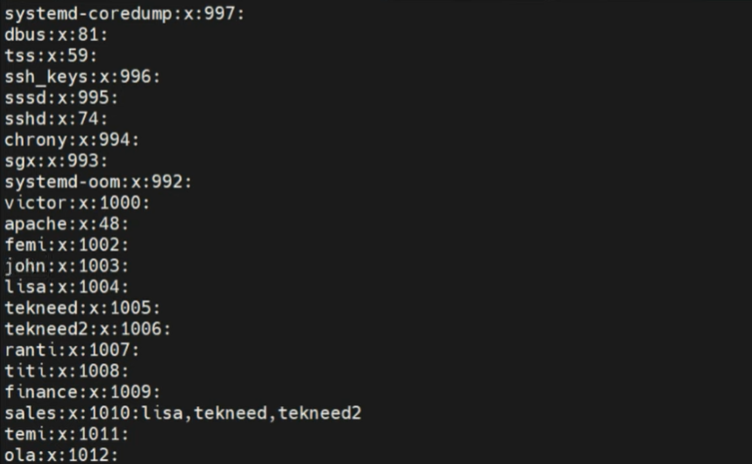
Modifying a Group
To modify a group, use the groupmod command. For example, to change the name of a group:
groupmod -n newname oldnamePassword Management
User passwords are stored in the /etc/shadow file, while group passwords (though rarely used) are stored in /etc/gshadow. For consistency when editing user or group information, use commands like vipw for users and vigr for groups to ensure both the password and shadow files are updated.
Editing User and Group Files
To edit user information safely:
sudo vipwTo edit group information:
sudo vigrThese commands ensure consistency between the /etc/passwd and /etc/shadow files, or the /etc/group and /etc/gshadow files.
How to Create Groups in Linux – Ubuntu
Adding a User
This has been comprehensively explained in our previous lesson.
To add a new user in Ubuntu, use the useradd command followed by the username. For instance, to create a user named ola, execute:
useradd olaTo set a password for ola, use:
passwd olaYou can verify the creation of the user by viewing the contents of the /etc/passwd file:
cat /etc/passwd | grep olaSimilarly, check the group file to confirm the creation of the user’s primary group:
cat /etc/group | grep olaWhen a user is created, a primary group with the same name is also created. This primary group is crucial for managing user permissions and file ownership.
Creating Secondary Groups
In Linux, secondary groups are often used to manage additional permissions and access rights. On how to create groups in linux, use the groupadd command:
groupadd financeVerify the creation of the group by checking the /etc/group file:
cat /etc/group | grep financeAdding Users to Groups
Users can be added to secondary groups using the usermod command. This command allows for various modifications, including adding users to supplementary groups:
usermod -aG finance olaHere, the -a option appends the user to the group without removing them from other groups, and the -G option specifies the supplementary group.
Verify the user’s group membership:
cat /etc/group | grep financeTo add multiple users to a group, repeat the command with different usernames:
usermod -aG finance tekneed
usermod -aG finance tekneed2
Note: If you do not use the -a option, it may remove the user from other supplementary groups.
Modifying and Deleting Groups
To modify group properties, use the groupmod command. For instance, to rename a group:
groupmod -n newgroupname oldgroupnameTo delete a group, use the groupdel command:
groupdel financeVerify the deletion:
cat /etc/group | grep financeEditing Configuration Files Directly
While commands like usermod and groupmod are preferred for safety, direct editing of configuration files is possible for experienced users. The primary files to be aware of are:
/etc/passwd: Stores user account information./etc/shadow: Stores encrypted user passwords./etc/group: Stores group information./etc/gshadow: Stores secure group information.
To ensure consistency, always use the vipw command for editing user information and vigr for group information. These commands lock the files, preventing concurrent modifications.
For example, to safely edit the /etc/passwd file:
vipwAnd for the /etc/group file:
vigrAfter making changes, you may also need to edit the shadow files to ensure consistency:
vipw -s
vigr -s
Conclusion
Understanding how to create groups in Linux is fundamental for system administration. Groups help in organizing users and managing permissions efficiently. Understanding how to add, modify, and delete users and groups, as well as ensuring consistency in configuration files, is essential for maintaining a secure and well-organized system. Practice these commands, and you’ll become proficient in handling user groups on any Linux system.
For those preparing for the Red Hat Certified System Administrator (RHCSA) exam, mastering these concepts is crucial. Stay tuned for more tutorials, and don’t forget to subscribe, like, and share!
Happy learning!
Feel free to leave your comments or questions below. If you’re preparing for certification exams, check out the practice questions linked in the description. Your feedback and engagement help us create more valuable content.
We believe that by the end of this tutorial, you now know how to create groups in linux; on both RHEL and Ubuntu systems.
Leave a Reply