
Last updated: June 2025
In our previous session, we provisioned a production-grade Kubernetes cluster using Terraform and Ansible.
Now, we are transitioning into GitOps, an operational model for Kubernetes using Git as the single source of truth. We will look at how to install AArgo CD on Kubernetes Cluster
In this lesson, we’ll explore:
- What GitOps is
- What Argo CD is and how it fits into GitOps
- How to deploy Argo CD using:
- Manual manifests
- Helm
- Ansible (to automate Helm)
What is GitOps?
GitOps is a way of managing Kubernetes and application configurations using Git. It’s built around continuous delivery, version control, and declarative infrastructure.
GitOps Principles:
- Git is the source of truth for the desired state.
- Pull-based deployments (your cluster syncs from Git).
- Declarative configurations are used.
- Auditable: Every change is tracked in Git.
- Automated reconciliation ensures your cluster matches what’s in Git.
What is Argo CD?
Argo CD is a GitOps continuous delivery tool for Kubernetes or any container orchestrator tool such as OpenShift, Vmware Tanzu, Rancher, etc
Key Features:
- Syncs Kubernetes manifests from Git repos into your cluster.
- Supports Helm, Kustomize, Jsonnet, plain YAML, etc.
- Provides a UI and CLI to manage apps.
- Tracks drift between the Git source and live cluster.
- Ensures your cluster is self-healing (auto-corrects when drift is detected).
Three (3) Ways to Install ArgoCD
We’ll install Argo CD using three methods — each more automated than the last:
1. Manual Installation (kubectl apply)
2. Installation Using Helm
3. Installation Using Ansible (with Helm automation)
Before installing Argo CD, let’s install the Argo CD CLI tool, as it is required to run argocd commands on your local system or server
Step By Step Guide Of How To Install Argo CLI Tool
1. Download the latest Argo CD CLI binary
ansu@mastern-01:~$ curl -sSL -o argocd https://github.com/argoproj/argo-cd/releases/latest/download/argocd-linux-amd642. Make it executable
ansu@mastern-01:~$ chmod +x argocd3. Move it to a directory in your PATH
ansu@mastern-01:~$ sudo mv argocd /usr/local/bin/4. verify the argocd version
ansu@mastern-01:~$ argocd version

argocd: v3.0.6+db93798
  BuildDate: 2025-06-09T22:03:15Z
  GitCommit: db93798d6643a565c056c6fda453e696719dbe12
  GitTreeState: clean
  GoVersion: go1.24.4
  Compiler: gc
  Platform: linux/amd64
{"level":"fatal","msg":"Argo CD server address unspecified","time":"2025-06-23T16:45:36Z"}
OR
1. Download the file on a system outside of the server and move the file to the server
ansu@mastern-01:~$ ls

argocd-linux-amd64
2. Rename the file
ansu@mastern-01:~$ mv argocd-linux-amd64 argocd3. Make the file executable
chmod +x argocd4. Move the file to /usr/local/bin/ for installation
ansu@mastern-01:~$ sudo mv argocd /usr/local/bin/5. Verify argocd version
ansu@mastern-01:~$ argocd version

argocd: v3.0.6+db93798
  BuildDate: 2025-06-09T22:03:15Z
  GitCommit: db93798d6643a565c056c6fda453e696719dbe12
  GitTreeState: clean
  GoVersion: go1.24.4
  Compiler: gc
  Platform: linux/amd64
{"level":"fatal","msg":"Argo CD server address unspecified","time":"2025-06-23T16:45:36Z"}
Having installed the Argo CD cli tool, lets now install Argo CD on Kubernetes cluster in three different ways
Step By Step Guide of How To Install Argo CD on Kubernetes Cluster (Manually)
1. Create the argocd namespace
ansu@mastern-01:~$ kubectl create namespace argocd

namespace/argocd created
2. Install argocd
ansu@mastern-01:~/kubernetes$ kubectl apply -n argocd -f https://raw.githubusercontent.com/argoproj/argo-cd/stable/manifests/install.yaml

---------------------------
customresourcedefinition.apiextensions.k8s.io/applications.argoproj.io unchanged
customresourcedefinition.apiextensions.k8s.io/applicationsets.argoproj.io unchanged
customresourcedefinition.apiextensions.k8s.io/appprojects.argoproj.io created
serviceaccount/argocd-application-controller created
serviceaccount/argocd-applicationset-controller created
serviceaccount/argocd-dex-server created
serviceaccount/argocd-notifications-controller created
serviceaccount/argocd-redis created
serviceaccount/argocd-repo-server created
serviceaccount/argocd-server created
role.rbac.authorization.k8s.io/argocd-application-controller created
role.rbac.authorization.k8s.io/argocd-applicationset-controller created
role.rbac.authorization.k8s.io/argocd-dex-server created
role.rbac.authorization.k8s.io/argocd-notifications-controller created
role.rbac.authorization.k8s.io/argocd-redis created
role.rbac.authorization.k8s.io/argocd-server created
clusterrole.rbac.authorization.k8s.io/argocd-application-controller created
clusterrole.rbac.authorization.k8s.io/argocd-applicationset-controller created
clusterrole.rbac.authorization.k8s.io/argocd-server created
rolebinding.rbac.authorization.k8s.io/argocd-application-controller created
rolebinding.rbac.authorization.k8s.io/argocd-applicationset-controller created
rolebinding.rbac.authorization.k8s.io/argocd-dex-server created
rolebinding.rbac.authorization.k8s.io/argocd-notifications-controller created
rolebinding.rbac.authorization.k8s.io/argocd-redis created
rolebinding.rbac.authorization.k8s.io/argocd-server created
clusterrolebinding.rbac.authorization.k8s.io/argocd-application-controller created
clusterrolebinding.rbac.authorization.k8s.io/argocd-applicationset-controller created
clusterrolebinding.rbac.authorization.k8s.io/argocd-server created
configmap/argocd-cm created
configmap/argocd-cmd-params-cm created
configmap/argocd-gpg-keys-cm created
configmap/argocd-notifications-cm created
configmap/argocd-rbac-cm created
configmap/argocd-ssh-known-hosts-cm created
configmap/argocd-tls-certs-cm created
secret/argocd-notifications-secret created
secret/argocd-secret created
service/argocd-applicationset-controller created
service/argocd-dex-server created
service/argocd-metrics created
service/argocd-notifications-controller-metrics created
service/argocd-redis created
service/argocd-repo-server created
service/argocd-server created
service/argocd-server-metrics created
deployment.apps/argocd-applicationset-controller created
deployment.apps/argocd-dex-server created
deployment.apps/argocd-notifications-controller created
deployment.apps/argocd-redis created
deployment.apps/argocd-repo-server created
deployment.apps/argocd-server created
statefulset.apps/argocd-application-controller created
networkpolicy.networking.k8s.io/argocd-application-controller-network-policy created
networkpolicy.networking.k8s.io/argocd-applicationset-controller-network-policy created
networkpolicy.networking.k8s.io/argocd-dex-server-network-policy created
networkpolicy.networking.k8s.io/argocd-notifications-controller-network-policy created
networkpolicy.networking.k8s.io/argocd-redis-network-policy created
networkpolicy.networking.k8s.io/argocd-repo-server-network-policy created
networkpolicy.networking.k8s.io/argocd-server-network-policy created
3. Watch the pods
ansu@mastern-01:~/kubernetes$ kubectl get pods -n argocd -w


NAME                                                READY   STATUS                       RESTARTS      AGE
argocd-application-controller-0                     0/1     CreateContainerConfigError   0             44s
argocd-applicationset-controller-77cb676b6c-p7k2v   1/1     Running                      0             44s
argocd-dex-server-69d76976fd-7dhms                  0/1     Init:0/1                     0             44s
argocd-notifications-controller-7776574f76-sttsw    1/1     Running                      0             44s
argocd-redis-6dd5986579-qp87j                       0/1     Init:0/1                     1 (13s ago)   44s
argocd-repo-server-575bbf7949-2tlqz                 0/1     CreateContainerConfigError   0             44s
argocd-server-6769964c47-dnvzd                      0/1     CreateContainerConfigError   0             44s
4. Verify all the resources in the argocd namespace
ansu@mastern-01:~/kubernetes$ kubectl get all -n argocd


NAME                                                    READY   STATUS             RESTARTS      AGE
pod/argocd-application-controller-0                     1/1     Running            0             4m24s
pod/argocd-applicationset-controller-77cb676b6c-4jgpp   1/1     Running            0             4m24s
pod/argocd-dex-server-69d76976fd-4zsrh                  0/1     CrashLoopBackOff   5 (53s ago)   4m24s
pod/argocd-notifications-controller-7776574f76-4bt95    1/1     Running            0             4m24s
pod/argocd-redis-6dd5986579-4dptr                       1/1     Running            0             4m24s
pod/argocd-repo-server-575bbf7949-wmplw                 1/1     Running            0             4m24s
pod/argocd-server-6769964c47-jfshc                      0/1     Running            2 (83s ago)   4m24s

NAME                                              TYPE        CLUSTER-IP       EXTERNAL-IP   PORT(S)                      AGE
service/argocd-applicationset-controller          ClusterIP   10.109.21.28     <none>        7000/TCP,8080/TCP            4m24s
service/argocd-dex-server                         ClusterIP   10.109.133.11    <none>        5556/TCP,5557/TCP,5558/TCP   4m24s
service/argocd-metrics                            ClusterIP   10.98.246.45     <none>        8082/TCP                     4m24s
service/argocd-notifications-controller-metrics   ClusterIP   10.96.87.107     <none>        9001/TCP                     4m24s
service/argocd-redis                              ClusterIP   10.110.186.122   <none>        6379/TCP                     4m24s
service/argocd-repo-server                        ClusterIP   10.109.49.125    <none>        8081/TCP,8084/TCP            4m24s
service/argocd-server                             ClusterIP   10.100.205.22    <none>        80/TCP,443/TCP               4m24s
service/argocd-server-metrics                     ClusterIP   10.96.208.32     <none>        8083/TCP                     4m24s

NAME                                               READY   UP-TO-DATE   AVAILABLE   AGE
deployment.apps/argocd-applicationset-controller   1/1     1            1           4m24s
deployment.apps/argocd-dex-server                  0/1     1            0           4m24s
deployment.apps/argocd-notifications-controller    1/1     1            1           4m24s
deployment.apps/argocd-redis                       1/1     1            1           4m24s
deployment.apps/argocd-repo-server                 1/1     1            1           4m24s
deployment.apps/argocd-server                      0/1     1            0           4m24s

NAME                                                          DESIRED   CURRENT   READY   AGE
replicaset.apps/argocd-applicationset-controller-77cb676b6c   1         1         1       4m24s
replicaset.apps/argocd-dex-server-69d76976fd                  1         1         0       4m24s
replicaset.apps/argocd-notifications-controller-7776574f76    1         1         1       4m24s
replicaset.apps/argocd-redis-6dd5986579                       1         1         1       4m24s
replicaset.apps/argocd-repo-server-575bbf7949                 1         1         1       4m24s
replicaset.apps/argocd-server-6769964c47                      1         1         0       4m24s

NAME                                             READY   AGE
statefulset.apps/argocd-application-controller   1/1     4m24s
5. confirm that the argocd server pod is running – we need to edit the corresponding service.
ansu@mastern-01:~/kubernetes$ kubectl get pods -n argocd

NAME                                                READY   STATUS             RESTARTS        AGE
argocd-application-controller-0                     1/1     Running            0               13m
argocd-applicationset-controller-77cb676b6c-4jgpp   1/1     Running            0               13m
argocd-dex-server-69d76976fd-4zsrh                  0/1     CrashLoopBackOff   7 (2m22s ago)   13m
argocd-notifications-controller-7776574f76-4bt95    1/1     Running            0               13m
argocd-redis-6dd5986579-4dptr                       1/1     Running            0               13m
argocd-repo-server-575bbf7949-wmplw                 1/1     Running            0               13m
argocd-server-6769964c47-jfshc                      0/1     Running            7 (3m27s ago)   13m
6. Verify that the argocd-server service is running.
ansu@mastern-01:~/kubernetes$ kubectl get svc -n argocd


NAME                                      TYPE        CLUSTER-IP       EXTERNAL-IP   PORT(S)                      AGE
argocd-applicationset-controller          ClusterIP   10.109.21.28     <none>        7000/TCP,8080/TCP            8m1s
argocd-dex-server                         ClusterIP   10.109.133.11    <none>        5556/TCP,5557/TCP,5558/TCP   8m1s
argocd-metrics                            ClusterIP   10.98.246.45     <none>        8082/TCP                     8m1s
argocd-notifications-controller-metrics   ClusterIP   10.96.87.107     <none>        9001/TCP                     8m1s
argocd-redis                              ClusterIP   10.110.186.122   <none>        6379/TCP                     8m1s
argocd-repo-server                        ClusterIP   10.109.49.125    <none>        8081/TCP,8084/TCP            8m1s
argocd-server                             ClusterIP   10.100.205.22    <none>        80/TCP,443/TCP               8m1s
argocd-server-metrics                     ClusterIP   10.96.208.32     <none>        8083/TCP                     8m1s
7. Edit the argocd-server service and change the “clusterIP” paramater to “NodePort” as shown in the screenshot below so that we are able to access argocd via a node IP address.
ansu@mastern-01:~/kubernetes$ kubectl edit svc argocd-server -n argocd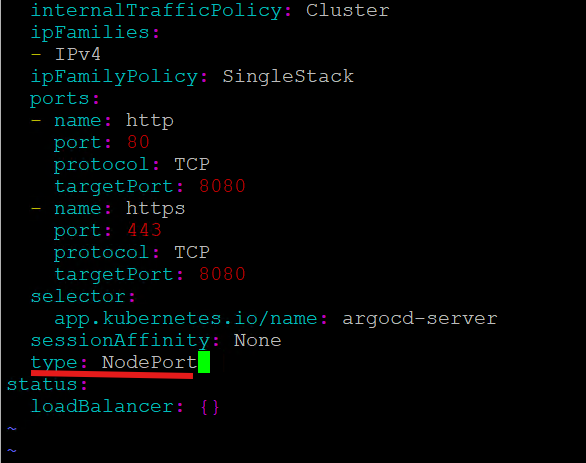
8. Verify that a port to use to access argocd via http is now available
ansu@mastern-01:~/kubernetes$ kubectl get svc -n argocd
NAME TYPE CLUSTER-IP EXTERNAL-IP PORT(S) AGE
argocd-applicationset-controller ClusterIP 10.109.21.28 <none> 7000/TCP,8080/TCP 16m
argocd-dex-server ClusterIP 10.109.133.11 <none> 5556/TCP,5557/TCP,5558/TCP 16m
argocd-metrics ClusterIP 10.98.246.45 <none> 8082/TCP 16m
argocd-notifications-controller-metrics ClusterIP 10.96.87.107 <none> 9001/TCP 16m
argocd-redis ClusterIP 10.110.186.122 <none> 6379/TCP 16m
argocd-repo-server ClusterIP 10.109.49.125 <none> 8081/TCP,8084/TCP 16m
argocd-server NodePort 10.100.205.22 <none> 80:32124/TCP,443:30125/TCP 16m
argocd-server-metrics ClusterIP 10.96.208.32 <none> 8083/TCP 16m
Now we have port 32124.
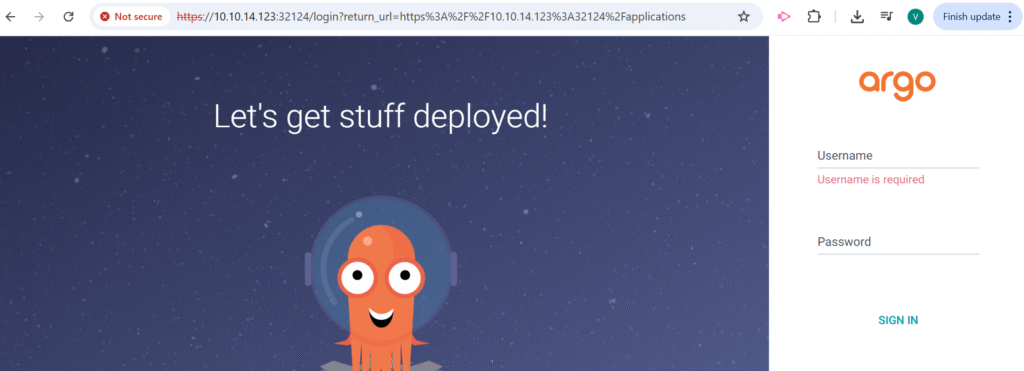
9. Launch the GUI from any of your Kubernetes nodes. It may take time for the URL to come up because the initialization may still be happening after the service was updated (Allow the port on the firewall on any of your Kubernetes node if the GUI refuses to launch)
10. When argocd is deployed by this method, by default, an administrator with the username, “admin” will be created. Use the command below to get the initial password for the username, admin
If you haven’t installed argocd cli, the command below may not work. Hence, you have to install argocd cli as done above, before the start of this step by step guide
ansu@mastern-01:~$ argocd admin initial-password -n argocd

NCUbz5DBrWUREL5r
This password must be only used for first time login. We strongly recommend you update the password using `argocd account update-password`.
11. login to argocd using admin as the username and the password that was generate
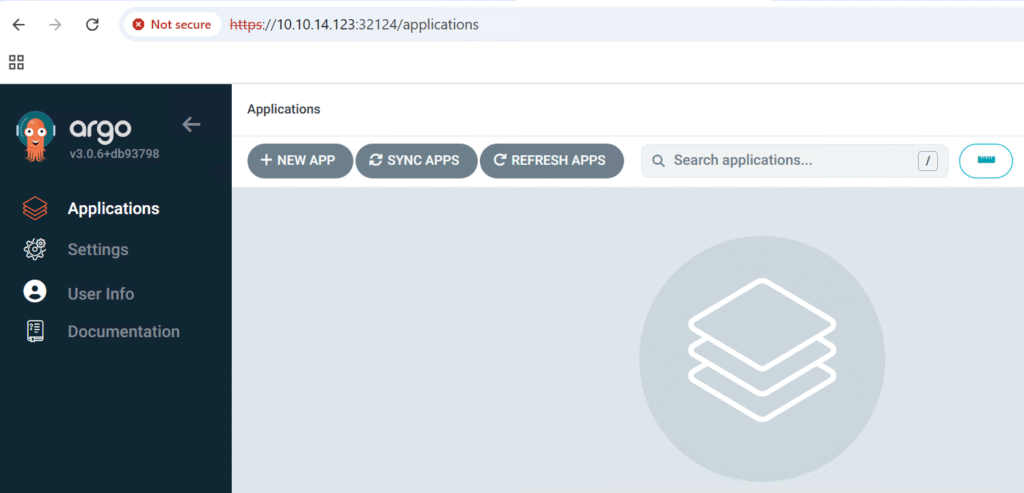
NB: You can change the admin password from the UI
Let’s look at the second way of installing Argo CD on Kubernetes Cluster
Step By Step Guide of How To Install Argo CD on Kubernetes Cluster (Using Helm Chart)
1. Download and install helm
ansu@mastern-01:~$ # 1. Download the Helm install script
curl https://raw.githubusercontent.com/helm/helm/main/scripts/get-helm-3 | bash

  % Total    % Received % Xferd  Average Speed   Time    Time     Time  Current
                                 Dload  Upload   Total   Spent    Left  Speed
100 11913  100 11913    0     0  12309      0 --:--:-- --:--:-- --:--:-- 12306
Downloading https://get.helm.sh/helm-v3.18.3-linux-amd64.tar.gz
Verifying checksum... Done.
Preparing to install helm into /usr/local/bin
helm installed into /usr/local/bin/helm
2. Verify helm version
ansu@mastern-01:~$ helm version

version.BuildInfo{Version:"v3.18.3", GitCommit:"6838ebcf265a3842d1433956e8a622e3290cf324", GitTreeState:"clean", GoVersion:"go1.24.4"}
3. Add argo helm repo
ansu@mastern-01:~$ helm repo add argo https://argoproj.github.io/argo-helm

"argo" has been added to your repositories
4. Verify that the repo is added
ansu@mastern-01:~$ helm repo list

NAME    URL
argo    https://argoproj.github.io/argo-helm
5. Always update the helm repo when its installed: its recommended
ansu@mastern-01:~$ helm repo update

Hang tight while we grab the latest from your chart repositories...
...Successfully got an update from the "argo" chart repository
Update Complete. ⎈Happy Helming!⎈
6. Create the namespace the argocd will be installed which is argocd by default
ansu@mastern-01:~$ kubectl create namespace argocd

namespace/argocd created
7. Create a Custom values.yaml – because we want to change some default settings of argocd
ansu@mastern-01:~$ vi argocd-values.yaml

configs:
  params:
    admin.enabled: "true"

server:
  service:
    type: NodePort
    nodePortHttp: 30080
    nodePortHttps: 30443
    ports:
      http: 80
      https: 443
This config tells the Helm chart to enable the default admin user in Argo CD. If you don’t set admin.enabled: true, Argo CD may disable the admin account by default for security, especially in newer versions. This ensures Admin user login is enabled, and Argo CD UI is accessible at <node-ip>:30080
8. Install ArgoCD using helm command – argo CD helm version of 8.11 deploys argocd of version 3.0.6
ansu@mastern-01:~/kubernetes$ helm install argocd argo/argo-cd -n argocd -f argocd-values.yaml --version 8.1.1

NAME: argocd
LAST DEPLOYED: Mon Jun 23 17:12:01 2025
NAMESPACE: argocd
STATUS: deployed
REVISION: 1
TEST SUITE: None
NOTES:
In order to access the server UI you have the following options:

1. kubectl port-forward service/argocd-server -n argocd 8080:443

    and then open the browser on http://localhost:8080 and accept the certificate

2. enable ingress in the values file `server.ingress.enabled` and either
      - Add the annotation for ssl passthrough: https://argo-cd.readthedocs.io/en/stable/operator-manual/ingress/#option-1-ssl-passthrough
      - Set the `configs.params."server.insecure"` in the values file and terminate SSL at your ingress: https://argo-cd.readthedocs.io/en/stable/operator-manual/ingress/#option-2-multiple-ingress-objects-and-hosts


After reaching the UI the first time you can login with username: admin and the random password generated during the installation. You can find the password by running:

kubectl -n argocd get secret argocd-initial-admin-secret -o jsonpath="{.data.password}" | base64 -d

(You should delete the initial secret afterwards as suggested by the Getting Started Guide: https://argo-cd.readthedocs.io/en/stable/getting_started/#4-login-using-the-cli)
9. Watch the pods/installation being done
ansu@mastern-01:~/kubernetes$ kubectl get pods -n argocd -w
NAME                                               READY   STATUS            RESTARTS   AGE
argocd-application-controller-0                    1/1     Running           0          31s
argocd-applicationset-controller-bdd44f68b-55fl7   1/1     Running           0          31s
argocd-dex-server-548b676dd-psr5m                  0/1     PodInitializing   0          31s
argocd-notifications-controller-7fdbb659cf-pzkwm   1/1     Running           0          31s
argocd-redis-59f7c9587-lc924                       1/1     Running           0          31s
argocd-redis-secret-init-qhxf9                     0/1     Completed         0          36s
argocd-repo-server-579c4b7784-jcs2q                1/1     Running           0          31s
argocd-server-54969cc769-hv6g6                     1/1     Running           0          31s
argocd-dex-server-548b676dd-psr5m                  1/1     Running           0          34s
argocd-redis-secret-init-qhxf9                     0/1     Terminating       0          64s
argocd-redis-secret-init-qhxf9                     0/1     Terminating       0          64s
ansu@mastern-01:~/kubernetes$ kubectl get pods -n argocd -w
NAME READY STATUS RESTARTS AGE
argocd-application-controller-0 1/1 Running 0 3m24s
argocd-applicationset-controller-bdd44f68b-55fl7 1/1 Running 0 3m24s
argocd-dex-server-548b676dd-psr5m 1/1 Running 0 3m24s
argocd-notifications-controller-7fdbb659cf-pzkwm 1/1 Running 0 3m24s
argocd-redis-59f7c9587-lc924 1/1 Running 0 3m24s
argocd-repo-server-579c4b7784-jcs2q 1/1 Running 0 3m24s
argocd-server-54969cc769-hv6g6 1/1 Running 0 3m24s
10. Verify all the resources in argocd namespace.
ansu@mastern-01:~/kubernetes$ kubectl get all -n argocd

NAME                                                   READY   STATUS    RESTARTS   AGE
pod/argocd-application-controller-0                    1/1     Running   0          5m14s
pod/argocd-applicationset-controller-bdd44f68b-55fl7   1/1     Running   0          5m14s
pod/argocd-dex-server-548b676dd-psr5m                  1/1     Running   0          5m14s
pod/argocd-notifications-controller-7fdbb659cf-pzkwm   1/1     Running   0          5m14s
pod/argocd-redis-59f7c9587-lc924                       1/1     Running   0          5m14s
pod/argocd-repo-server-579c4b7784-jcs2q                1/1     Running   0          5m14s
pod/argocd-server-54969cc769-hv6g6                     1/1     Running   0          5m14s

NAME                                       TYPE        CLUSTER-IP       EXTERNAL-IP   PORT(S)                      AGE
service/argocd-applicationset-controller   ClusterIP   10.106.28.204    <none>        7000/TCP                     5m15s
service/argocd-dex-server                  ClusterIP   10.99.66.240     <none>        5556/TCP,5557/TCP            5m15s
service/argocd-redis                       ClusterIP   10.109.82.126    <none>        6379/TCP                     5m15s
service/argocd-repo-server                 ClusterIP   10.109.100.179   <none>        8081/TCP                     5m15s
service/argocd-server                      NodePort    10.103.207.138   <none>        80:30080/TCP,443:30443/TCP   5m14s

NAME                                               READY   UP-TO-DATE   AVAILABLE   AGE
deployment.apps/argocd-applicationset-controller   1/1     1            1           5m14s
deployment.apps/argocd-dex-server                  1/1     1            1           5m14s
deployment.apps/argocd-notifications-controller    1/1     1            1           5m14s
deployment.apps/argocd-redis                       1/1     1            1           5m14s
deployment.apps/argocd-repo-server                 1/1     1            1           5m14s
deployment.apps/argocd-server                      1/1     1            1           5m14s

NAME                                                         DESIRED   CURRENT   READY   AGE
replicaset.apps/argocd-applicationset-controller-bdd44f68b   1         1         1       5m14s
replicaset.apps/argocd-dex-server-548b676dd                  1         1         1       5m14s
replicaset.apps/argocd-notifications-controller-7fdbb659cf   1         1         1       5m14s
replicaset.apps/argocd-redis-59f7c9587                       1         1         1       5m14s
replicaset.apps/argocd-repo-server-579c4b7784                1         1         1       5m14s
replicaset.apps/argocd-server-54969cc769                     1         1         1       5m14s

NAME                                             READY   AGE
statefulset.apps/argocd-application-controller   1/1     5m14s
11. Use the command below to get the initial password for the username, admin
If you haven’t installed argocd cli, the command below may not work. Hence, you have to install argocd cli as done above, before the start of this step by step guide
ansu@mastern-01:~/kubernetes$ argocd admin initial-password -n argocd

p7z4Q9yNh9vJZPNu

This password must be only used for first time login. We strongly recommend you update the password using `argocd account update-password`.
12. Launch the GUI from any of your Kubernetes nodes.
(Allow the port on the firewall on any of your Kubernetes node if the GUI refuses to launch)
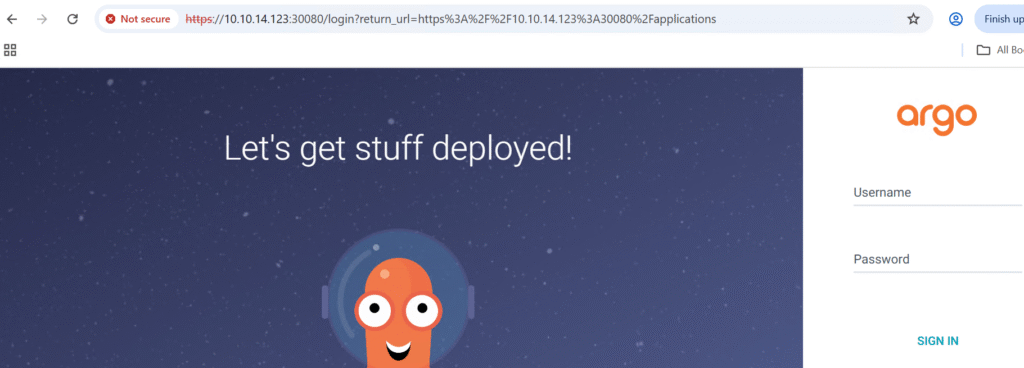
12. login to argocd using admin as the username and the password that was generate
NB: You can change the admin password from the UI
Having looked at the second way of deploying Argo CD on Kubernetes cluster, let’s look at the third way.
Step By Step Guide of How To Install Argo CD Using Ansible (With Helm chart)
1 On your Ansible node, ensure that the Kubernetes admin.conf configuration file is present by logging in to the master node and copying the admin.conf file to the ansible node.
ansu@mastern-01:~$ sudo scp /etc/kubernetes/admin.conf ansu@10.10.34.33:/home/ansu/.kube/config
2. On your Ansible node, verify that you can access the Kubernetes cluster. Ensure the kubectl client is installed on the Ansible node just like we did in method 1 or 2 above
ansu@101-Ansible-01:~$ kubectl get nodes

NAME         STATUS   ROLES           AGE     VERSION
mastern-01   Ready    control-plane   5d18h   v1.29.15
mastern-02   Ready    control-plane   5d18h   v1.29.15
workern-01   Ready    <none>          5d18h   v1.29.15
workern-02   Ready    <none>          5d18h   v1.29.15
3. Ensure that your Ansible inventory file includes localhost, so that Ansible can communicate with the local Kubernetes cluster from the Ansible control node.
(This is the last entry in the inventory file as shown below.)
ansu@101-Ansible-01:~$ cat ansible/linux-inventory

[prod_k8s_master]
mastern-01     ansible_host=10.10.14.120
mastern-02     ansible_host=10.10.14.121

[prod_k8s_worker]
workern-01     ansible_host=10.10.14.122
workern-02     ansible_host=10.10.14.123

[prod_k8s_lb]
haproxylb-01  ansible_host=10.10.14.145

[localhost_k8s]
localhost ansible_connection=local #gather facts for other kubernetes node during join command

[local_ans_dep_to_k8s]
localhost                  #For local ansible control node to Kubernetes API deployment
4. Confirm your ansible configuration file – This depends on how you setup Ansible though.
(ansible-k8s) ansu@101-Ansible-01:~$ cat ansible/ansible.cfg

[defaults]
inventory=~/ansible/linux-inventory
ask_pass=false
remote_user=ansu
collection_paths = /home/ansu/.ansible/collections:/usr/share/ansible/collections

[privilege_escalation]
become=true
become_method=sudo
become_user=root
become_ask_pass=false
5. Depending on how Ansible is setup in your environment, you may need to install the following requirements on your Ansible node “community.kubernetes” and ” openshift pyyaml”. The community.kubernetes collection contains the helm module
ansu@101-Ansible-01:~/ansible$ ansible-galaxy collection install community.kubernetes
ansu@101-Ansible-01:~/ansible$ pip install kubernetes openshift pyyaml

error: externally-managed-environment

× This environment is externally managed
╰─> To install Python packages system-wide, try apt install
    python3-xyz, where xyz is the package you are trying to
    install.

    If you wish to install a non-Debian-packaged Python package,
    create a virtual environment using python3 -m venv path/to/venv.
    Then use path/to/venv/bin/python and path/to/venv/bin/pip. Make
    sure you have python3-full installed.

    If you wish to install a non-Debian packaged Python application,
    it may be easiest to use pipx install xyz, which will manage a
    virtual environment for you. Make sure you have pipx installed.

    See /usr/share/doc/python3.12/README.venv for more information.

note: If you believe this is a mistake, please contact your Python installation or OS distribution provider. You can override this, at the risk of breaking your Python installation or OS, by passing --break-system-packages.
hint: See PEP 668 for the detailed specification.
If you encounter the error above, you’re running into the PEP 668 “externally-managed environment” restriction, which is common on Debian/Ubuntu systems where pip is not allowed to install packages system-wide (to avoid breaking OS-managed Python packages).
Recommended Fix: Use a Virtual Environment
This is the safest and cleanest approach, and it will work without needing --break-system-packages.
Step-by-Step to Set Up Virtual Environment for Ansible
a. Install the virtual environment package if not installed:
ansu@101-Ansible-01:~/ansible$ sudo apt install python3-venv

Reading package lists... Done
Building dependency tree... Done
Reading state information... Done
The following additional packages will be installed:
  python3-pip-whl python3-setuptools-whl python3.12-venv
b. Create a virtual environment:
ansu@101-Ansible-01:~/ansible$ python3 -m venv ~/venvs/ansible-k8sc. Activate the virtual environment:
ansu@101-Ansible-01:~/ansible$ source ~/venvs/ansible-k8s/bin/activate
(ansible-k8s) ansu@101-Ansible-01:~/ansible$
You’ll know it worked if your shell prompt changes to:
(ansible-k8s) ansu@101-Ansible-01:~$d. Now install the Python packages safely:
(ansible-k8s) ansu@101-Ansible-01:~/ansible$ pip install kubernetes openshift pyyaml

.......
Collecting kubernetes
  Downloading kubernetes-33.1.0-py2.py3-none-any.whl.metadata (1.7 kB)
Collecting openshift
  Downloading openshift-0.13.2-py3-none-any.whl.metadata (964 bytes)
..................
(ansible-k8s) ansu@101-Ansible-01:~/ansible$
What Really Happens When You Use a Python Virtual Environment
A virtual environment is just an isolated directory with:
- Its own Python interpreter
- Its own
pipand installed packages - Zero interference with system packages (like
/usr/lib/python3)
Instead of installing to:
/usr/lib/python3.10/site-packages ← system-wide (protected by OS)
It installs to:
~/venvs/ansible-k8s/lib/python3.10/site-packages ← user space, isolated
So What Changes When You Use It?
| Without venv (system-wide) | With venv (virtualenv) |
|---|---|
| Python packages go to system | Packages go to user-local space |
| Might break OS tools if wrong version | Safe and isolated |
pip may be blocked (PEP 668) | pip works freely |
Needs sudo sometimes | No sudo needed |
| Same Python for all projects | You can have different environments for each project |
| Breaks Ansible if dependencies clash | Keeps your Ansible/K8s environment stable |
Why You Should Use It (In My Case)
Since you’re installing:
kubernetesopenshiftpyyaml
which are not typically part of Ubuntu’s system packages, using a virtual environment avoids all conflicts with system Python and lets Ansible work cleanly.
This is exactly what most DevOps engineers do, especially when:
- Working across different environments or clients
- Running playbooks for Kubernetes, Azure, AWS, GCP, etc.
- Needing specific versions of Python packages
Sometimes, even though you activated your virtual environment, Ansible may still use the system Python (/usr/bin/python3) instead of the one in your virtualenv. You can also override it directly when running the playbook and in your yaml manifest file itself which is what we are going to do
6. Verify that your jinja2 file is placed in the right path
(ansible-k8s) ansu@101-Ansible-01:~/ansible$ tree
.
├── ansible.cfg
├── linux-inventory
├── deploy-argocd
│   ├── argocd-install.yaml
│   └── templates
│       └── values.yaml.j2
7. Create argocd-install.yaml file
(ansible-k8s) ansu@101-Ansible-01:~/ansible$ vi deploy-argocd/argocd-install.yaml

---
- name: Install Argo CD on Kubernetes (NodePort, Helm-based)
  hosts: localhost
  gather_facts: false

  vars:
    ansible_python_interpreter: "{{ ansible_playbook_python }}"
    argo_namespace: argocd
    argo_helm_release: argocd
    argo_helm_repo_name: argo
    argo_helm_repo_url: https://argoproj.github.io/argo-helm
    argo_helm_chart_version: "8.1.1"
    kubeconfig_path: "/home/ansu/.kube/config"

  tasks:
    - name: Check if Argo Helm repo exists
      shell: helm repo list | grep -w "{{ argo_helm_repo_name }}"
      register: argo_helm_repo_check
      ignore_errors: true

    - name: Add Argo Helm repo if not present
      shell: helm repo add {{ argo_helm_repo_name }} {{ argo_helm_repo_url }}
      when: argo_helm_repo_check.rc != 0

    - name: Update Helm repos
      shell: helm repo update

    - name: Create Argo CD namespace
      kubernetes.core.k8s:
        api_version: v1
        kind: Namespace
        name: "{{ argo_namespace }}"
        state: present
        kubeconfig: "{{ kubeconfig_path }}"

    - name: Install Argo CD using Helm
      community.kubernetes.helm:
        name: "{{ argo_helm_release }}"
        chart_ref: "{{ argo_helm_repo_name }}/argo-cd"
        chart_version: "{{ argo_helm_chart_version }}"
        release_namespace: "{{ argo_namespace }}"
        create_namespace: false
        values: "{{ lookup('template', 'templates/values.yaml.j2') | from_yaml }}"
        wait: true
        timeout: "600s"
        kubeconfig: "{{ kubeconfig_path }}"

    - name: Wait for Argo CD pods to be ready
      kubernetes.core.k8s_info:
        kind: Pod
        namespace: "{{ argo_namespace }}"
        kubeconfig: "{{ kubeconfig_path }}"
      register: pod_status
      until: pod_status.resources | selectattr('status.phase', 'equalto', 'Running') | list | length >= 4
      retries: 10
      delay: 15

    - name: Get Argo CD admin password
      shell: |
        kubectl -n {{ argo_namespace }} get secret argocd-initial-admin-secret \
        -o jsonpath="{.data.password}" | base64 -d
      register: admin_password
      changed_when: false

    - name: Display Argo CD admin password
      debug:
        msg: " Argo CD admin password is: {{ admin_password.stdout }}"
8. create the templates/values.yaml.j2 file (jinja2 file)
(ansible-k8s) ansu@101-Ansible-01:~/ansible$ vi deploy-argocd/templates/values.yaml.j2

configs:
  params:
    admin.enabled: "true"

server:
  service:
    type: NodePort
    nodePortHttp: 30080
    nodePortHttps: 30443
    ports:
      http: 80
      https: 443
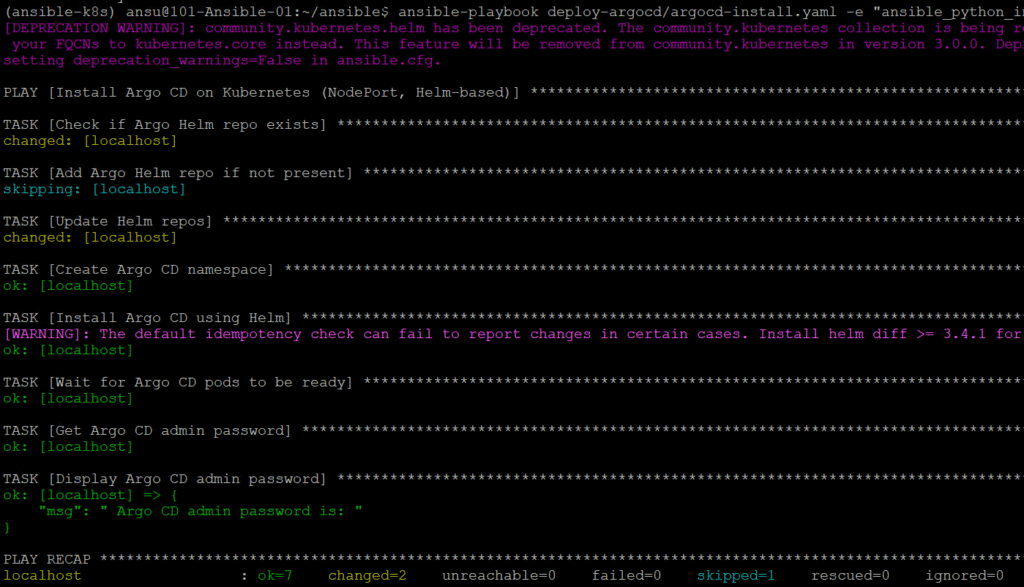
9. Run the playbook
(ansible-k8s) ansu@101-Ansible-01:~/ansible$ ansible-playbook deploy-argocd/argocd-install.yaml -e “ansible_python_interpreter=$(which python)”
——–
[DEPRECATION WARNING]: community.kubernetes.helm has been deprecated. The community.kubernetes collection is being renamed to kubernetes.core. Please update
your FQCNs to kubernetes.core instead. This feature will be removed from community.kubernetes in version 3.0.0. Deprecation warnings can be disabled by
setting deprecation_warnings=False in ansible.cfg.
PLAY [Install Argo CD on Kubernetes (NodePort, Helm-based)] *************************************************************************************************
TASK [Check if Argo Helm repo exists] ***********************************************************************************************************************
……………………………………….
10. Verify that the argocd pods are running
ansu@mastern-01:~$ kubectl get all -n argocd
NAME READY STATUS RESTARTS AGE
pod/argocd-application-controller-0 1/1 Running 0 126m
pod/argocd-applicationset-controller-bdd44f68b-rmwbx 1/1 Running 0 126m
pod/argocd-dex-server-548b676dd-pbd5v 1/1 Running 0 126m
pod/argocd-notifications-controller-7fdbb659cf-gpz8f 1/1 Running 0 126m
pod/argocd-redis-59f7c9587-qq8sd 1/1 Running 0 126m
pod/argocd-repo-server-579c4b7784-7kk8w 1/1 Running 0 126m
pod/argocd-server-54969cc769-bnzg7 1/1 Running 0 126m
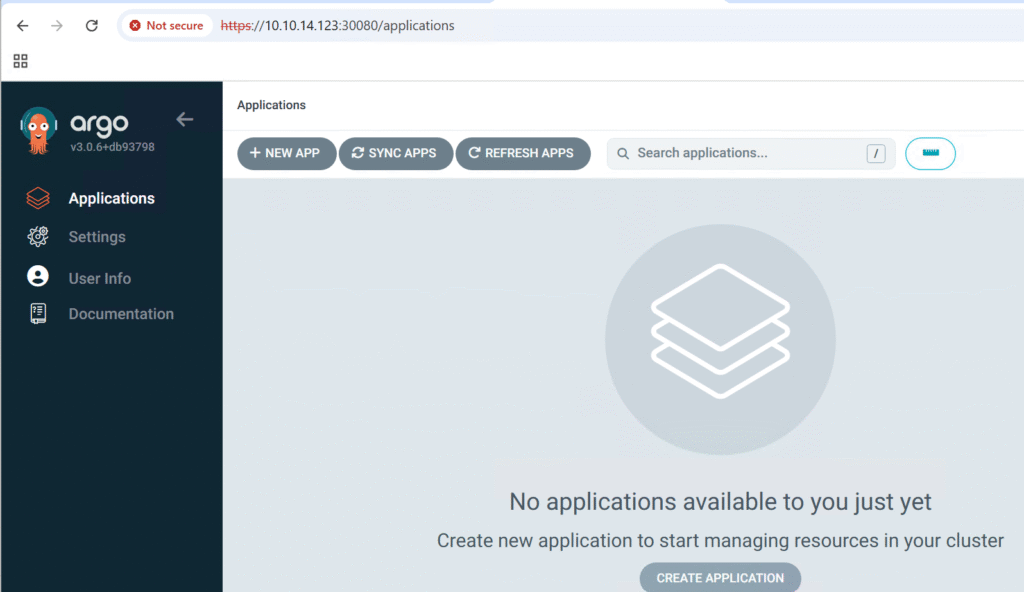
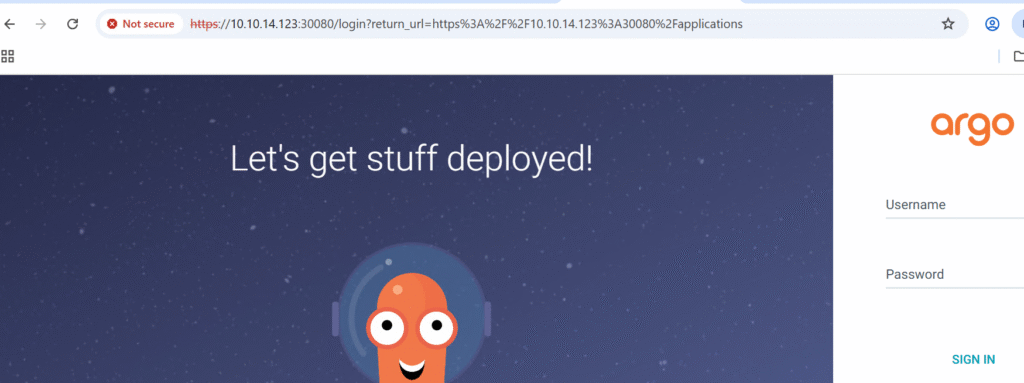
----------------------11. Access the Argo CD UI
12. Get the argocd admin Password
This can be done from any of the Kubernetes master node OR you can also install agocd cli on the ansible node and run the command from there also
ansu@mastern-01:~/kubernetes$ argocd admin initial-password -n argocd

p7z4Q9yNh9vJZPNu

This password must be only used for first time login. We strongly recommend you update the password using `argocd account update-password`
14. Login to argocd
Default username is admin, use the password generated.
NB: You can change the admin password from the UI
How To Uninstall argocd Using Helm
1. Use the helm uninstall command
ansu@mastern-01:~/kubernetes$ helm uninstall argocd -n argocd
These resources were kept due to the resource policy:
[CustomResourceDefinition] applications.argoproj.io
[CustomResourceDefinition] applicationsets.argoproj.io
[CustomResourceDefinition] appprojects.argoproj.io
2. To be sure all argocd components are removed, you may also want to run the command below
# 1. Delete Helm release (if it exists)
helm uninstall argocd -n argocd || true

# 2. Delete the entire namespace and wait for cleanup
kubectl delete ns argocd --wait --timeout=180s || true

# 3. Delete Argo CD CRDs
kubectl get crds | grep argoproj | awk '{print $1}' | xargs kubectl delete crd || true

# 4. Delete leftover cluster roles and bindings
kubectl delete clusterrole,clusterrolebinding -l app.kubernetes.io/part-of=argocd || tr

# 5. (Optional) Delete PVCs related to Argo CD if any are stuck
kubectl get pvc -A | grep argocd | awk '{print $1 " " $2}' | xargs -n2 bash -c 'kubectl delete pvc -n "$0" "$1"' || true
How To Uninstall ArgoCD manually
To uninstall argocd manually, use the commands below.
# 1. Delete Helm release (if it exists)
helm uninstall argocd -n argocd || true

# 2. Delete the entire namespace and wait for cleanup
kubectl delete ns argocd --wait --timeout=180s || true

# 3. Delete Argo CD CRDs
kubectl get crds | grep argoproj | awk '{print $1}' | xargs kubectl delete crd || true

# 4. Delete leftover cluster roles and bindings
kubectl delete clusterrole,clusterrolebinding -l app.kubernetes.io/part-of=argocd || tr

# 5. (Optional) Delete PVCs related to Argo CD if any are stuck
kubectl get pvc -A | grep argocd | awk '{print $1 " " $2}' | xargs -n2 bash -c 'kubectl delete pvc -n "$0" "$1"' || true
Hey Victor
Thank you for this piece. It was helpful. You are doing a great job
Thank you for your kind words. I am glad it was helpful