Last updated: November 2026
In this lesson, you will learn how to Create Persistent Volume & Claim in OpenShift, and mount it to a container In OpenShift
You will also have practical ex280 exam practice questions and answers to prepare you for the ex280 exam.
Understanding The Subject Matter
One of the important things to understand when deploying applications in Kubernetes or OpenShift is how to manage application data. Containers and Pods are designed to be replaceable. A Pod can be deleted, recreated, or scheduled on another node. If an application stores important data only inside its container’s writable filesystem, that data can disappear when the container is replaced.
This is particularly important for applications that need to retain information, such as databases, content management systems, file-processing applications, and other stateful workloads.
In this lesson, we will explore how persistent storage works in Kubernetes and OpenShift. We will also configure an NFS server and use it to provide shared storage to an OpenShift application through a PersistentVolume (PV) and a PersistentVolumeClaim (PVC).
By the end of the practical exercise, you will understand how to:
- Differentiate between temporary, local, and remote persistent storage.
- Understand PersistentVolumes and PersistentVolumeClaims.
- Configure an NFS server on Red Hat Enterprise Linux.
- Create a static PersistentVolume backed by NFS.
- Create a PersistentVolumeClaim to request storage.
- Mount the claimed storage inside an OpenShift workload.
- Verify that application data remains available after a Pod is deleted and recreated.
1. Understanding storage in OpenShift
Before creating storage resources, let’s understand why persistent storage is necessary.
In a traditional virtualized environment, enterprise applications commonly use external storage systems such as SAN, NAS, and NFS. These storage systems provide a separate location for application data rather than keeping all data on the local disk of the virtual machine.
A similar concept applies to Kubernetes and OpenShift.
Consider an application running in a Pod. If the application writes important data into the container’s writable filesystem, that data is associated with the lifecycle of that container. If the container is replaced, the data may not be available in the replacement container.
Kubernetes provides volumes to address different storage requirements. Some volumes are temporary, while others provide persistent access to storage outside the lifecycle of an individual Pod.
1.1 Local storage versus shared storage
Imagine an application deployed with three replicas across three different worker nodes.
- Pod A runs on Worker Node A.
- Pod B runs on Worker Node B.
- Pod C runs on Worker Node C.
If each Pod writes its data to a separate local directory on its respective node, the data is not automatically shared between the three locations.
For example, if Pod A writes a file to the local disk of Worker Node A, Pod B does not automatically see that file on Worker Node B.
This can become a problem when an application requires multiple instances to access the same files or when a workload is rescheduled onto another node.
A shared storage system provides a common storage location that can be accessed by multiple Pods or nodes, subject to the capabilities and access permissions of the storage system.
For example:
Pod A → NFS Server/Shared/remote Storage
Pod B → NFS Server/Shared/remote Storage
Pod C → NFS Server/Shared/remote Storage
Instead of each Pod maintaining a separate copy of the data on its own node, all three Pods can access the same exported NFS directory.
If Pod A is deleted and recreated on another worker node, the replacement Pod can mount the same persistent storage, provided the new node can reach the NFS server and the volume is configured to support that access.
1.2 Is remote storage always better than local storage?
Not necessarily. The storage option should depend on the application and its requirements.
Local storage can be suitable for workloads that need fast node-local access, temporary data, caching, or storage that is intentionally tied to a particular node.
Shared or remote storage is useful when data must remain independent of an individual Pod or node, or when multiple workloads need access to a common filesystem.
However, shared storage does not automatically make an application highly available. The storage system itself must be designed for availability, performance, backup, and recovery.
There is also an important consideration for databases. Although NFS can allow multiple clients to read and write to a shared filesystem, this does not mean that multiple database instances can safely write to the same database files. Database applications must use storage and replication architectures that are supported by the database vendor.
The key point is that persistent storage separates the lifecycle of application data from the lifecycle of a Pod.
2. Understanding PersistentVolumes and PersistentVolumeClaims
Kubernetes and OpenShift use two important resources to manage persistent storage:
- PersistentVolume (PV)
- PersistentVolumeClaim (PVC)
Although they work together, they serve different purposes.
2.1 What is a PersistentVolume?
A PersistentVolume is a storage resource made available to a Kubernetes or OpenShift cluster.
It represents storage that has been provisioned and configured for use by workloads. The underlying storage can be provided by different technologies, including NFS, SAN-backed storage, cloud storage services, and storage systems accessed through Container Storage Interface (CSI) drivers.
A PV is a cluster-scoped resource. This means it is not created inside a particular project or namespace.
A PV describes information such as:
- Storage capacity.
- Supported access modes.
- Storage class.
- Reclaim policy.
- The underlying storage system.
For example, an administrator can create a PersistentVolume that represents a 13 GiB NFS export.
2.2 What is a PersistentVolumeClaim?
A PersistentVolumeClaim is a request for persistent storage made by a user or application.
Instead of directly configuring the underlying storage system inside an application deployment, the workload references a PVC.
A PVC specifies requirements such as:
- Requested storage capacity.
- Required access mode.
- Storage class, where applicable.
The Kubernetes control plane attempts to match the PVC with a suitable PersistentVolume.
For example, an application can request 10 GiB of storage with ReadWriteMany access. If an available PV satisfies the claim’s requirements, Kubernetes binds the PVC to that PV.
A PVC is namespaced. This means it belongs to the project or namespace in which it is created.
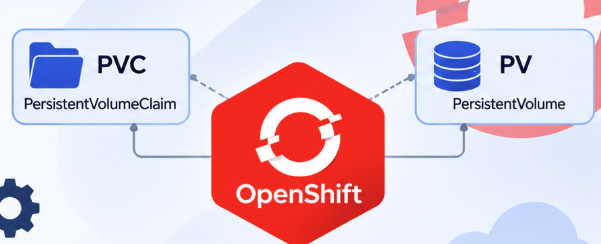
2.3 How PV and PVC work together
The relationship can be understood as follows:
- The storage administrator provisions storage and makes it available as a PersistentVolume.
- An application or user creates a PersistentVolumeClaim requesting storage.
- Kubernetes identifies a suitable PV.
- The PVC is bound to the PV.
- A Pod references the PVC in its volume configuration.
- Kubernetes mounts the storage into the container.
The relationship looks like this:
NFS Server → PersistentVolume → PersistentVolumeClaim → Pod → Container
A Pod does not normally need to know whether the underlying storage is an NFS server, SAN, or another supported storage system. It references the PVC, which provides an abstraction between the application and the storage implementation.
3. Understanding storage access modes
When creating a PersistentVolume or PersistentVolumeClaim, you will need to specify an access mode.
The access mode describes how the storage can be mounted by workloads.
The common access modes are:
| Access mode | Meaning |
|---|---|
| ReadWriteOnce (RWO) | The volume can be mounted as read-write by a single node. Multiple Pods on that same node may still access it. |
| ReadOnlyMany (ROX) | The volume can be mounted as read-only by multiple nodes. |
| ReadWriteMany (RWX) | The volume can be mounted as read-write by multiple nodes. |
| ReadWriteOncePod (RWOP) | The volume can be mounted as read-write by one Pod only. |
Not every storage technology supports every access mode. For example, NFS supports ReadWriteMany, while other storage systems may have different capabilities.
It is also important to understand that access modes are used for volume matching and mounting capabilities. They do not automatically enforce application-level write coordination or guarantee that multiple writers can safely modify the same data.
For this practical exercise, we will use ReadWriteMany because our NFS storage can be accessed by multiple nodes.
4. Understanding static and dynamic volume provisioning
PersistentVolumes can be provisioned in two main ways.
4.1 Static provisioning
With static provisioning, an administrator creates the storage resource first and then creates a PersistentVolume to represent it in the cluster.
The user subsequently creates a PVC to request the available storage.
This is the approach we will use in this lesson.
For example:
- An administrator configures an NFS server.
- The administrator creates an NFS export.
- A PersistentVolume is created to represent that export.
- A user creates a PVC to request storage from the PV.
- A Pod mounts the PVC.
4.2 Dynamic provisioning
Dynamic provisioning automates the process of creating storage.
Instead of manually creating a PV for every storage request, an administrator configures a StorageClass with an appropriate storage provisioner.
When a user creates a PVC requesting that StorageClass, the provisioner can automatically create the underlying storage and make it available to the cluster.
StorageClasses are particularly useful in enterprise environments where different storage options may be offered to applications, such as:
- High-performance storage.
- General-purpose storage.
- Shared file storage.
- Encrypted storage.
- Different performance or availability tiers.
We will cover StorageClasses and dynamic provisioning in a separate lesson.
5. Practical: Configure an NFS server for OpenShift persistent storage
Now that we understand the storage concepts, let’s implement a practical example.
In an enterprise environment, you may have a dedicated storage array from vendors such as Dell, HPE, or IBM. You can integrate supported storage platforms with Kubernetes or OpenShift using the appropriate storage drivers and interfaces.
For this demonstration, however, we will use a separate Red Hat Enterprise Linux server as our remote storage server.
We will configure Network File System (NFS) on that server and make an exported directory available to the OpenShift cluster.
5.1 Lab environment
The environment consists of the following:
| Component | Configuration |
|---|---|
| Storage server | Red Hat Enterprise Linux 9 |
| NFS server IP | 192.168.37.128 |
| Shared directory | /nfsshare |
| Storage protocol | NFS |
| PersistentVolume capacity | 13Gi |
| PVC request | 10Gi |
| Access mode | ReadWriteMany |
| StorageClass name | static |
| Application | Test workload running in OpenShift |
The NFS server must be reachable from the OpenShift worker nodes, because the nodes perform the storage mounts on behalf of the Pods.
The IP address and directory above are from this demonstration. Replace them with the values in your own environment.
ACTION TIME
5.2 Install the NFS utilities
Log in to the RHEL server that will act as the NFS server.
Install the NFS utilities package:
[tekneed@osl ~]$ sudo dnf install nfs-utils -yThe package provides the utilities required to configure and manage NFS services.
5.3 Start and enable the NFS server
Start the NFS server service:
[tekneed@osl ~]$ sudo systemctl enable --now nfs-serverCheck its status:
[tekneed@osl ~]$ sudo systemctl status nfs-serverYou should see that the service is active and running.
For NFSv4, the NFS server service is the main service required for serving the export. The rpcbind service is primarily relevant to NFSv3 and related RPC-based services, so it is not necessary to start it simply because you are configuring an NFSv4 export.
5.4 Create the NFS shared directory
Next, create the directory that will be exported to the OpenShift cluster.
[tekneed@osl ~]$ sudo mkdir -p /nfsshareFor this isolated learning lab, we will temporarily allow write access to the directory so that the test workload can demonstrate persistent file creation.
[tekneed@osl ~]$ sudo chmod 0777 /nfsshareSecurity note: The permissions above are deliberately broad for a simple lab exercise. Do not use them as a production storage-permission model. In production, configure appropriate ownership, group permissions, client restrictions, and access controls based on the identities used by your workloads.
5.5 Configure the NFS export
The NFS export configuration is maintained in:
/etc/exportsOpen the file:
[tekneed@osl ~]$ sudo vi /etc/exportsAdd the following entry:
/nfsshare *(rw,sync,root_squash,no_subtree_check)This example makes the export accessible to any client that can reach the server. It is suitable only for an isolated lab network.
For a real environment, replace * with the IP address or subnet of the OpenShift worker nodes. For example, use a suitable worker-node subnet in CIDR notation.
Let’s understand the options:
| Option | Description |
|---|---|
rw | Allows clients to read and write to the export. |
sync | Ensures changes are committed to stable storage before the server replies to the client. |
root_squash | Maps remote root access to an unprivileged identity on the NFS server. |
no_subtree_check | Disables subtree checking, which can simplify access to exported directories. |
Notice that we use root_squash, not no_root_squash. Disabling root squashing can give remote root users excessive privileges over the exported filesystem and should not be used casually.
Save the file and exit the editor.
5.6 Apply the export configuration
Run:
[tekneed@osl ~]$ sudo exportfs -ravThis reloads the export configuration and displays the exports being made available.
To list the active exports, run:
[tekneed@osl ~]$ sudo exportfs -vYou can also inspect the exports using:
[tekneed@osl ~]$ showmount -e localhost5.7 Configure the firewall
Do not disable the firewall simply to make NFS work.
For an NFSv4 lab, allow NFS traffic through the firewall:
s[tekneed@osl ~]$ udo firewall-cmd --permanent --add-service=nfs
[tekneed@osl ~]$ sudo firewall-cmd --reload
NFSv4 normally uses TCP port 2049.
If you are using NFSv3, additional RPC services and ports may be required, including rpcbind and mountd. Configure those according to the NFS version and the firewall requirements of your environment.
5.8 Verify the NFS server
Check that the NFS server is running:
[tekneed@osl ~]$ sudo systemctl status nfs-serverCheck the exported directory:
[tekneed@osl ~]$ sudo exportfs -vAt this point, the NFS server has been configured and is ready to provide the shared directory to authorized clients.
6. Test NFS connectivity from an OpenShift worker node
Before creating the PersistentVolume, confirm that the OpenShift worker nodes can reach the NFS server.
This is important because a successful connection from your laptop or administration workstation does not prove that the cluster nodes can mount the NFS export.
From a suitable client or worker node, you can inspect the exported directory:
[tekneed@osl ~]$ showmount -e 192.168.37.128Expected output:
Export list for 192.168.37.128:
/nfsshare *
The output confirms that the NFS server is advertising the export. It does not, by itself, prove that a Pod can mount it successfully.
Where you have the necessary administrative access, you can also test an actual NFS mount from a suitable Linux client:
[tekneed@osl ~]$ sudo mkdir -p /mnt/nfs-test
[tekneed@osl ~]$ sudo mount -t nfs -o vers=4.1 192.168.37.128:/nfsshare /mnt/nfs-test
Check the mounted filesystem:
[tekneed@osl ~]$ df -hYou should see an entry similar to:
192.168.37.128:/nfsshare 13G 40M 13G 1% /mnt/nfs-testThe exact capacity and usage will depend on the filesystem backing the NFS export.
After the test, unmount it:
[tekneed@osl ~]$ sudo umount /mnt/nfs-testIf the mount fails, investigate network connectivity, firewall rules, NFS version compatibility, export permissions, and the NFS server configuration before proceeding.
7. Create a PersistentVolume in OpenShift
Now that the NFS server is configured, we can create a PersistentVolume in OpenShift.
A PersistentVolume tells the cluster that a particular storage resource is available for workloads to consume.
In this example, the PV will represent the /nfsshare directory on the NFS server.
Create a file named pv.yml:
[tekneed@osl ~]$ vi pv.ymlAdd the following configuration:
apiVersion: v1
kind: PersistentVolume
metadata:
  name: pv-lun1
spec:
  storageClassName: static
  capacity:
    storage: 13Gi
  accessModes:
    - ReadWriteMany
  persistentVolumeReclaimPolicy: Retain
  volumeMode: Filesystem
  mountOptions:
    - vers=4.1
  nfs:
    server: 192.168.37.128
    path: /nfsshare
Let’s understand the important fields.
kind: PersistentVolumeidentifies the resource as a PV.metadata.namespecifies the name of the PersistentVolume.storageClassNameidentifies the storage class associated with the PV. We are using the namestaticfor this manually provisioned example.capacity.storagespecifies the capacity advertised by the PV.accessModesspecifies that the volume supports read-write access from multiple nodes.persistentVolumeReclaimPolicydetermines what happens to the storage resource after its claim is released.volumeModespecifies that the volume will be mounted as a filesystem.mountOptionsspecifies the NFS version to use.nfs.serveridentifies the NFS server.nfs.pathidentifies the exported directory.
We use the Retain reclaim policy because we want the underlying data to remain available when the PVC is released. This means that an administrator must handle the storage reclamation process manually before the PV can be reused.
Important: The 13Gi capacity is the capacity advertised to Kubernetes. A manually configured NFS PV does not automatically enforce a 13 GiB quota on the exported directory. If you need an actual capacity limit, configure a quota or an appropriately sized filesystem on the storage server.
Create the PV:
[tekneed@osl ~]$ oc create -f pv.ymlCheck the PersistentVolumes:
[tekneed@osl ~]$ oc get pvYou should see an entry similar to:
NAME      CAPACITY   ACCESS MODES   RECLAIM POLICY   STATUS      CLAIM   STORAGECLASS
pv-lun1   13Gi       RWX            Retain           Available           static
The Available status means that the PV has been created and is not yet bound to a PVC.
8. Create a PersistentVolumeClaim
We now have a PersistentVolume available in the cluster. The next step is to create a PersistentVolumeClaim that requests storage from it.
Create a file named pvc.yml:
[tekneed@osl ~]$ vi pvc.ymlAdd the following configuration:
apiVersion: v1
kind: PersistentVolumeClaim
metadata:
  name: nginx-pvc
spec:
  storageClassName: static
  accessModes:
    - ReadWriteMany
  resources:
    requests:
      storage: 10Gi
Let’s examine the configuration.
kind: PersistentVolumeClaimidentifies the resource as a storage request.metadata.namespecifies the name of the PVC.storageClassName: staticensures that the claim requests the same storage class as the PV created earlier.accessModesrequests read-write access from multiple nodes.resources.requests.storagerequests 10 GiB of storage.
Notice that our PV advertises 13 GiB, while the PVC requests 10 GiB. The PV therefore has sufficient advertised capacity to satisfy the claim.
Create the PVC:
[tekneed@osl ~]$ oc create -f pvc.ymlCheck the claim:
[tekneed@osl ~]$ oc get pvcExpected output:
NAME        STATUS   VOLUME    CAPACITY   ACCESS MODES   STORAGECLASS
nginx-pvc   Bound    pv-lun1   13Gi       RWX            static
The Bound status means that the PVC has successfully been matched with a PersistentVolume.
You can also inspect the PV:
[tekneed@osl ~]$ oc get pvIts status should now be Bound, and the CLAIM column should identify the PVC.
For more detailed information, run:
[tekneed@osl ~]$ oc describe pvc nginx-pvcAt this point, the storage has been provisioned and claimed. We can now attach it to an application.
9. Mount the PersistentVolumeClaim inside a Pod
Creating a PV and PVC does not automatically make the storage available inside a container.
We must reference the PVC in the workload’s volume configuration and mount that volume into the container.
For this demonstration, we will create a simple test workload using a Red Hat UBI container. The workload will remain running while we create and inspect files on the mounted NFS share.
First, create a file named nginx.yml:
[tekneed@osl ~]$ vi nginx.ymlAdd the following configuration:
apiVersion: apps/v1
kind: Deployment
metadata:
  name: nginx
spec:
  replicas: 1
  selector:
    matchLabels:
      app: nginx
  template:
    metadata:
      labels:
        app: nginx
    spec:
      containers:
        - name: nginx
          image: registry.access.redhat.com/ubi9/ubi:latest
          command:
            - /bin/sh
            - -c
            - sleep infinity
          volumeMounts:
            - name: nginx-vol
              mountPath: /usr/share/nginx/html
      volumes:
        - name: nginx-vol
          persistentVolumeClaim:
            claimName: nginx-pvc
Although the Deployment is named nginx, this particular container is being used as a storage test workload. It is not running an NGINX web server. We are using it to demonstrate how an application container can access persistent storage.
Let’s understand the important configuration.
The volumeMounts section
volumeMounts:
  - name: nginx-vol
    mountPath: /usr/share/nginx/html
This tells the container where the storage should be mounted.
The directory /usr/share/nginx/html inside the container will point to the mounted persistent volume.
The volumes section
volumes:
  - name: nginx-vol
    persistentVolumeClaim:
      claimName: nginx-pvc
This connects the volume to the PVC named nginx-pvc.
The volumeMounts.name and volumes.name values must match.
The container does not directly reference the NFS server IP address. Instead, it references the PVC, which is already bound to the PV representing the NFS export.
Create the Deployment:
[tekneed@osl ~]$ oc create -f nginx.ymlCheck the Pod:
oc get podsYou can watch the Pod until it becomes ready:
[tekneed@osl ~]$ oc get pods -wExpected output:
NAME                     READY   STATUS    RESTARTS   AGE
nginx-xxxxxxxxxx-xxxxx   1/1     Running   0          30s
The exact Pod name will differ in your environment.
If the Pod remains in ContainerCreating or enters CreateContainerConfigError, inspect its events:
[tekneed@osl ~]$ oc describe pod <pod-name>Common causes include NFS connectivity problems, export permissions, incorrect NFS mount options, and storage access issues.
10. Verify that the Pod can write to persistent storage
Now that the Pod is running, let’s verify that the NFS volume has been mounted successfully.
First, identify the Pod:
[tekneed@osl ~]$ oc get podsOpen a shell inside it:
[tekneed@osl ~]$ oc exec -it <pod-name> -- /bin/shNavigate to the mounted directory:
cd /usr/share/nginx/htmlList the files:
ls -laYou may see files that already existed in the NFS export.
Create two test files:
touch testfile1
touch testfile2
List the directory again:
ls -laYou should now see the two files.
Exit the container:
exitThe files have been created through the container, but they are stored on the NFS server rather than in the container’s temporary writable filesystem.
11. Verify persistence after deleting the Pod
This is one of the most important parts of the exercise.
We want to prove that the files remain available even when the Pod is deleted and recreated.
Delete the current Pod:
[tekneed@osl ~]$ oc delete pod <pod-name>Because the Pod is managed by a Deployment, Kubernetes will automatically create a replacement Pod to maintain the desired replica count.
Watch the replacement Pod:
[tekneed@osl ~]$ oc get pods -wWhen the new Pod is running, identify its name and open a shell:
[tekneed@osl ~]$ oc exec -it <new-pod-name> -- /bin/shNavigate to the same directory:
cd /usr/share/nginx/htmlList the files:
ls -laYou should still see:
testfile1
testfile2
This demonstrates that the data survived the deletion and recreation of the Pod.
The reason is that the files were stored on the NFS server. The replacement Pod mounted the same PVC, which remained bound to the same PV.
The lifecycle of the Pod and the lifecycle of the persistent data are therefore independent.
13. Troubleshooting common OpenShift NFS storage issues
When working with NFS-backed persistent storage, you may encounter some common problems.
13.1 PVC remains in Pending state
Check the PVC:
[tekneed@osl ~]$ oc describe pvc nginx-pvcCheck available PVs:
[tekneed@osl ~]$ oc get pvPossible causes include:
- The requested storage capacity is greater than the available PV capacity.
- The access modes do not match.
- The StorageClass names do not match.
- The PV has already been claimed by another PVC.
In our example, both resources use the static StorageClass name and ReadWriteMany access mode.
13.2 Pod remains in ContainerCreating
Inspect the Pod:
[tekneed@osl ~]$ oc describe pod <pod-name>Review the Events section for errors relating to volume mounting.
Possible causes include:
- The NFS server is unreachable from the worker node.
- The NFS export is not configured correctly.
- The NFS server firewall blocks the required traffic.
- The NFS version or mount options are incompatible.
- The worker node cannot mount the NFS filesystem.
Remember that the storage mount is performed by the node, not by your workstation.
13.3 Permission denied when creating files
If the Pod can read the mounted directory but cannot create files, inspect the directory permissions and ownership on the NFS server.
For example:
[tekneed@osl ~]$ sudo ls -ld /nfsshareOpenShift commonly runs containers with an assigned, non-root user ID. Consequently, the user inside the container may not have the same UID or group ownership as the directory on the NFS server.
For a production deployment, configure directory ownership and group permissions to match the application’s security requirements. Also consider the project’s Security Context Constraints (SCC), supplemental groups, and SELinux configuration.
Avoid solving production permission problems by granting unrestricted write permissions or disabling security controls.
13.4 NFS mount succeeds but the application cannot write
A successful mount does not necessarily mean the application has permission to write.
Check:
- The NFS export’s read/write settings.
- The POSIX permissions and ownership of the exported directory.
- The effective UID and group memberships of the container.
- SELinux settings on the NFS server and client nodes.
- The application’s own filesystem requirements.
For SELinux-related issues, consult the Red Hat OpenShift NFS storage documentation before changing security settings.
14. Cleaning up the lab resources
After completing the exercise, you can remove the resources created in OpenShift.
Delete the Deployment:
[tekneed@osl ~]$ oc delete deployment nginxDelete the PVC:
[tekneed@osl ~]$ oc delete pvc nginx-pvcBecause the PV uses the Retain policy, deleting the PVC does not automatically delete the underlying NFS data.
Check the PV:
[tekneed@osl ~]$ oc get pvIt may show a Released status.
If you are finished with the lab and want to remove the PV object, you can delete it:
[tekneed@osl ~]$ oc delete pv pv-lun1This deletes the Kubernetes PV resource, not the files stored in /nfsshare.
Only remove or clean up the NFS data when you are certain that it is no longer required.
Conclusion
In this lesson, we explored persistent storage in OpenShift and why it is important for applications that need to retain data beyond the lifecycle of individual Pods.
We also examined the differences between local and shared storage, learned how PersistentVolumes and PersistentVolumeClaims work together, and configured an NFS server to provide shared storage to an OpenShift workload.
Finally, we created a static PersistentVolume, claimed the storage using a PVC, mounted it inside a container, and verified that files remained available after the Pod was deleted and recreated.
The next step is to understand StorageClasses and dynamic volume provisioning. With dynamic provisioning, OpenShift can request and provision storage automatically through a configured storage provisioner, reducing the need for administrators to manually create PersistentVolumes for every application.
Recent EX280 Exam Questions & Answers On How To Create Persistent Volume & Claim In OpenShift – EX280 Series 2
For Complete Exam Practice Questions & Answer, use this link.
For EX280 Exam Tips, use this link
An application team requires persistent storage for an application running in an OpenShift cluster.
Create a new project named storage-project.
Create a PersistentVolumeClaim named app-storage with a storage request of 5Gi, ReadWriteOnce access mode, and the default StorageClass.
Deploy an Nginx application named nginx-app using the nginx:latest image and attach the app-storage PVC to the deployment.
Mount the persistent volume inside the container at /usr/share/nginx/html.
Answer
Method 1: Imperative Approach
Step 1: Create the project
Create a new OpenShift project named storage-project.
[api@sno ~]$ oc new-project storage-project


Now using project "storage-project".
Step 2: Check the available StorageClasses
Before creating the PVC, verify that a default StorageClass is available.
[api@sno ~]$ oc get storageclassoutput:
NAME                 PROVISIONER             RECLAIMPOLICY   VOLUMEBINDINGMODE
standard (default)   example.csi.driver      Delete          Immediate
The output will depend on the storage provisioner configured in your cluster.
The (default) label indicates the default StorageClass. We will use this StorageClass without explicitly specifying its name in the PVC manifest.
Step 3: Create the PersistentVolumeClaim
Create a YAML file named app-storage.yaml.
[api@sno ~]$ vi app-storage.yamlAdd the following configuration:
apiVersion: v1
kind: PersistentVolumeClaim
metadata:
  name: app-storage
  namespace: storage-project
spec:
  accessModes:
    - ReadWriteOnce
  resources:
    requests:
      storage: 5Gi
Save and close the file.
Notice that storageClassName is omitted. This allows OpenShift to use the cluster’s default StorageClass.
Create the PVC:
[api@sno ~]$ oc create -f app-storage.yaml

persistentvolumeclaim/app-storage created
Step 4: Verify the PVC
[api@sno ~]$ oc get pvc app-storageExample output:
NAME          STATUS    VOLUME   CAPACITY   ACCESS MODES   STORAGECLASS
app-storage   Bound     pvc-xxx  5Gi        RWO            standard
Step 5: Deploy the Nginx application
Create a Deployment named nginx-app using the nginx:latest image.
[api@sno ~]$ oc create deployment nginx-app --image=nginx:latest

deployment.apps/nginx-app created
Step 6: Attach the PVC to the Deployment
Use oc set volume to attach the existing PVC to the Deployment and mount it inside the container.
[api@sno ~]$ oc set volume deployment/nginx-app \
  --add \
  --name=app-storage \
  --type=pvc \
  --claim-name=app-storage \
  --mount-path=/usr/share/nginx/html
output:
deployment.apps/nginx-app volume updatedThis command performs two important configurations:
- Creates a volume reference to the existing PVC named
app-storage. - Mounts the volume inside the Nginx container at
/usr/share/nginx/html.
Step 7: Verify the Deployment and PVC attachment
Check the Deployment:
[api@sno ~]$ oc get deployment nginx-appCheck the pod:
[api@sno ~]$ oc get podsCheck the volume configuration:
[api@sno ~]$ oc describe deployment nginx-appConfirm that the volume references the app-storage PVC and that the mount path is /usr/share/nginx/html.
Wait for the application to become ready:
[api@sno ~]$ oc rollout status deployment/nginx-appoutput:
deployment "nginx-app" successfully rolled outMethod 2: Declarative Approach
In the declarative approach, we define the desired PVC and Deployment configurations in YAML manifests and create the resources using oc apply.
Step 1: Create the project
[api@sno ~]$ oc new-project storage-project

Now using project "storage-project".
Step 2: Create the PVC manifest
Create a file named app-storage.yaml:
[api@sno ~]$ vi app-storage.yamlAdd the following configuration:
apiVersion: v1
kind: PersistentVolumeClaim
metadata:
  name: app-storage
  namespace: storage-project
spec:
  accessModes:
    - ReadWriteOnce
  resources:
    requests:
      storage: 5Gi
Save and close the file.
Apply the manifest:
[api@sno ~]$ oc apply -f app-storage.yaml


persistentvolumeclaim/app-storage created
Step 3: Create the Deployment manifest
Create a file named nginx-app.yaml:
[api@sno ~]$ vi nginx-app.yamlAdd the following configuration:
apiVersion: apps/v1
kind: Deployment
metadata:
  name: nginx-app
  namespace: storage-project
spec:
  replicas: 1
  selector:
    matchLabels:
      app: nginx-app
  template:
    metadata:
      labels:
        app: nginx-app
    spec:
      containers:
        - name: nginx
          image: nginx:latest
          ports:
            - containerPort: 80
          volumeMounts:
            - name: app-storage
              mountPath: /usr/share/nginx/html
      volumes:
        - name: app-storage
          persistentVolumeClaim:
            claimName: app-storage
Save and close the file.
Step 4: Apply the Deployment manifest
[api@sno ~]$ oc apply -f nginx-app.yaml

deployment.apps/nginx-app created
Step 5: Verify the Deployment
[api@sno ~]$ oc get deployment nginx-appCheck the pod:
[api@sno ~]$ oc get podsWait for the Deployment to become ready:
[api@sno ~]$ oc rollout status deployment/nginx-appEX280 Exam Tips (2026-2027)
- Understand PV and PVC: A PersistentVolume (PV) represents storage provisioned for the cluster, while a PersistentVolumeClaim (PVC) is an application’s request for storage.
- Know the access modes:
ReadWriteOnce(RWO) allows read-write mounting by a single node. It does not necessarily mean only one pod can use the volume. - Understand StorageClasses: Omitting
storageClassNameallows the default StorageClass to be used, provided one is configured. - Remember dynamic provisioning: A PVC can trigger automatic PV provisioning when a suitable dynamic provisioner is available.
- Know how to attach storage: In imperative operations,
oc set volumecan attach an existing PVC to a Deployment. - Understand volumeMounts and volumes:
volumesreferences the PVC, whilevolumeMountsspecifies where the storage appears inside the container. - Verify the PVC status: A
BoundPVC indicates that storage has been successfully matched or provisioned. APendingPVC requires investigation or may be waiting for pod scheduling. - Remember persistent data: Data stored on a properly configured persistent volume survives container restarts and pod replacement, subject to the storage backend and volume lifecycle.
- Know your verification commands: Be comfortable with
oc get pvc,oc describe pvc,oc get pv,oc describe deployment, andoc exec.
Both methods can satisfy the task. The imperative approach uses individual commands to create and configure the resources, while the declarative approach defines the desired configuration in YAML manifests.
Leave a Reply