
Last updated: August 2024
Hello, everyone! Welcome to part two of our series on configuring and managing networks on a Linux server. In this lesson, we’ll delve into how to configure dns in Linux and the tools available to manage DNS (Domain Name System) on Linux. DNS translates human-readable domain names like amazon.com and google.com into machine-readable IP addresses, which is essential for web browsing and other internet activities.
For a deeper dive into DNS, you can check our comprehensive DNS course on how to configure dns in Linux, once it’s available. The link will be in the description box. If you’re new to DNS, I recommend exploring additional resources online to gain a solid understanding of its importance and functionality.
In Linux, several tools are used to manage DNS, including dig, nslookup, and host. These tools are not installed by default on Red Hat systems, but they come pre-installed on Ubuntu systems. Despite these differences, the functionality remains consistent across both distributions. In this guide, we’ll use an Ubuntu system for demonstration purposes, but rest assured that the instructions apply equally to Red Hat.
Understanding DNS Tools in Linux
The dig Tool
The dig (Domain Information Groper) tool is a flexible command-line utility that queries DNS servers. It’s especially useful for diagnosing DNS problems.
To query the IP address of a domain using dig, simply run:
dig google.com
The output will include the IP address of google.com and details about the DNS server performing the query. For instance, you might see:
;; ANSWER SECTION:
google.com.             8     IN      A       216.58.223.206
;; SERVER: 127.0.0.53#53(127.0.0.53)
This indicates that the local caching DNS server (127.0.0.53) resolved the IP address for google.com as 216.58.223.206
To query a specific DNS server, use the @ symbol followed by the server’s IP address. For example:
dig @8.8.8.8 amazon.com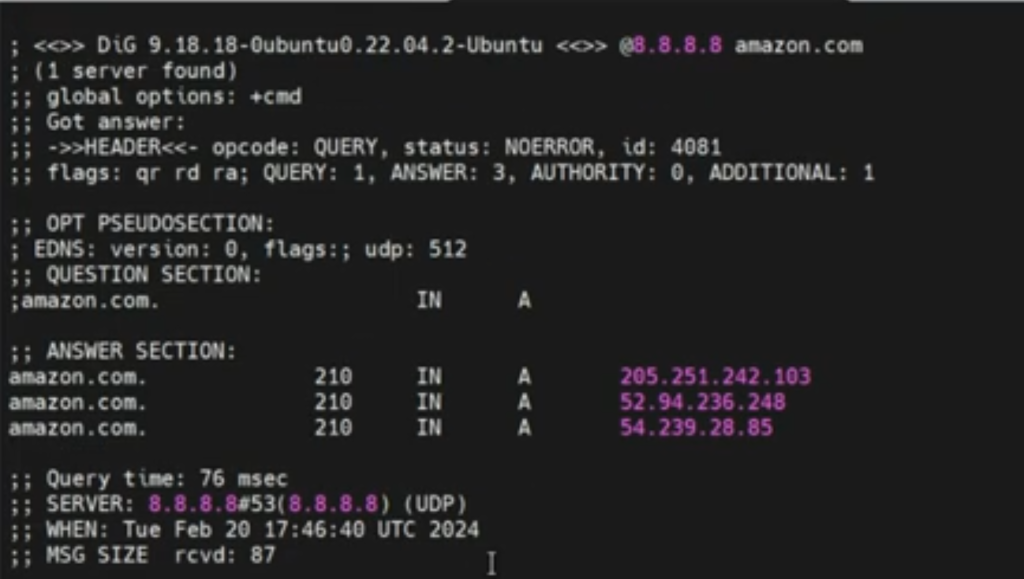
This command queries Google’s public DNS server (8.8.8.8) for the IP address of amazon.com.
The nslookup Tool
The nslookup tool also queries DNS servers but provides a simpler output format. To use nslookup, run:
nslookup google.com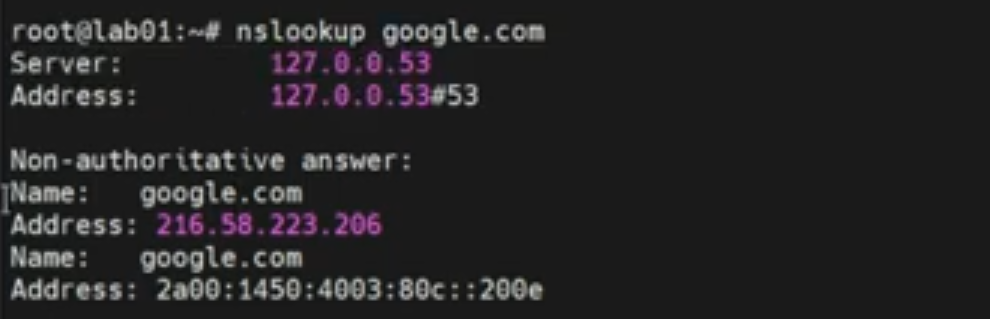
The output will show the server used for the query and the IP address of the domain:
Server:         127.0.0.53
Address:        127.0.0.53#53

Non-authoritative answer:
Name:   google.com
Address: 216.58.223.206
To specify a DNS server with nslookup, append the server’s IP address:
nslookup amazon.com 8.8.8.8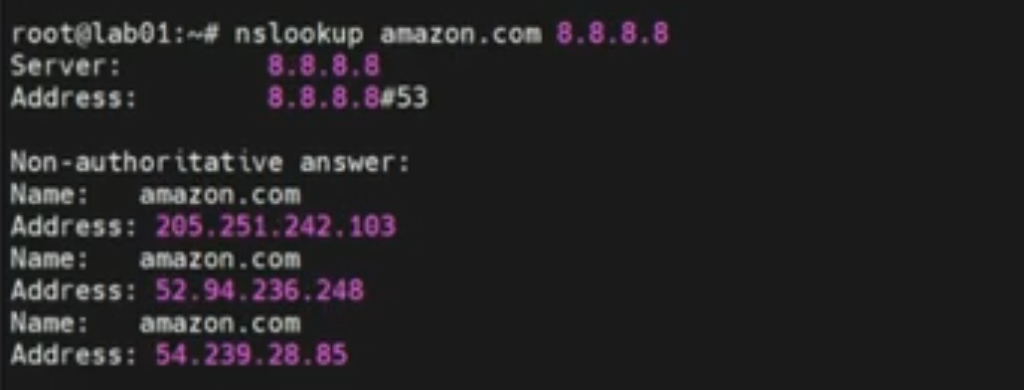
This tells nslookup to use Google’s DNS server (8.8.8.8) for the query.
The host Tool
The host tool is a straightforward utility for DNS lookup. To query the IP address of a domain, use:
host google.comThe output will display the domain’s IP address:
google.com has address 216.58.223.206To specify a DNS server, use the following format:
host google.com 8.8.8.8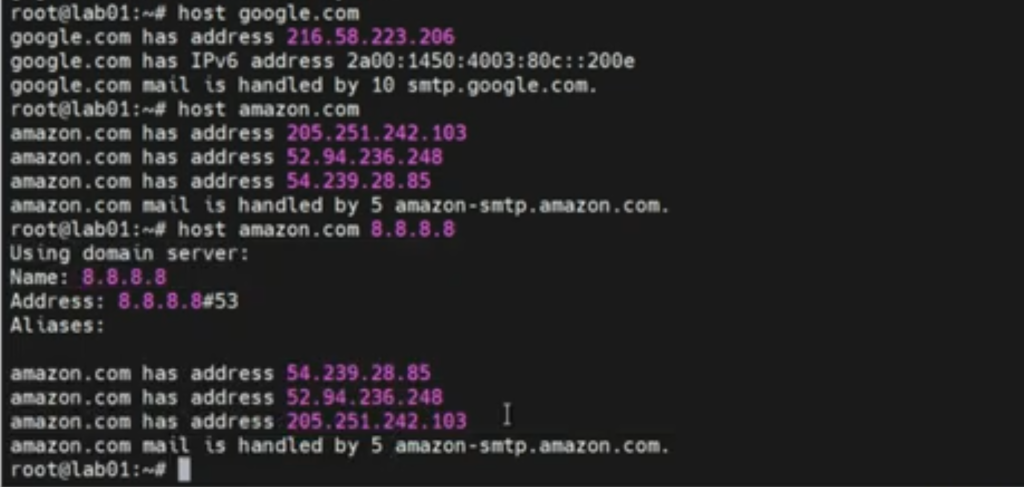
This queries Google’s DNS server for the IP address of google.com.
Key Network Configuration Files in Linux
Two important configuration files for DNS management in Linux are /etc/hosts and /etc/hostname.
The /etc/hosts File
The /etc/hosts file maps hostnames to IP addresses, similar to DNS. However, it’s checked before DNS queries, making it useful for local network configurations and testing. Here’s an example of a populated /etc/hosts file:
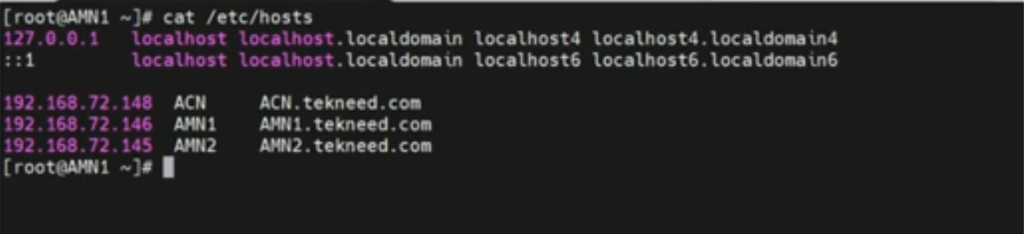
127.0.0.1 localhost
This configuration resolves ACN.tekneed.com to the IP address 192.168.72.148; AMN1.tekneed.com to 192.168.72.146; and AMN2.tekneed.com to 192.168.72.145.
The /etc/hostname File
The /etc/hostname file contains the system’s hostname. To view or change the hostname, you can use the hostnamectl command. For example:
hostnamectl set-hostname "new-hostname"This command sets the system’s hostname to new-hostname and persists across reboots.
Configuring Hostnames on Red Hat and Ubuntu
Changing Hostname Using hostnamectl
To change the hostname on a Red Hat system, use the hostnamectl command:
hostnamectl set-hostname "new-hostname"Verify the change with:
hostnamectl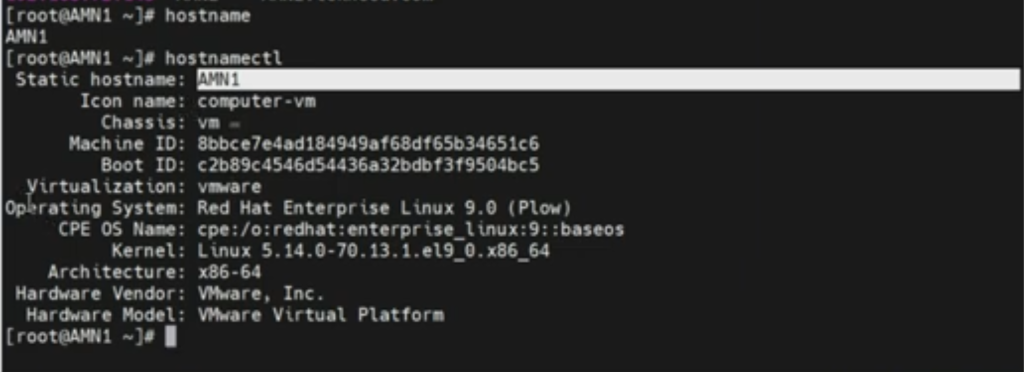
You should see the new hostname listed. The same process applies to Ubuntu systems.
Manually Editing /etc/hostname
You can also change the hostname by editing the /etc/hostname file directly. Open the file with a text editor, such as vi or nano:
sudo vi /etc/hostnameReplace the current hostname with the new one, save the file, and restart the hostname service:
sudo systemctl restart systemd-hostnamedThis method works on both Red Hat and Ubuntu systems.
Practical Insights and Real-World Applications
In my experience, understanding these tools and configurations is crucial during practical exams or job interviews. For instance, during a practical interview, I was given a Linux server to configure. When asked about the Linux distribution, I used the following command to check the OS release information:
cat /etc/os-releaseThis command provides detailed information about the operating system. However, I found that the hostnamectl command offers even more comprehensive details, including the virtualization environment and kernel version.
For example, running hostnamectl yields:
Static hostname: new-hostname
Icon name: computer-vm
Chassis: vm
Machine ID: 8bca3c344d4b414b9c6e045b15a4a5c9
Boot ID: e8d214dca3d347a5b34b6e92e47a573e
Virtualization: kvm
Operating System: Ubuntu 20.04.2 LTS
Kernel: Linux 5.4.0-74-generic
Architecture: x86-64
This output is invaluable during troubleshooting and system configuration tasks.
Additional DNS Tools and Techniques
While understanding how to configure dns in Linux, there are more advanced DNS management tools and techniques you can explore, beyond the basic tools like dig, nslookup, and host.
BIND (Berkeley Internet Name Domain)
BIND is the most widely used DNS software on the Internet. It provides a robust and scalable DNS server implementation.
To install BIND on a Red Hat-based system, use:
sudo yum install bind bind-utilsOn Ubuntu, use:
sudo apt-get install bind9 dnsutilsConfiguration files for BIND are located in /etc/named.conf for Red Hat and /etc/bind/named.conf for Ubuntu. BIND’s flexibility and comprehensive feature set make it an excellent choice for managing complex DNS environments.
DNSmasq
DNSmasq is a lightweight DNS forwarder and DHCP server. It’s suitable for small networks where ease of configuration and low resource consumption are priorities.
To install DNSmasq on a Red Hat-based system, use:
sudo yum install dnsmasqOn Ubuntu, use:
sudo apt-get install dnsmasqConfiguration is straightforward, with the main file located at /etc/dnsmasq.conf.
Resolvconf
Resolvconf is a framework for managing /etc/resolv.conf dynamically. It’s particularly useful in environments where the system’s DNS configuration might change frequently, such as laptops that connect to different networks.
To install Resolvconf on Ubuntu, use:
sudo apt-get install resolvconfConfiguration details can be found in the /etc/resolvconf directory.
Securing Your DNS
DNS security is crucial to prevent attacks such as DNS spoofing and cache poisoning. Here are a few tips to enhance your DNS security:
DNSSEC (DNS Security Extensions)
DNSSEC adds a layer of security by enabling DNS responses to be verified. It ensures that the responses come from the correct source and have not been tampered with.
To enable DNSSEC on BIND, add the following to your configuration:
options {
    dnssec-enable yes;
    dnssec-validation yes;
};
Implementing Access Control
Limit who can query your DNS server by implementing access control. In BIND, this can be done using ACLs (Access Control Lists):
acl "trusted" {
    192.168.1.0/24;
    localhost;
};

options {
    allow-query { trusted; };
};
This configuration restricts DNS queries to trusted IP addresses.
Regular Updates and Monitoring
Keep your DNS software up to date to protect against known vulnerabilities. Regularly monitor your DNS logs for unusual activity, which might indicate an attempted attack.
Conclusion
Proper network configuration and management are essential for the smooth operation of Linux systems. Whether you’re using Red Hat or Ubuntu, mastering tools like dig, nslookup, and host is crucial for effective DNS management. Additionally, understanding key configuration files like /etc/hosts and /etc/hostname will enhance your ability on how to configure dns in Linux, and to manage network settings efficiently.
In addition to the basic tools, exploring advanced options like BIND and DNSmasq can provide more control and flexibility in your DNS management. Ensuring DNS security through DNSSEC, access control, and regular updates is vital for protecting your network.
I hope you found this guide on how to configure dns in Linux helpful. If you have any questions or need further assistance, feel free to contact us at info@tekneed.com. Don’t forget to subscribe, like, share, and comment to encourage us to create more valuable content. Check the link for exam practice questions and additional resources.
Thank you for reading, and happy networking!
Leave a Reply