
Last updated: August 2024
Hello, everyone! Victor here again, and welcome back to another exciting lesson on managing permissions and understanding how to change ownership of a file in Linux. In today’s lesson, we will continue from where we left off in our previous lesson on how to set and manage permissions in Linux. We’ll dive deeper into the nuances of file ownership and special permissions in Linux, with a focus on how to change ownership and set special permissions like setuid, setgid, and the sticky bit. By the end of this lesson, you’ll have a comprehensive understanding of these essential concepts, making you a more effective Linux administrator.
Understanding File Ownership in Linux
In Linux, every file has an owner and a group associated with it. The owner is typically the user who created the file, and the group is often the primary group of that user. As an administrator or a user with the necessary privileges, you can change both the owner and the group ownership of a file. This flexibility is crucial for knowing how to change ownership of a file in linux, managing access and ensuring that files are controlled appropriately in a multi-user environment.
Let’s illustrate this with a practical example. Suppose you are the system administrator, and you have a user named John who has created a file. If for some reason you want to change the ownership of this file from John to another user, say Lisa, you can easily do so. Similarly, you can change the group ownership of a file from one group to another.
The commands you will use to perform these operations are:
chownfor changing the owner of a file.chgrpfor changing the group ownership of a file.
Changing File Ownership
To demonstrate these commands, let’s start by creating a file and then changing its ownership. Here is a step-by-step guide:
- Create a File: First, we create a file using the
touchcommand.touch file1 - Check File Ownership: Use the
ls -lcommand to view the file’s details, including its owner and group.ls -l file1This command will display information showing that the owner and group offile1are bothroot. - Change File Owner: Now, we will change the owner of
file1to a user namedOla.chown Ola file1 - Verify the Change: Again, use
ls -lto confirm the change in ownership.ls -l file1The output should now show thatOlais the owner of the file. - Change Group Ownership: Similarly, we can change the group ownership using the
chowncommand. Let’s assign the group ownership to a group namedsales.chown :sales file1 - Alternative Method: You can also use the
chgrpcommand to change the group ownership.chgrp sales file1
Commands in Action
Example: Changing Ownership with chown
Let’s start with a practical example on how to change ownership of a file in Linux (RHEL) server. First, create a file using the touch command:
touch file1To verify the file’s ownership, use:
ls -l file1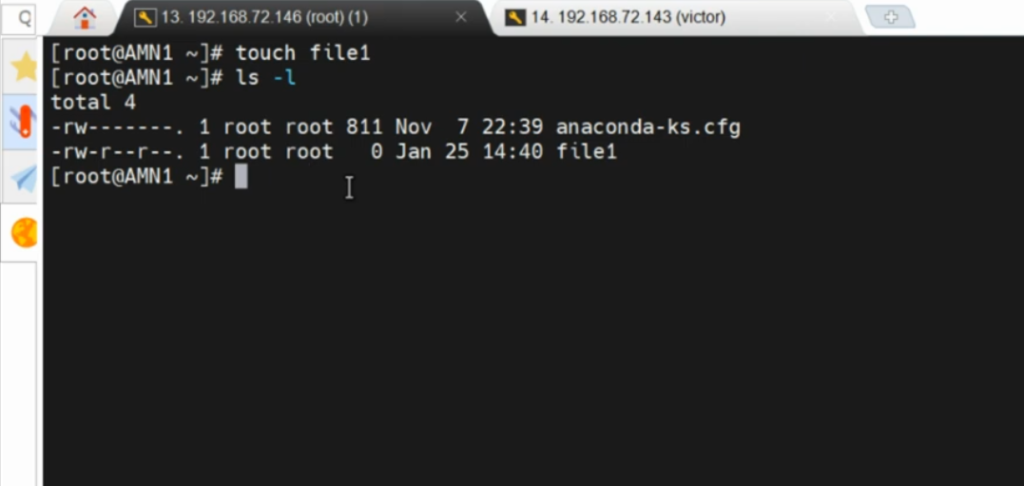
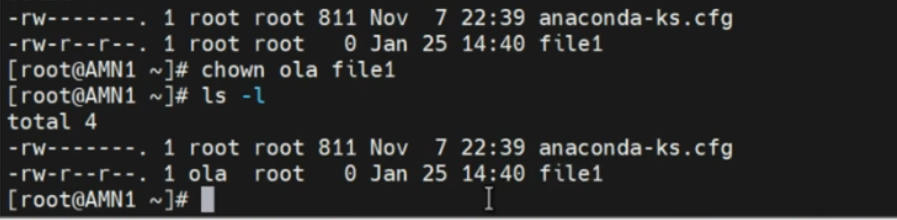
You should see that the owner and group are both set to root. To change the owner of file1 to a user named Ola, execute:
chown Ola file1Verify the change:
ls -l file1Now, you’ll see that the owner has been changed to Ola.
Example: Changing Group Ownership with chgrp
Similarly, to change the group ownership of file1 to a group named sales, use:
chgrp sales file1Confirm the change:
ls -l file1The group owner should now be sales.
Combining chown and chgrp
You can also change both the owner and group simultaneously using chown:
chown Ola:sales file1This sets the owner to Ola and the group to sales.

Here’s how these commands work on a Red Hat Enterprise Linux server:
touch file1
ls -l file1
chown Ola file1
ls -l file1
chown :sales file1
ls -l file1
chgrp Ola file1
ls -l file1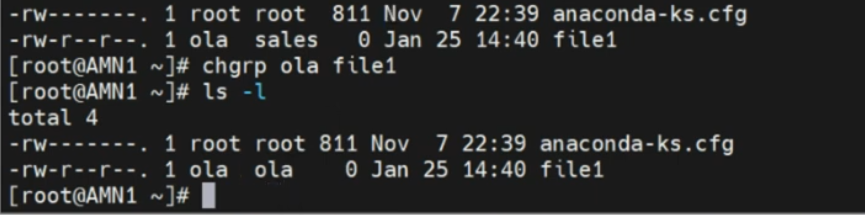
And similarly, on an Ubuntu server:
touch file2
ls -l file2
chown joy file2
ls -l file2
chown :joy file2
ls -l file2
chgrp tekneed3 file2
ls -l file2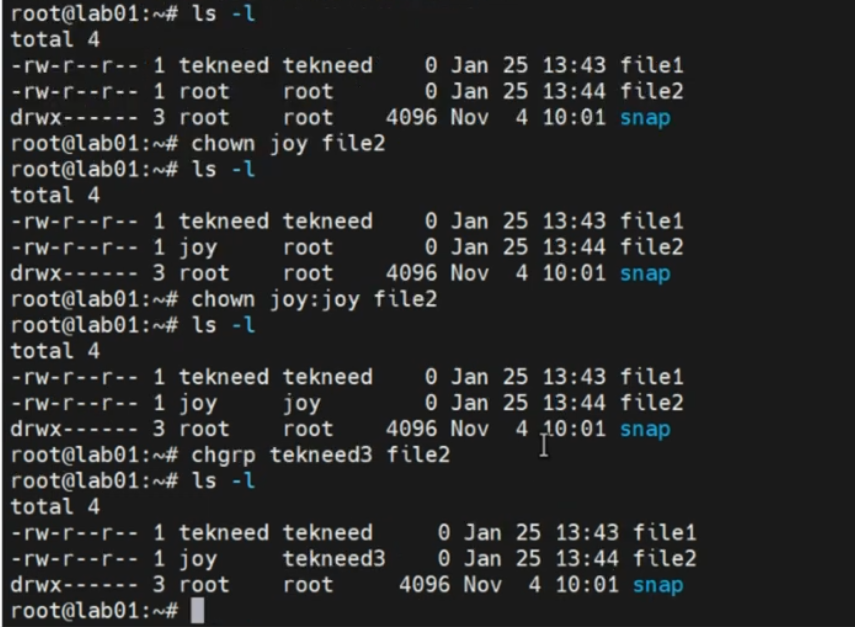
Special Permissions in Linux
Beyond the standard read (r), write (w), and execute (x) permissions, Linux offers three special permissions: Set User ID (SUID), Set Group ID (SGID), and the Sticky Bit. These permissions provide additional control over file execution and directory access.
Set User ID (SUID)
The SUID permission allows users to execute a file with the permissions of the file owner. This is particularly useful for programs that require elevated privileges. For example, the passwd command has SUID set so that it can update password files, even though it’s executed by a regular user.
To set the SUID permission, you can use the chmod command with the u+s option. Here’s how:
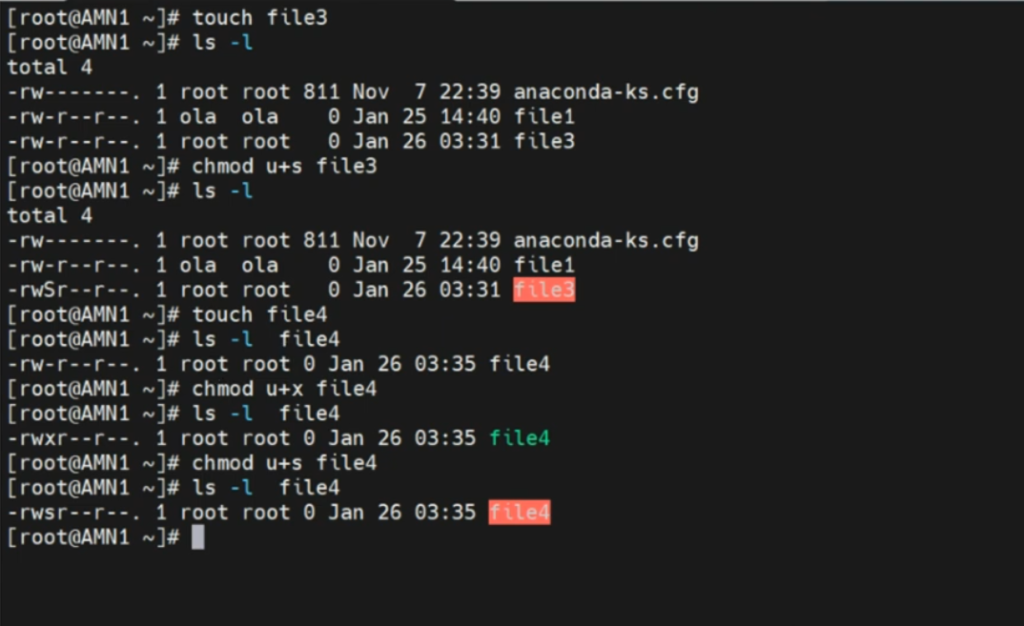
- Create a File:
touch file3 - Set SUID:
chmod u+s file3 - Verify:
ls -l file3You should see ansin the user execute field, indicating that SUID is set.
If the execute permission is not set before applying SUID, you will see an uppercase S. Otherwise, a lowercase s will be displayed.
Note: the set user id (SUID) permission does not have an effect on directories. It is only included in the process of how to change ownership of a file in Linux.
Set Group ID (SGID)
The SGID permission works similarly to SUID, but it applies to the group owner of the file. When SGID is set on a directory, new files created within that directory inherit the group ownership of the directory.
To set SGID, use chmod with the g+s option:
- Create a File:
touch file4 - Set SGID:
chmod g+s file4 - Verify:
ls -l file4
An s in the group execute field indicates that SGID is set. While an S in the group execute field indicates that the execute permission was not previously set.
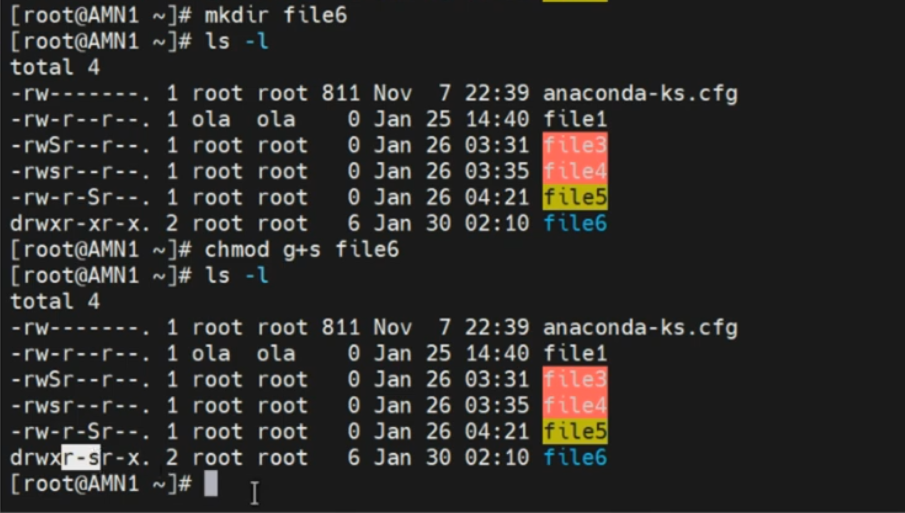
When applied to directories, SGID ensures consistent group ownership:
- Create a Directory:
mkdir dir1 - Set SGID on Directory:
chmod g+s dir1 - Verify:
ls -ld dir1
Sticky Bit
The Sticky Bit is used on directories to restrict file deletion. When set, only the file owner or the root user can delete files within that directory, even if other users have write permissions. This is commonly used in directories like /tmp where multiple users have write access. The sticky bit permission has no effect on a file.
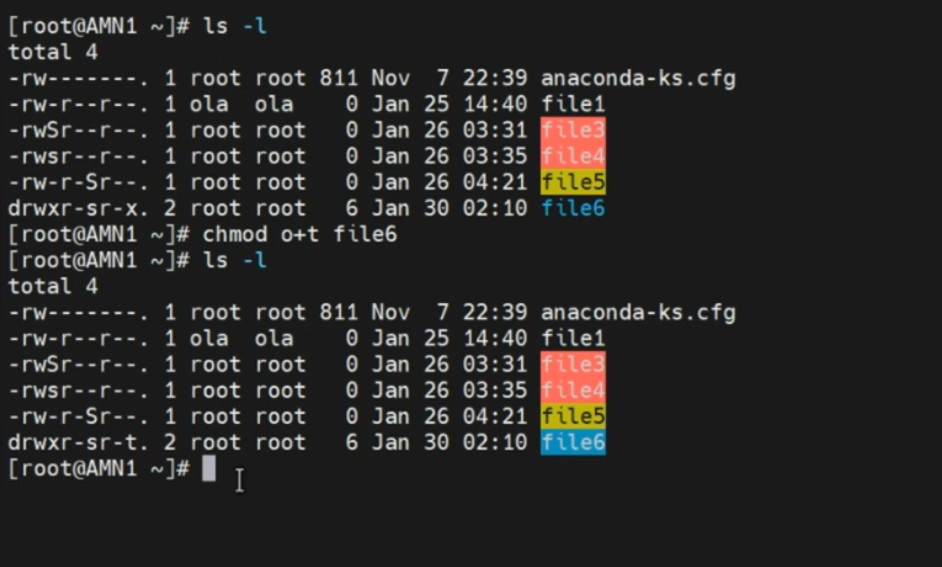
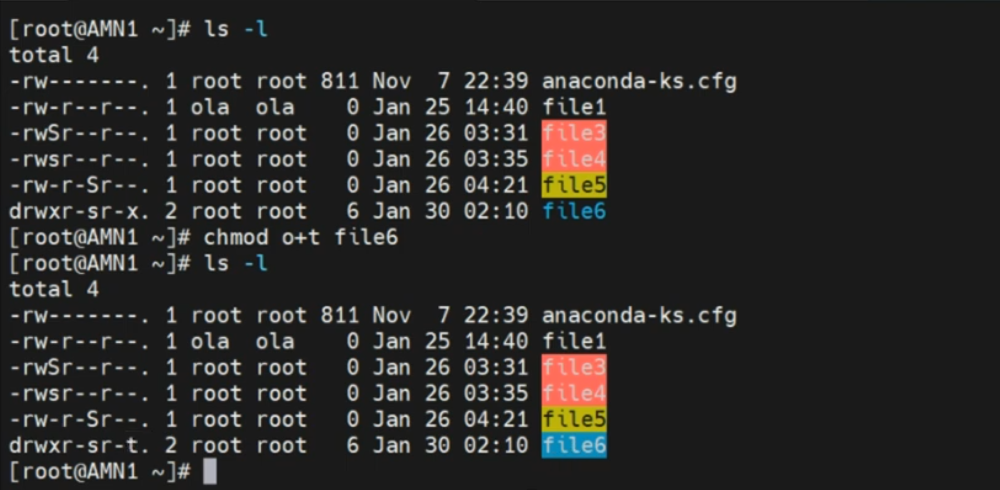
To set the Sticky Bit, use chmod with the +t option:
- Create a Directory:
mkdir dir2 - Set Sticky Bit:
chmod +t dir2 - Verify:
ls -ld dir2You will see atin the others execute field, indicating that the Sticky Bit is set.
Practical Example
Here’s how you can use these permissions on both Red Hat and Ubuntu systems:
Red Hat:
Ubuntu:
Understanding the Significance of Special Permissions
Special permissions in Linux, such as SUID, SGID, and the Sticky Bit, play a critical role in enhancing security and managing access control. They allow administrators to grant specific privileges that can help in creating a more secure and efficient operating environment.
- Set User ID (SUID):
- Purpose: Allows a file to be executed with the privileges of the file owner.
- Use Case: Commonly used for programs that need to perform tasks that require higher privileges.
- Example: The
passwdcommand, which allows users to change their passwords.
- Set Group ID (SGID):
- Purpose: Similar to SUID, but applies to the group owner. When set on directories, new files inherit the group of the directory.
- Use Case: Useful in collaborative environments where files need to share a common group ownership.
- Example: Shared directories in project environments.
- Sticky Bit:
- Purpose: Restricts file deletion in directories.
- Use Case: Ensures that users can only delete their own files in a shared directory.
- Example: The
/tmpdirectory, where multiple users need write access but should not delete each other’s files.
Conclusion
Understanding how to change ownership of a file in Linux and effectively managing file ownership and special permissions in Linux, is crucial skill for any system administrator, for maintaining a secure and well-functioning system. By mastering these commands and concepts, you can ensure that your files and directories are accessible only to the appropriate users and groups. Also, by mastering commands like chown and chgrp, and by understanding the nuances of special permissions like SUID, SGID, and the Sticky Bit, you can ensure that your system is both secure and efficient.
Stay tuned for our next lesson, where we’ll explore Access Control Lists (ACLs) in Linux, an advanced method for fine-grained permission management. For detailed documentation and practice questions, check this link or email us at info@tekneed.com
Thank you for reading this article on how to change ownership of a file in Linux. If you found this article helpful, please subscribe, like, share, and comment. Your feedback encourages us to produce more high-quality content.
Leave a Reply