
Last updated: April 2025
Understanding The Subject Matter
Hi everyone! Victor here again—welcome to another exciting lesson.
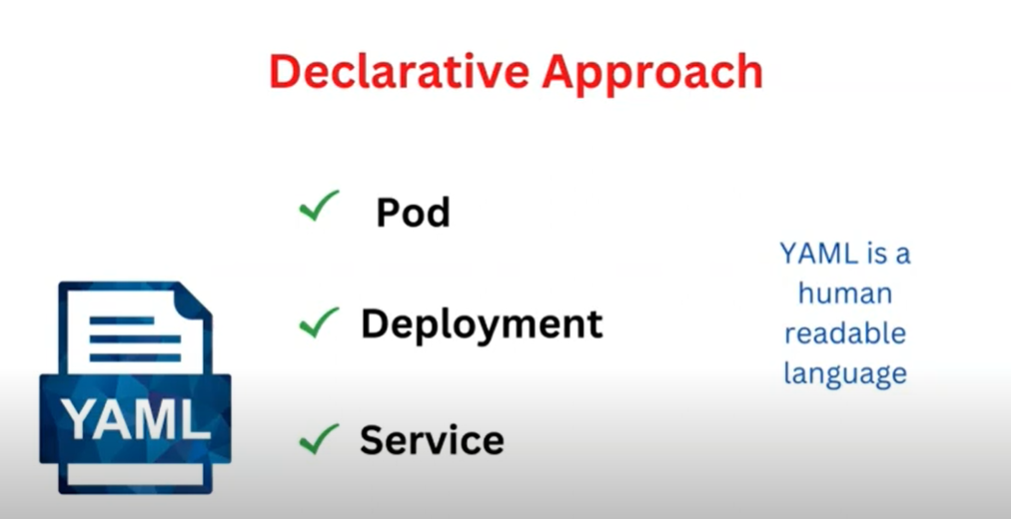
In this session, we’ll explore how to create & manage OpenShift resources by declarative approach. Now, what does “declarative” mean in this context?
Think of it this way: instead of telling Kubernetes how to do something step by step, you simply declare what you want done. You define the desired state, and Kubernetes figures out the rest. It’s like saying:
“Here’s what I want—just make it happen.”
The language we’ll be using to declare these configurations is YAML (Yet Another Markup Language), a human-readable format that’s perfect for defining Kubernetes/OpenShift objects.
Why Declarative Over Imperative?
In previous lessons, we used the imperative approach—running “oc" commands directly to create objects. While useful for quick tasks, this method isn’t ideal for production environments.
Why?
Because in production, we want repeatable, version-controlled, and automatable deployments. YAML files allow us to define and manage infrastructure consistently and reliably. With YAML, everything you need is written once and applied many times—with confidence.
In summary, below are the reasons why declarative is better.
Consistency: You can version-control your YAML files, ensuring consistent deployments across environments.
Simplicity: All your configurations live in a single file, or a set of organized files, making it easier to understand and manage.
Automation: Tools like GitOps and CI/CD pipelines thrive on declarative infrastructure.
Documentation-as-Code: Your YAML files double as documentation because of their human-readable structure.
What You’ll Learn
In this lesson, we’ll cover how to create key Kubernetes/OpenShift resources such as:
- Pods
- Deployments
- Services
We’ll also learn about important components like:
- Labels
- Selectors
- Templates
- Annotations
The Structure of a Kubernetes/OpenShift YAML File
Every Kubernetes YAML configuration typically consists of five main parts:
apiVersion– Specifies the API version of the object.kind– Defines the type of resource (e.g., Pod, Deployment, Service).metadata– Contains data like name, namespace, and labels.spec– Specifies the desired state/configuration of the resource.status– Automatically generated by Kubernetes after the object is created.
Let’s break these down:
1. apiVersion
This specifies the version of the Kubernetes API you’re working with. Different resource types have different API versions. Here are a few examples:
- For a Pod:
v1 - For a Deployment:
apps/v1 - For a Service:
v1
Correct usage of apiVersion ensures compatibility and proper functioning.
2. kind
This defines the type of resource you want to create:
- For a Pod:
kind: Pod - For a Deployment:
kind: Deployment - For a Service:
kind: Service
This keyword tells Kubernetes what kind of object to create from the configuration.
3. metadata
The metadata section contains essential information about the resource, such as:
name: The unique name for your resource within a namespace.labels: Key-value pairs used to organize, select, and manage groups of objects.
Why Are Labels Important?
Imagine you have 10 Pods running different applications. Using labels, you can categorize them—for instance:
yamlCopyEditlabels:
  app: frontend
  environment: production
With these labels, you can easily target all frontend pods in the production environment using a selector.
4. spec (Specification)
This is where the “meat” of your configuration lies. The spec field defines the desired behavior of the object.
For a Pod, the spec section might include:
yamlCopyEditspec:
  containers:
    - name: nginx-container
      image: nginx
      ports:
        - containerPort: 80
This describes a container running the nginx image and exposing port 80.
For a Deployment, the spec might include:
yamlCopyEditspec:
  replicas: 3
  selector:
    matchLabels:
      app: nginx
  template:
    metadata:
      labels:
        app: nginx
    spec:
      containers:
        - name: nginx
          image: nginx
          ports:
            - containerPort: 80
Let’s break this down:
replicas: The number of Pods the Deployment should maintain.selector: Defines how the Deployment knows which Pods to manage. This must match thelabelsinside thetemplate.template: A mini pod specification embedded within the Deployment.
For a Service, the spec might look like:
yamlCopyEditspec:
  selector:
    app: nginx
  ports:
    - protocol: TCP
      port: 80
      targetPort: 8080
  type: NodePort
The service forwards traffic on port 80 to pods exposing port 8080. The selector helps the service find the right pods to route to.
5. status
This section is automatically added by Kubernetes and shows the current status of the resource (e.g., running, pending, succeeded, etc.). You don’t need to define this when writing your YAML—it’s handled by the system.
Helpful Tip: Use Kubernetes.io for Reference
You don’t need to memorize every field. The official Kubernetes documentation site is your best friend.
Here’s a quick way to use it:
- Go to kubernetes.io
- Navigate to Documentation > Reference > API Reference
- Select the resource you want—Pod, Deployment, Service, etc.
- View all the required and optional fields
- Copy the base template and modify it as needed
It’s a great way to avoid syntax errors and to understand what each field does.
YAML Formatting Tips
YAML is indentation-sensitive! It uses spaces, not tabs. Every nested block is indented using two spaces (or four, depending on your team’s convention). Here’s an example:
yamlCopyEditmetadata:
  name: nginx-pod
  labels:
    app: nginx
Make sure your indentation is consistent; otherwise, your file won’t be valid.
Key Concepts: Label vs Selector
These two concepts are tightly connected:
- Labels help identify a group of resources.
- Selectors are used by other resources (like Deployments or Services) to find those labeled resources.
Example:
If your Pod is labeled like this:
yamlCopyEditlabels:
  app: nginx
Your Deployment or Service must have:
yamlCopyEditselector:
  matchLabels:
    app: nginx
Without this match, the resources won’t link correctly.
ACTION TIME
Let’s Go Practical
Now that we’ve explained the theory, let’s apply it. We’ll create:
- A Pod
- A Deployment
- A Service
Here’s how the Pod YAML might look:
apiVersion: v1
kind: Pod
metadata:
  name: nginx-pod
  labels:
    app: nginx
spec:
  containers:
    - name: nginx-container
      image: nginx
      ports:
        - containerPort: 80
To create this Pod, simply save it as nginx-pod.yaml and run:
kubectl apply -f nginx-pod.yaml
Deployment YAML Example:
apiVersion: apps/v1
kind: Deployment
metadata:
  name: nginx-deployment
spec:
  replicas: 3
  selector:
    matchLabels:
      app: nginx
  template:
    metadata:
      labels:
        app: nginx
    spec:
      containers:
        - name: nginx
          image: nginx
          ports:
            - containerPort: 80
Service YAML Example:
apiVersion: v1
kind: Service
metadata:
  name: nginx-service
spec:
  selector:
    app: nginx
  ports:
    - protocol: TCP
      port: 80
      targetPort: 80
  type: NodePort
Apply these YAML files the same way:
kubectl apply -f nginx-deployment.yaml
kubectl apply -f nginx-service.yaml
Below is the example used in the video lesson in case you need to copy.
For Deployment
[victor@sno ~]$ cat deploy2.yml

apiVersion: apps/v1
kind: Deployment
metadata:
  name: nginx-application
  labels:
    app: nginx
spec:
  replicas: 3
  template:
    metadata:
      labels:
        app: nginx
    spec:
      containers:
        - name: nginx-app3
          image: nginx
          ports:
           - containerPort: 8080
  selector:
    matchLabels:
      app: nginx
For Pod
[victor@sno ~]$ cat pod2.yml

apiVersion: v1
kind: Pod
metadata:
  name: nginx-app
  labels:
    app: nginx
    environ: prod
    name: nginx-label
spec:
  containers:
  - name: nginx
    image: nginx
    ports:
    - containerPort: 8080
For Service
[victor@sno ~]$ cat service2.yml

apiVersion: v1
kind: Service
metadata:
  name: nginx-application
  labels:
    app: nginx
spec:
  selector:
    app: nginx
  ports:
  - name: http
    port: 80
    protocol: TCP
    targetPort: 8080
  type: NodePort
Wrapping Up
Understanding the declarative approach is essential for modern DevOps and cloud-native application management. In this lesson, we:
- Explained what declarative configuration means
- Broke down the structure of YAML files
- Covered critical concepts like labels, selectors, and specs
- Demonstrated how to define Pods, Deployments, and Services in YAML
- Highlighted the importance of correct formatting and API references
What’s Next?
In future lessons, we’ll dive deeper into advanced topics like:
- ConfigMaps and Secrets
- Volumes and Persistent Storage
- Ingress Controllers
- Rolling Updates and Rollbacks
Stay tuned—and if you’re not comfortable with container runtimes yet, I recommend checking out my beginner’s course on Docker and Podman.
Until next time, keep exploring, keep building!
Leave a Reply